20 Back-to-School Projects

Here’s a round-up of some projects to get the kids ready for school. Can you tell I’m ready? Be sure to share links to your own back-to-school projects in the comments section. We love to see what you’re making!

BACKPACKS, BAGS & POUCHES

Apple Print Backpack from Alpha Mom.

School Bag from Make it Do.

Personalize a Backpack from Simply Modern Mom.

Oilcloth Backpack from Uhandbag.

Kid’s Backpack from Four Wise Monkeys for Sew, Mama, Sew!

Zakka-Inspired Pencil Pouch from Noodlehead.

Pencil Case from Annie Get Your Glue Gun.

LUNCH BAGS & ACCESSORIES

Lunch Bag from The Long Thread.

Embroidered Lunch Sack from The Purl Bee.

Reusable Snack Sack from Reprodepot.

Kids’ Placemat & Napkins from The Long Thread.

CLOTHING & ACCESSORIES

Apple Appliqué Tee from The Long Thread.

Yoga Skirts from Patty Young for Sew, Mama, Sew!

Art Smock from Patterns by Figgy’s for Sew, Mama, Sew!

Ribbon Hair Clips from The Long Thread.

Flower Headband from Simple Modern Mom for Ucreate.

Back to School Embroidery Designs from Sarah Jane Studios for Sew, Mama, Sew!

Nap Mat from Prudent Baby.

PRINTABLES

Days of the Week Hanger Tags from Living Locurto.

Lunchbox Notes from Cindy Hopper for Alpha Mom.
Custom Pet Tee

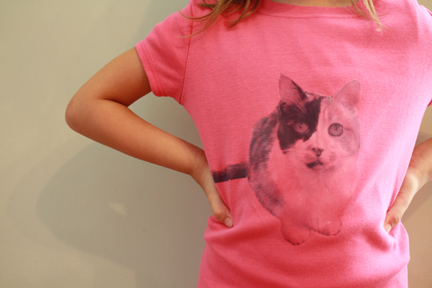
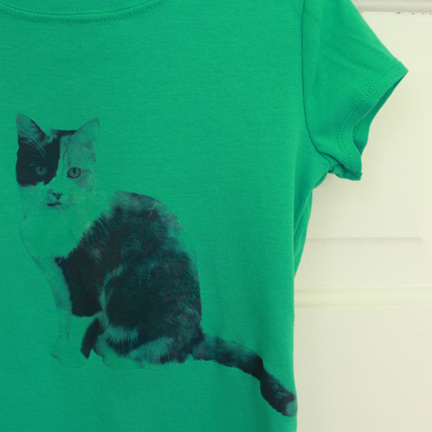
I saw some super-cute pet tees at Mini Boden and decided to make some of our own with a photo of our cat Kiki.

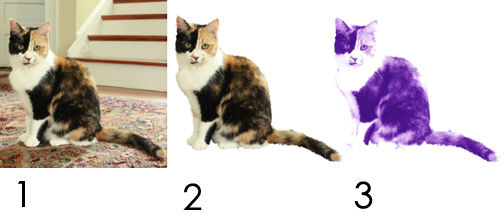
The hardest part of this project was getting the cat to pose. I used Photoshop to edit the pictures, but perhaps you could use another free photo program? I looked at a couple of tutorials for extracting an image from a background here and here. Then I brightened up the photo, desaturated it, added some color and flipped it to print in mirror image. I printed the image on iron-on transfer paper (available at office supply stores), pressed it onto the fabric and voilà — a custom pet tee! I’m thinking of embroidering around the edge, maybe with some silver thread on the one above since this is my glamour girl. And they would definitely be cute worn over striped tees like the Mini Boden shirts.

Here’s the other one that I made for my older daughter. The kids picked out the colors and the pose. And of course this kid wouldn’t model for me. She’s apparently seven going on seventeen. Such attitude, but I think she actually likes the shirt.

Here’s the progression of the images:

Lunch Bag

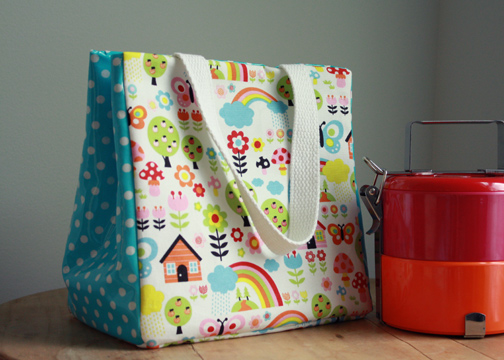
For some reason, I get obsessive over lunch containers. I love to look through the bento blogs and I’m always cutting the girls’ sandwiches with cookie cutters. I never thought I’d be this kind of parent, but here I am. I want their lunch to look good. So after I ordered this adorable stacking container set purely based on its appearance, I realized that it wasn’t insulated and wouldn’t fit in any of our existing lunch bags. I considered making a simple insulated sleeve, but then just decided to make the bag to also hold a drink, silverware and a napkin.

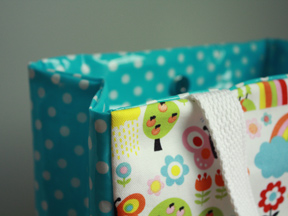
This bag is fully lined, insulated and fastens with a magnetic snap at the top. See below for variations and a link to the pattern. It was simple to make and is extra roomy (9″  x 9″ and 5 1/2″ deep). I used vinyl-coated cotton, but acrylic-coated cotton may be a safer and more eco-friendly choice. If you have a teflon presser foot attachment, that’s helpful but not required as you’ll mostly be sewing the vinyl right sides together. I got the printed fabric from Fabricworm, but it looks like it’s currently out of stock. It is perfect for my five-year-old and even has bits of glitter in the fabric.

Variations on this pattern:

  • Make it your own size. Change the dimensions to suit your needs. This bag is large enough to work for an adult lunch bag as well. Simply choose your favorite fabrics or try a basic black.
  • Use all cotton. This is a simple tote bag pattern and can be made with all organic cotton for easy care in an eco-friendly fabric.
  • Add a flap. By simply inserting a lined flap in the final step, you can help keep food contained. You’ll need to move the magnetic snap to the front of the bag and use one strap attached to the sides.
  • Make a tab. You could also make a simple tab with the magnetic closure attached to it.
  • Add a zipper. Someone mentioned in the comments that she might like to add a zipper, which is a great idea. But I’d suggest omitting the side pieces and squaring off the bottom corners of the bag (similar to the construction of this tote). This would make zipper installation much less complicated.
  • Add a pocket. You could easily add a pocket to the inside for an ice pack, an outer pocket for notes, or a side pocket for a drink. But this is a pretty roomy bag as it is.

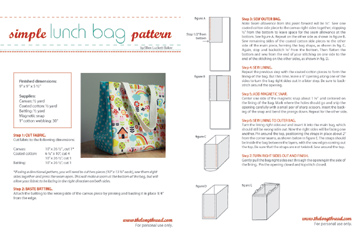
Click on the image below to download the pattern .pdf file.