

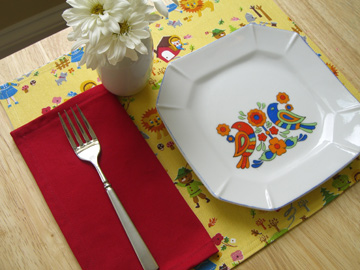
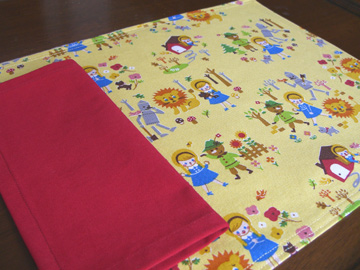
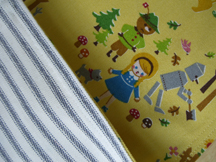
We have eliminated paper napkins around our house, so thought I’d share this project for kids’ place mats and napkins. Obviously you could use this pattern for adult-sized napkins and place mats by increasing the dimensions (I’ve made some suggestions below). This is a super-easy project and a great one for beginners. I also think that some plain fabric with appliqué monsters or flowers would be really cute. We just happened to have this Wizard of Oz canvas from Reprodepot and my kids love it. I backed the mats with a ticking stripe.
Supplies for 4 Place Mats and Napkins:
- 1 yard main fabric (heavy weight cotton or canvas)
- 1 yard contrasting fabric (heavy weight cotton or canvas)
- 1/2 yard napkin fabric (cotton twill or similar)
- scissors
- matching thread
- measuring tape
A note about fabrics: Working with a striped fabric will help you cut straight lines. If you choose to use a lighter weight cotton or even linen for the place mats, you could add a layer of interfacing. And for the napkins, I wanted to use a fabric that was the same on both sides so that a bad side wouldn’t show as you are using the napkin (this is just my personal preference). I’d recommend washing and drying your fabrics before you begin.
Place Mats
Step 1:
Cut your fabrics to the following specifications:
Napkins 10″x 10″ (cut 4). Try 18″ x 18″ for adult-sized napkins.
Place mats 14″ x 12″ (cut 4 of each, main and contrasting fabrics) . Try 20″ x 14″ for adult-sized placemats.
A clear square ruler like one of these will help you get straight lines and achieve 90 degree corners easily. A rotary cutter and mat are also helpful for this project, but not necessary.
Step 2:
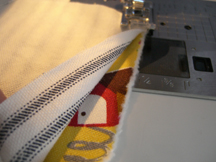
Pin place mat fabrics right sides together and sew a straight stitch about 1/4″ around the edges (pictured below), leaving about 4 inches open. Then turn place mats right side out. Push out corners with the blunt end of your scissors or the end of a pen. Press place mats flat, turning in the open edge.
Step 3:
Sew around edges 1/4″ from edge. Then sew another straight stitch 1/2″ from edge. This will leave you with a nice double-stitched edging. Alternately, you could sew a nice decorative stitch or ric-rac trim around the edges. I didn’t think this fabric needed any embellishment.
Napkins
Step 1:
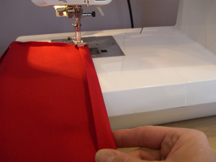
Fold and press napkin edges 1/4″ towards wrong side of fabric. Then bring napkins to the sewing machine. Fold again about 1/2″ and place under the presser foot. Hold the bottom of the fold as you sew (see picture below). Then sew the opposite side.
Step 2:
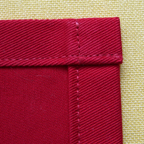
There are two ways that you could do the corners of the napkins. You may fold corners over at a 90 degree angle like this:
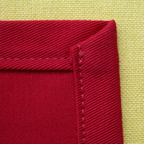
Or tuck under for an angle like this (works best with thin fabrics):
Either way you do it — fold a bottom corner, pin it in place, then make top corner and sew it, then continue down the seam. Repeat for the other side.
Another project finished! Please let me know if you have any comments or questions.
I love your ‘kid-elegant’ table & dining accessories!
Hi! I love the placemats – I think I will get to work on some right away! Where did you get that plate?? I had a similar-looking plate and mug set when I was young and would love to get some for my girls!
Laura
The plate is vintage and I bought it on Etsy at peacock modern:
http://www.etsy.com/shop.php?user_id=5506596
What a wonderful gift for birthday’s for kids.
Thank you for sharing this idea very cute!
Love the idea. That you know of is there material that is wipeable? Or has a coating? Thanks.
I like this idea very much, easy to make for Christmas gifts for grandkids – I havee 11, so best get started ! LOL
I’ve been searching for something cute and different for presents for children. These would be cute made out of fabric relating to their hobbies, etc. Thanks for sharing.
I’ve been trying to brush up on my sewing techniqes. This looks like a fun first project idea. Thanks for sharing it with everyone and keep up the good work!
I have some grandchildren that might enjoy these. Going to try them.
These are just perfect, me and my 11 yr.old daughter love to sew this will be a good go to project, good all year long Valentine”s day , St.Patrick’s day, Easter ,ect. will let you know how it turns out.
Placemat is a must-have in our table. My kids couldn’t eat without looking at the cute placemats designs from Essmak.