Clothesline Caddy

make-it-monday

clothesline-caddy

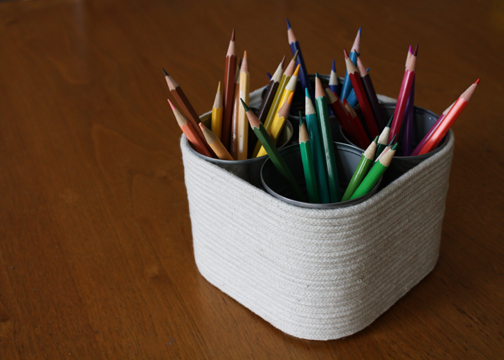
Today we made this caddy to hold the ever-growing supply of kid’s art materials.  Made from clothesline and recycled tin cans, it’s an easy and inexpensive solution.  You could use this caddy to hold various art supplies like we did here, or you could put it in the center of the table to keep utensils handy.  And I’m sure you could think of other uses.  We used four cans, but you could use more or less for your project.  You could also add a braided rope handle.  Here’s what you’ll need for the project:

  • cans
  • pliers
  • clothesline (I bought mine at a fabric store, but I think you could pick this up at a hardware or even the grocery store.  The plain cotton kind is best if you can find it.  A package of clothesline should make it through several projects.  I’ve been using mine for little backpacks like this one.)
  • glue gun and glue sticks
  • scissors
  • masking tape
  1. Wash out four tin cans.  Flatten any protruding metal with the pliers.
  2. Using the glue gun, put some glue toward the bottom of the cans to hold them together, two at a time.  Allow the glue to harden.
  3. Wrap masking tape around one end of your clothesline.
  4. Using the glue gun, glue the end of the clotheslin in place at the bottom of one of the cans (not the underside).
  5. Wrap around the cans, pulling the clothesline as you go.  Add a bead of glue when you get back to your starting point and continue to wrap it around, pushing down to keep the clothesline together.  Continue until you get to the top.
  6. Leave a tail 2″ long.  Wrap the tail end with masking tape, add some hot glue and tuck it in between the cans so that it sticks in place (see photo below).

clothesline-caddy2

If you make one of these, add your photo to the Make it Monday Flickr group here.

Little House Pouch

make-it-monday3

little-house-pouch

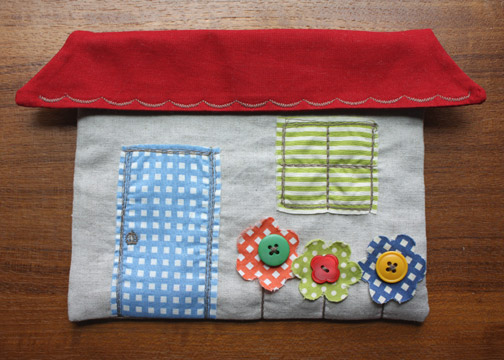
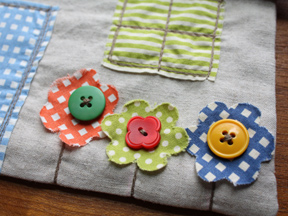
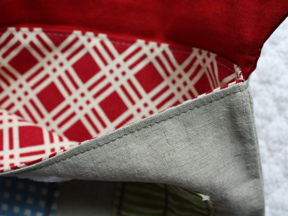
Here’s a tutorial for this little house pouch.  Quick and easy to make.  It’s lined and you can add a velcro or magnetic closure.  Tuck some colored pencils and paper inside for a child’s art pouch, or put it in your bag to carry odds and ends.  You could even add a strap and make it into a sweet child’s purse.  This one’s been taken over by my six-year-old who is calling it a wallet.  Kind of big for that, but okay.  Oh, and the printed fabrics came from here and here.

Click here for the template and instructions.  If you make one of these, be sure to share a picture in our Make it Monday Flickr group here.
little-house-pouch-detail

little-house-pouch-inside

Quick Crafty Round-Up

8-29-09

A very cool way to make a flip doll with legs from We Wilsons (link via Luv in the Mommyhood).

And over at Meet me at Mike’s, Pip has posted some great links: 25 Adorable Amigurumi Critters to Crochet and25 Super Cute Totes to Make (that’s my kid’s artwork tote pictured).

Print this handy Pocket Stitch Book from Cassi of The Crafty Crow for Sew, Mama, Sew.

Make this Table Runner from Betz White for Craft.

Pincushion from A Stitch in Dye (link via Whip Up).  And look, she has a new book available for pre-order.

Find some sandwich inspiration for your kid’s lunchbox from Funky Lunch (link via Craft Gossip).

Log Cabin washcloths from The Purl Bee.

Make it Do shows you how she made these school bags (she used my squirrel appliqué design that you can find here).

Happy Apple Embroidery

make-it-monday2

happy-apples

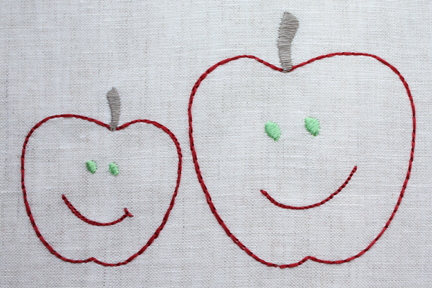
This one’s for those of you with an embroidery machine.  I designed these happy little apples last year, but never got around to sewing them out.  Just stumbled across the file this morning and thought I’d share.  The design is 4.8″x3.1″ with a quick and easy stitch count of 1460.  I’m attaching it here in several formats.  I think it would be sweet on a little tee, a tote bag, or my drawstring backpack from last week.  Happy Sewing!

happy-apples-pes

happy-apples-hus

happy-apples-dst

Oh, and I have to mention that this design is for personal use only.  Please don’t sell stuff made from this without my permission.  Thanks!

Stitched Lamp Shade

make-it-monday1

stitched-lamp-shade1

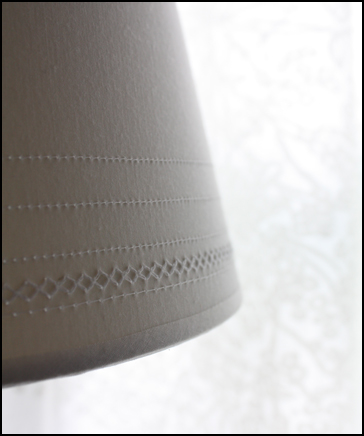
I tried this last year to add some embellishment to a lamp shade, so I thought I’d quickly show you how I did it.

An easy project if you are brave enough to put a lamp shade in your sewing machine.  You’ll need an inexpensive paper or plastic lined shade.  I’d advise using a heavy-duty needle, long stitches on slow speed, with loose tension. Simply wind the thread that you want to show onto your bobbin and place the shade in your machine with the wrong side facing up, as shown below.  Stitch around — and that’s all!

stitching-lamp-shade1