Paper Bag Bowls

recycled-halloween

pumpkin-and-ghost-bowls

pumpkin-bowl

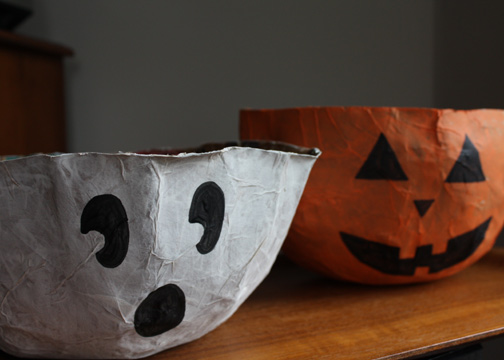
Here’s a fun project to make with the kids.  These are papier-mâché bowls made from paper bags and tissue paper.  We plan to use our bowls for Halloween candy.

I’ve never had much luck with the flour mixtures (maybe because of the humidity here), so I used a mixture of equal parts white glue and water.  I used a full bottle of glue for each bowl.  For the pumpkin bowl, I cut off the top of an actual pumpkin and used that as our base, but we just used a metal mixing bowl for the ghost bowl.  If you do use a pumpkin, be sure to cut it at the widest point so that you can remove the paper bowl when dry.

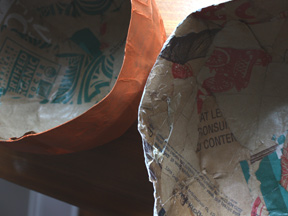
For both, I first covered the base with a plastic grocery bag (you could use plastic wrap), dipped strips of paper bags in the glue mixture, squeezed off the excess and laid the strips across the top until the bowl was covered.  Oh, if you’re working with kids, you will definitely want to do this project outside.  We let the bowls dry for a day, then brushed them with more glue mixture and laid tissue paper (cut into strips) on top.  We then brushed more glue on top of the tissue as we laid it around the bowl.  Once dry, you can trim your edges or leave them ragged.  We painted our bowls with acrylic paints and left the insides unfinished.  If you used colored tissue paper, you wouldn’t need to paint at all.  I just used some brown tissue paper leftover from packaging.  Now the kids are ready to fill up the bowls!

inside-of-bowls

Halloween Jars and Cans

recycled-halloween

pumpkin-jars2

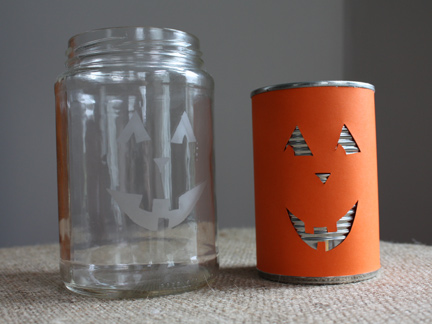
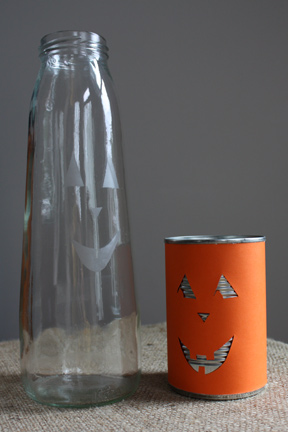
A couple more ideas to add to your list of Halloween decorations using recycled materials.  Here, I used etching cream to create a jack o’ lantern face on the jars.  It’s a subtle effect, but would be pretty with an orange votive.  I simply put masking tape on the jar, cut out the shapes with a craft knife, and let the etching cream sit for about twenty minutes (not a kid-friendly project, obviously).

And for the jack o’lantern cans, I cut out the face with a craft knife and glued the paper onto the can.  A quick tip for holding the paper in place while you wait for the glue to dry — painter’s tape.  I love painter’s tape and use it all the time in my crafting.

pumpkin-jars

More Halloween crafts with bottles and cans (just clap your hands).

Bat Mobile

recycled-halloween

bat-mobile

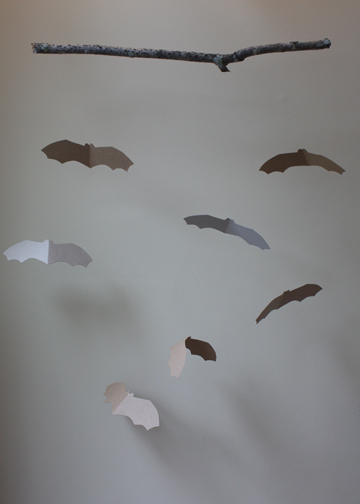
This is not a vehicle for the caped crusader, but rather a hanging mobile!  I’ll be periodically featuring recycled projects for Halloween over the next month.  In addition to my disdain for plastic crap made in China, I am just frugal.

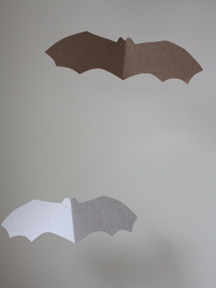
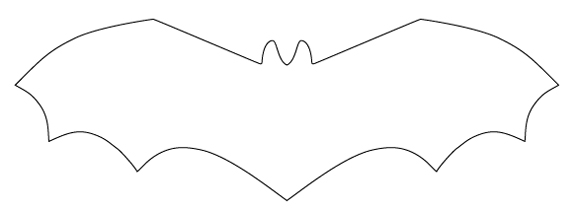
So here’s an easy project made with thin cardboard.  You can use cereal or cracker boxes, or save chipboard from packing materials, like I did here.  I think these would also be pretty cut from patterned paper, if you are so inclined.  I just cut these from cardboard, poked holes where the eyes should be and hung them to a branch using clear thread.  This clear thread looks completely invisible and is light enough for the bats to fly around a bit.

bat-mobile-detail

I’m feeling for bats these days after hearing about the decline in the bat population along the east coast.  We need these little critters.  I’ll try to post some more batty projects over the weekend.

Just click on the image below and print out the template.

bat-template

Clothesline Caddy

make-it-monday

clothesline-caddy

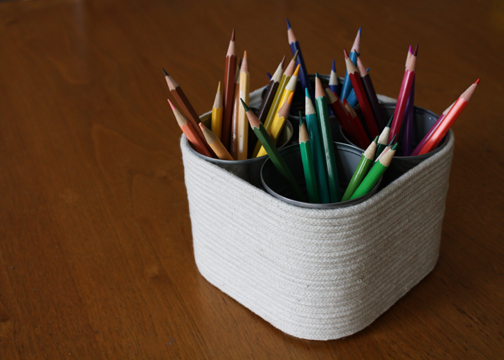
Today we made this caddy to hold the ever-growing supply of kid’s art materials.  Made from clothesline and recycled tin cans, it’s an easy and inexpensive solution.  You could use this caddy to hold various art supplies like we did here, or you could put it in the center of the table to keep utensils handy.  And I’m sure you could think of other uses.  We used four cans, but you could use more or less for your project.  You could also add a braided rope handle.  Here’s what you’ll need for the project:

  • cans
  • pliers
  • clothesline (I bought mine at a fabric store, but I think you could pick this up at a hardware or even the grocery store.  The plain cotton kind is best if you can find it.  A package of clothesline should make it through several projects.  I’ve been using mine for little backpacks like this one.)
  • glue gun and glue sticks
  • scissors
  • masking tape
  1. Wash out four tin cans.  Flatten any protruding metal with the pliers.
  2. Using the glue gun, put some glue toward the bottom of the cans to hold them together, two at a time.  Allow the glue to harden.
  3. Wrap masking tape around one end of your clothesline.
  4. Using the glue gun, glue the end of the clotheslin in place at the bottom of one of the cans (not the underside).
  5. Wrap around the cans, pulling the clothesline as you go.  Add a bead of glue when you get back to your starting point and continue to wrap it around, pushing down to keep the clothesline together.  Continue until you get to the top.
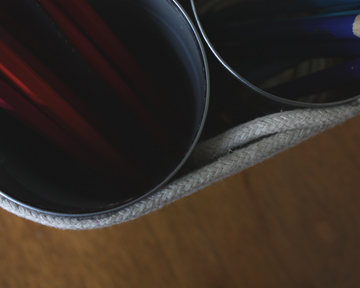
  6. Leave a tail 2″ long.  Wrap the tail end with masking tape, add some hot glue and tuck it in between the cans so that it sticks in place (see photo below).

clothesline-caddy2

If you make one of these, add your photo to the Make it Monday Flickr group here.

Cap Stamps

cap-stamps1

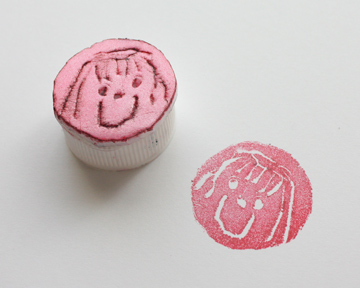
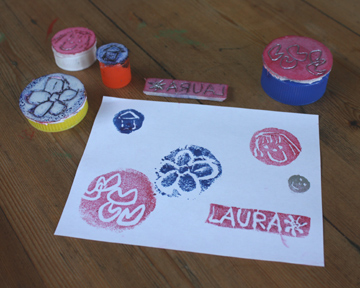
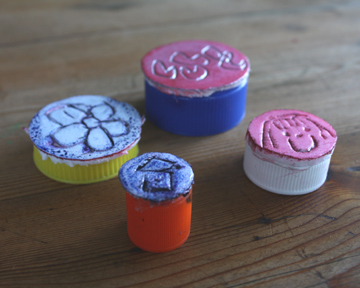
Here’s a recycled project great for a rainy day.  After making these stamps the other day, I wanted to try something that would allow the kids to be more involved in the process.  So, remembering this smart project from glittergoods, I gathered a couple of styrofoam trays.  I added some plastic bottle tops and there you go — custom stamps.

cap-stamps3

Supplies:

  • styrofoam trays
  • plastic bottle caps
  • craft knife
  • cutting mat
  • stamp ink pads
  • pen or pencil

First, I cut off the curved edges from the styrofoam trays with scissors.  Then I traced the outline of a plastic cap onto the foam and let the girls make their drawings within the circle.  I then cut these out with a craft knife because I found that scissors left a jagged edge, but it’s not a precision art here.  Oh, and if you’re going to try to write words, remember to make them a mirror image (I literally had to walk into the bathroom and hold the letters to the mirror because my brain does not work that way).

I talked with the girls about positive and negative space and encouraged them to draw their designs with as little detail as possible.  It probably would have been helpful to have the kids draw their designs on paper first and to show them a sample of a completed styrofoam stamp.  After they drew their designs, I went over them with the pen to make sure the grooves were deep enough to avoid the ink.

Once I cut out the shape, I glued the styrofoam circle to the cap with the hot glue gun.  I’m thinking that these won’t last forever because the styrofoam flattens out a bit, but they are a lot of fun.  My four-year-old wants to make more and more of these, so I guess we’ll have to go back to the farmer’s market and buy more muffins.

cap-stamps2