
Humpty Dumpty GIVE-AWAY!

humpty-dumpty.jpg

make-it-monday-smaller.jpg

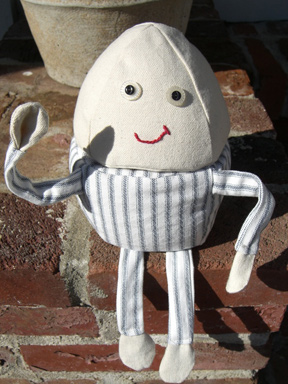
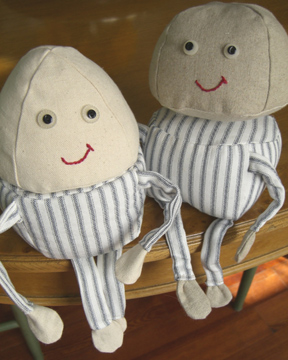
It’s Make it Monday and our first ever Give-Away! Enter to win this Humpty Dumpty toy by simply leaving a comment on this post. Entries must be received by midnight Eastern time on Tuesday night, when the winning comment number will be chosen at random. I will e-mail the winner to get the shipping address, so no need to leave any personal information in your comment. I will try to mail this so that it arrives before the weekend if you live within the continental United States. I’m willing to ship overseas, but obviously that will take longer.
sitting-on-wall2.jpghumpty-falls2.jpg

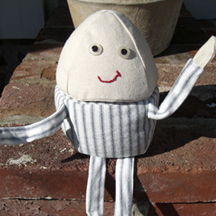
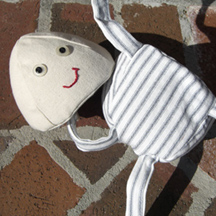
Humpty Dumpty sat on a wall. Humpty Dumpty had a great fall. This Humpty Dumpty breaks in half! But you can put him back together again. He is made in two pieces and attached with velcro. I stuffed the bottom with buckwheat hulls and the top with polyfill. He has adjustable arms thanks to a couple of pipe cleaners. Instructions for making him can be found here:

Humpty Dumpty Pattern Please note that this is a large file (189KB).
humpty-and-frank.jpg

Just so I’m never accused of making things look easy, I wanted to show you that designing toys is a process. Here’s Humpty with his cousin Frank. Frank lives in the Land of Misfit Toys and might prefer to be a hamburger bun. Not to worry, he’s getting a lot of love from my kids. Obviously I made the shape a little wrong the first time and had some construction issues. I never get it right on the first try. This is NOT the toy you will win in this give-away.

Hurry and enter the contest! Humpty Dumpty needs a home.  If you make a Humpty Dumpty toy, please add a photo to the Make it Monday Flickr photo pool here.  I would love to see your creations!

Egg Matryoshka Dolls

make-it-monday3.jpg

matryoshka4.jpg
matryoshka5.jpg

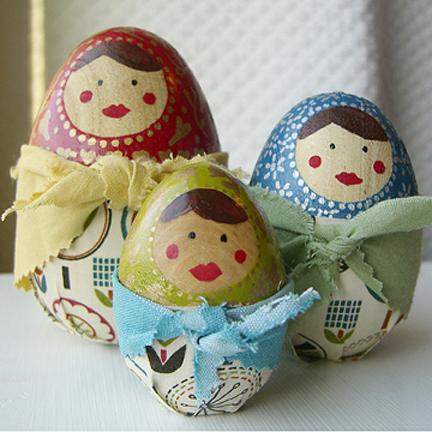
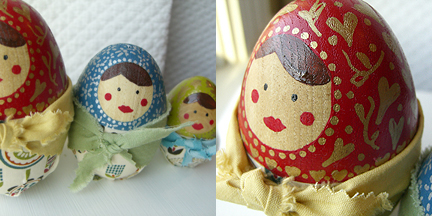
When I made the little egg man for the rocket ship I thought that wooden eggs would also make cute matryoshka style dolls. So here they are. Painted wooden eggs with fabric bottoms and little scarves. Here are some quick and basic directions. As you can see, I am not an artist so I think anyone with a paint brush can do this. Imperfections are the mark of handcrafted love! You could use pastel colors and they would make lovely little Easter gifts. These are probably the kind of dolls that would be happiest living on a shelf, but I’ll let you know how ours hold up to wear and tear.

Supplies:

  • 3 wooden eggs of varying sizes (available at craft stores)
  • painter’s tape
  • exact-o knife
  • acrylic paint
  • small paint brushes
  • paint pen (s)
  • spray polyurethane (I used clear satin for a little shine)
  • fabric scraps
  • scissors
  • spray adhesive (multi-purpose craft adhesive)

Note: Before you begin, you might want to lightly sand the eggs. I did not sand mine and wish I had. The bumpy surface makes painting a little more difficult and the porous areas allow paint to seep under the painter’s tape when you are painting the upper portion.

Step 1: Cut a circle from the painter’s tape. I rolled out some tape onto my cutting mat, traced a circle and used an exact-o knife to cut it out. I then applied it to the egg where I wanted the face. Make sure that the tape is pressed down firmly all around the edges. Measure where you want the paint to stop and mark that with a pencil. Paint this area and allow to dry for about five minutes. Then remove the painter’s tape circle and touch up any areas where paint may have bled through.

supplies.jpg

Step 2: Paint the face. I used a small brush and undiluted acrylic paints.

Step 3: Use paint pens and/or paint to embellish the top portion. Spray with a coat of polyurethane and allow to dry.

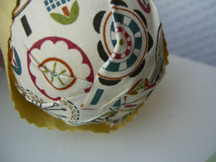
Step 4: Wrap fabric around the eggs to measure how much you will need for each bottom portion. Mark and cut. Then cut slits about 1″ long at 1″ intervals in the bottom of the fabric. Spray back of fabric with spray adhesive and apply to the egg carefully and quickly. On the bottom press down every other tab, then come back around and press down the rest. This will allow for a pleated look at the base (see image below). You may have to spray a bit more adhesive as you are working.

doll-bottom.jpg

Step 5: Make scarves. Again wrap fabric around the egg and add a couple of inches extra. Cut a long, narrow triangle of fabric. You could finish the top, but I just folded mine under and used the selvedge ends. I used pinking shears for the edges.

Thanks for looking! Remember, all patterns and original designs on the long thread are for non-commercial use only. Make things, give them as gifts, enjoy them, but please do not sell them. If you do make these dolls, please add your photos to the Make it Monday photo pool at Flickr here.  I would love to see your creations!  Thanks.

Place Mats and Napkins for Kids

make-it-monday3.jpg

placemats2.jpg

placemat1.jpg

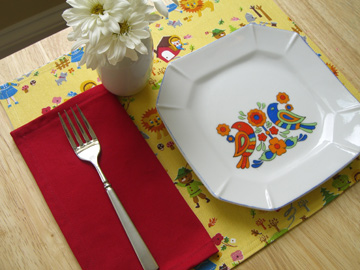
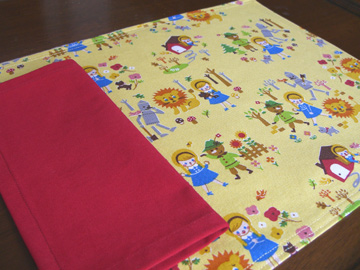
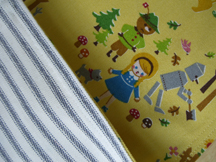
We have eliminated paper napkins around our house, so thought I’d share this project for kids’ place mats and napkins. Obviously you could use this pattern for adult-sized napkins and place mats by increasing the dimensions (I’ve made some suggestions below). This is a super-easy project and a great one for beginners. I also think that some plain fabric with appliqué monsters or flowers would be really cute. We just happened to have this Wizard of Oz canvas from Reprodepot and my kids love it. I backed the mats with a ticking stripe.

Supplies for 4 Place Mats and Napkins:

  • 1 yard main fabric (heavy weight cotton or canvas)
  • 1 yard contrasting fabric (heavy weight cotton or canvas)
  • 1/2 yard napkin fabric (cotton twill or similar)
  • scissors
  • matching thread
  • measuring tape

A note about fabrics: Working with a striped fabric will help you cut straight lines. If you choose to use a lighter weight cotton or even linen for the place mats, you could add a layer of interfacing. And for the napkins, I wanted to use a fabric that was the same on both sides so that a bad side wouldn’t show as you are using the napkin (this is just my personal preference).  I’d recommend washing and drying your fabrics before you begin.

ticking.jpg

Place Mats

Step 1:

Cut your fabrics to the following specifications:

Napkins 10″x 10″ (cut 4). Try 18″ x 18″ for adult-sized napkins.
Place mats 14″ x 12″ (cut 4 of each, main and contrasting fabrics) . Try 20″ x 14″ for adult-sized placemats.

A clear square ruler like one of these will help you get straight lines and achieve 90 degree corners easily. A rotary cutter and mat are also helpful for this project, but not necessary.

Step 2:

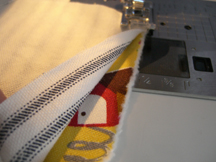
Pin place mat fabrics right sides together and sew a straight stitch about 1/4″ around the edges (pictured below), leaving about 4 inches open. Then turn place mats right side out. Push out corners with the blunt end of your scissors or the end of a pen. Press place mats flat, turning in the open edge.

right-sides-together.jpg

Step 3:

Sew around edges 1/4″ from edge. Then sew another straight stitch 1/2″ from edge. This will leave you with a nice double-stitched edging. Alternately, you could sew a nice decorative stitch or ric-rac trim around the edges. I didn’t think this fabric needed any embellishment.

Napkins

Step 1:

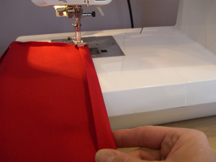
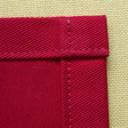
Fold and press napkin edges 1/4″ towards wrong side of fabric. Then bring napkins to the sewing machine. Fold again about 1/2″ and place under the presser foot. Hold the bottom of the fold as you sew (see picture below). Then sew the opposite side.

napkin-seam.jpg

Step 2:

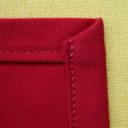
There are two ways that you could do the corners of the napkins. You may fold corners over at a 90 degree angle like this:

squared-corner.jpg

Or tuck under for an angle like this (works best with thin fabrics):

45degree-corner.jpg

Either way you do it — fold a bottom corner, pin it in place, then make top corner and sew it, then continue down the seam. Repeat for the other side.

Another project finished! Please let me know if you have any comments or questions.

Rocket Man

make-it-monday3.jpg

rocket.jpg rocket-boy.jpg

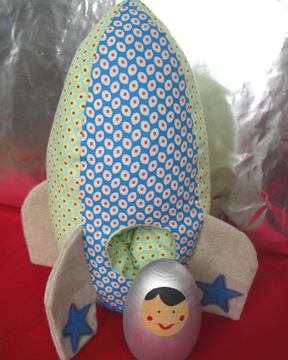
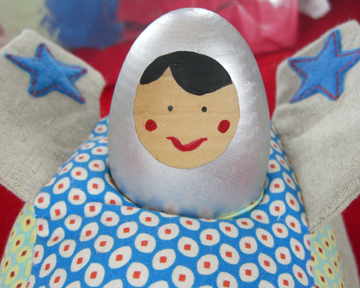
OK, all finished. Crystal got it right — it’s a rocket ship! Finally, I get to make something for a boy. I used quilting weight cotton fabric (from the Belle line by Amy Butler, available here), but it might be wise to try a canvas, tweed or wool felt. I hand-sewed the bottom and was concerned that the fabric was pulling a bit, so I whip stitched a piece of felt on top to secure it. The fabric and design of the rocket was so egg-like that I decided to use a wooden egg for the little rocket boy. I am so not artistic; therefore I tried to keep the design simple and the hand painting to a minimum. But I think I’d like to try some of these egg dolls as matryoshka dolls for Easter. Maybe with some decoupage fabric dresses? Always thinking of the girly stuff.

Instructions and template for the rocket ship are below. I’ll leave it to you to work on a little space boy figure if you want. Here’s the down-low: I bought a wooden egg from the craft store, cut a circular piece of painter’s tape and applied it to the face area, sprayed the body silver and came back and painted the face with acrylic paints. Then it needs a coat of polyurethane.

Instructions for Rocket Ship:

If you make one of these, please share it by uploading a photo to the Make it Monday Flickr group here.

Supplies:

  • 1/2 yard of fabric (I used three different fabrics, plus some felt)
  • scissors
  • thread
  • thin cardboard (cereal box will do)
  • polyfill stuffing

Step 1: Cut all fabrics according to template below. Cut out four pieces of thin cardboard slightly smaller than the template of the rocket wings (leave a bit of room for sewing on the side that attaches to the rocket — I sewed right over the cardboard, but not sure if that’s advisable).

rocket-template.pdf

Step 2: Add your own appliqué stars if you choose. I did not provide these in the template, but you can handle it!

Add a pouch for a little figure (skip to step 3 if you don’t want to bother with this): I just measured the circumference of my egg, added extra for seam allowance and cut a rectangular shape (you want it to be snug so the little egg doesn’t fly on its own). I then sewed right sides together. Then my husband showed off his knowledge of pi to the 10th decimal place and helped me figure out the size of the circle for the bottom of the pouch (you’re on your own here since I don’t know the size of your little figure). I am told that you can determine the diameter of the circle you need to cut by taking the circumference of your little figure divided by pi. I then sewed the circle to the little “sleeve” and sewed the entire piece to one of the main body pieces of the rocket ship (cut a circular hole in the fabric first!).

Step 3: Make wings by sewing right sides together (leave the side that attaches each wing to the rocket unfinished). Turn wings right side out. Insert cardboard pieces.

Step 4: Sew pieces of rocket body right sides together, inserting and attaching wings as you go (bottom of wing should be about 1″ from the bottom of the rocket ship). It might be a good idea to reinforce seams with an overcasting stitch. Turn right side out.

Step 5: Sew bottom circle of rocket to four sides of the main body, leaving room for stuffing. I hand-sewed this part because I found that the wings got in the way when I tried with the machine.

Step 6: Stuff densely with polyfill or filling f your choice (add figure to pouch while you stuff). Pin and sew final seam together and reinforce if needed.

Blast off!

Work in Progress

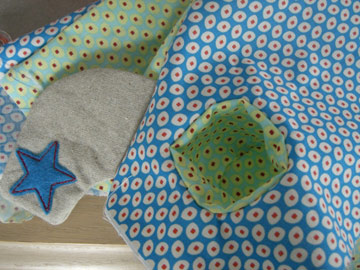
I’m poking along here… orders, taxes, kindergarten registration. I’m still working on the Make it Monday project. Kind Laura is letting me procrastinate, so I think it will be next Monday before I get it completed with instructions. Here’s a sneak peek. Can you guess what it’s going to be?

in-progress.jpg