Make it Monday

make-it-monday2.jpg

Well, today is Monday, but no project yet. Thanks to a cold and a husband who was working all weekend, I am behind schedule. I do have an idea for a soft toy requested by my friend Laura, but we’ll see how it turns out. Hopefully by tomorrow?

Also, you may have noticed that I’ve thrown in the towel on the Valentine’s Day crafting. Yep. I might try a few more things this week, but in the meantime you can view links to other Valentine’s crafts here.

Valentine’s Day Cards

make-it-monday2.jpg

card3.jpg


card11.jpgcard21.jpg

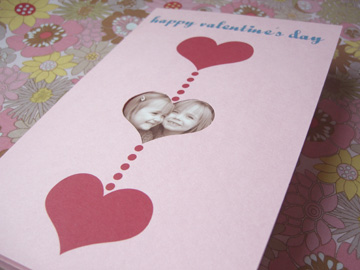
No store-bought cards this year! Make a special card for family and friends with photos of loved ones.

You’ll find the printable templates below for use with 8 1/2″x 11″ card stock. With an exacto knife and a cutting mat, you can cut out as many hearts as you’d like and insert photos. I printed my card on pink card stock and added an additional half size piece of card stock behind the photograph so that it would look neat when you open the card. I just glued it in place. One tip on folding card stock is to score it before folding (I used the tip of my closed scissors and a ruler to score the inside of the card). I re-sized a photo to 2″ wide by 1 3/4″ tall. Happy Valentine’s Day!

Card with Three Hearts

Card with Many Hearts

If you make a card and would like to share it, please add it to the Make It Monday Flickr group here.

Lucy Goosey

make-it-monday3.jpg

goose1.jpg

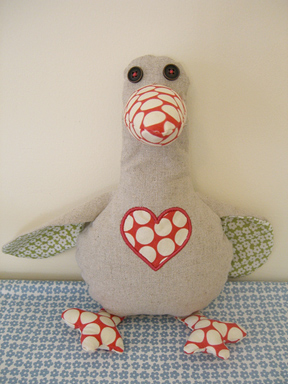
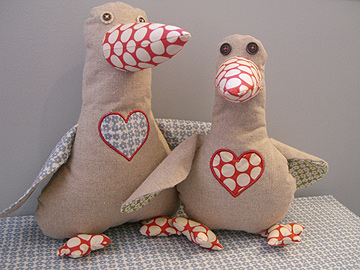
I call my five-year-old a goose all the time, so I made her one. And then I made another for my three-year-old with some of the fabric I bought at Reprodepot. Below is a picture of Lucy and Gertrude. The template below is for the smaller goose, but feel free to play around with the design. I appliquéd a heart onto the goose’s tummy (which I did not include in the instructions below); but you could embroider it, use heart fabric or fabric stamps, or just leave it plain. I think this would make a nice Valentine’s or Easter gift and I found this book of the same name that looks really sweet.
geese2.jpg

Supplies:

1/4 yard fabric (canvas, heavyweight cotton, tweed, wool felt, etc.)
scraps of contrasting fabric for wings, nose and feet
stuffing material (bamboo filling, polyfill, buckwheat hulls, etc.)
scissors
thread
two buttons

Step 1: Cut out fabric according to template: goose.pdf. Draw a 1 1/2″ vertical line where you want the nose to be, fold over your fabric and cut a half-circle shape.

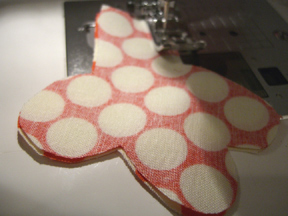
Step 2: Sew nose, wings, and feet right sides together (see photo below). To turn them right-side out, it might be helpful to have one of these tools. But I use the technique of safety pinning a piece of string into the top of the tube before I sew. Then I pull on the string to turn the fabric tube right-side out. (Caution: this technique can pull delicate fabrics and sometimes the safety pin comes open). Some people sew the string directly into the tube and then cut it.
instructions1.jpg

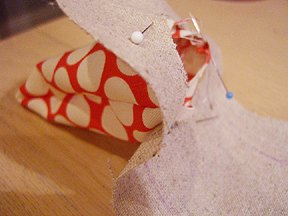
Step 3: Pin nose to body (see picture below). Tack on by hand and then machine sew like you would attach a sleeve. Since this is so small I found that pins got in my way, so had to do the hand tacking.
instructions2.jpg

Step 4: Sew buttons or use embroidery floss for eyes.

Step 5: Stuff feet with polyfill.

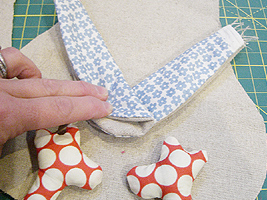
Step 6: Place body fabric pieces right-side together and insert wings and legs (as shown in photo below). Wings should be folded in half lengthwise. Pin. Sew around the edges, leaving an opening between the legs.
instructions3.jpg

Step 7: Turn goose right-side out by gently pulling (I found it helpful to get the wings and feet out first).

Step 8: Stuff the nose and neck, then the body. Hand sew bottom securely. I stuffed the head and nose with polyfill, the body with buckwheat hulls, then a little more polyfill to keep the hulls from falling out as I sewed it together.

All done! If you make this goose and you’d like to share your photos, please add them to the flickr group here.

Folk Art Felt Pillow

make-it-monday2.jpg

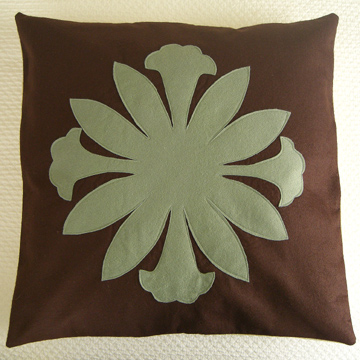
Inspired by Hawaiian quilts and folk art traditions, I created a flower pattern that can be appliquéd for a 20″x20″ pillow. I’m giving complete instructions for making the pillow, so if you’re not interested in trying the appliqué you can still use the tutorial to learn to make a pillow cover. I used a wool blend for the front of this pillow and a canvas fabric for the back. The felt is easy to work with and cut, but I would recommend using 100% wool or a high-quality blend for durability. I think this would be great in a variety of colors.

pillow1.jpg

Rather than attaching a .pdf file, I will just give the instructions here, as they are pretty quick. This project may take an hour or two. This is difficult for me to estimate because I was working on it with kids “helping”. I think a beginner can do this, but you might want to practice sewing around corners and edges.

Supplies:

  • felt: 1 yard of background color, 1/2 yard of contrasting felt
  • backing fabric: 1 yard of canvas, felt, or upholstery fabric
  • small, sharp scissors
  • fabric marker or regular pen
  • pins
  • 2 large buttons
  • thread to match contrasting felt color
  • 20″ x 20″pillow form

Step 1: Cut Fabric

  • Background felt: 22″x22″
  • Pillow Back (2 pieces): 22″x17″, 22″x14″

Step 2: Create Appliqué Shape

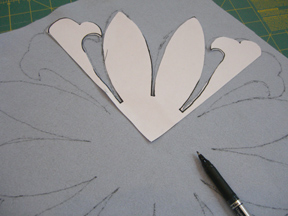
  • Print and cut out template below. Card stock might be helpful here.
  • Trace pattern directly onto felt with a fabric marker or regular pen, then rotate design 90 degrees and continue until you have the full flower effect (if using a regular pen, be sure to flip over before sewing design to hide markings).
  • Carefully cut out shape with small, sharp scissors.

folk-art-pillow-template.pdf

tracing.jpg

Step 3: Sew Appliqué Shape

  • Fold pillow front background fabric in halves to mark center (or measure), then pin appliqué design to the center of the fabric, with at least one pin in each point of the flower. Felt sticks to itself pretty well, so you shouldn’t have too much trouble with slipping as you sew.
  • With matching thread, carefully sew shape onto pillow background with a straight stitch, moving slowly around the corners. Stitching should be almost to the edge. Take your time.

Step 4: Buttonholes

  • Take the two pieces of backing fabric and fold one edge of each piece down 3″ (on a 22″ side). If you can manage it, try to have the selvege ends folding down; otherwise, run a quick overcasting stitch along the edge to prevent fraying. Press the folds down.
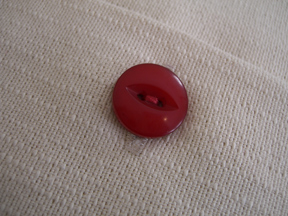
  • On the larger piece, measure 7 1/2″ in from each edge and 1/2″ up from fold. Mark this as the bottom of your buttonhole. Sew buttonholes perpendicular to the fold in the fabric, as shown in photo below (this helps keep them from opening).

button21.jpg

Step 5: Sew Pillow Together

Make a “fabric sandwich” in the following order:

  1. felt pillow front piece (with appliqué side face up).
  2. backing fabric larger piece with buttonhole (wrong side facing up).
  3. backing fabric without buttonhole next (wrong side facing up). The fabric with the buttonholes should overlap the smaller piece by about 3″ to form pillow opening.
  • Pin and sew fabric together.
  • Trim excess and corners.
  • Cut buttonholes open with a seam ripper or sharp scissors (you can put a pin in the bottom so you don’t cut too far).
  • Turn right side out and sew buttons. It helps to lay pillow cover flat and draw a line through the buttonhole to mark the correct spot for the button.

All done! Hope this makes sense. Please let me know if you have any questions or suggestions.

Make it Monday!

make-it-monday1.jpg

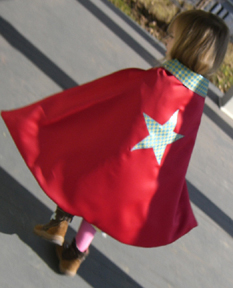
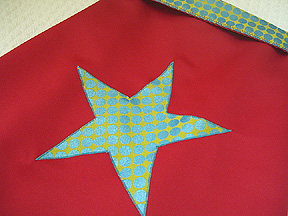
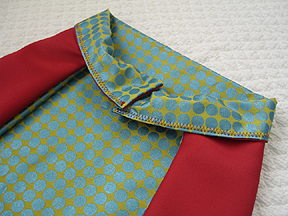
I’m adding a new feature to the blog called Make it Monday. I’ll be offering free craft and sewing patterns every other Monday (maybe every week, but I’m not promising). This week I’m posting a pattern for my Superhero Cape. This can be made with the fabrics of your choice and used for a superhero, princess, magician, sorcerer, or anything else you can imagine. The cape is lined with a contrasting fabric, appliquéd with a design, and fastened by Velcro so the wee ones can take care of themselves. I used matte satin and a shiny cotton print for this cape. It seems to fit sizes 2-6, but is easily adjustable. It was tough to get a good picture of the cape because Supergirl is always on the run!

cape-in-action.jpg

cape4.jpg

cape2.jpg

Below is the pattern file and the shape templates. I have included a star, lightning bolt, crown and heart. If anyone makes this I would love to see some pictures. I have set up a flickr group here.

superhero-cape.pdf

applique-shapes.pdf

Of course with any of these patterns, they are intended for personal use and not for sale!