Assembly Line Valentines

valentines-day-recycled-wid2

hearts-1

It’s time to crack the craft whip on those kids.  Valentines for school are often a source of frustration for parents whether you are trying to get your kid to make them or simply write his name on each one. It’s tedious.  Probably best to tackle them assembly line style and start way ahead of time.  Here are some ideas for recycled paper materials that can be used to make valentines:

  • maps
  • book pages
  • junk mail
  • holiday cards
  • paper bags
  • cereal boxes
  • sheet music
  • children’s artwork (with permission)
  • office paper
  • gift wrap
  • brochures
  • invitations
  • magazines

The problem with recycled materials is that they usually have printing on both sides.  Once our cards are done, I will cut up some back sides of office paper and have the kids write their names and glue to the inside of each card.

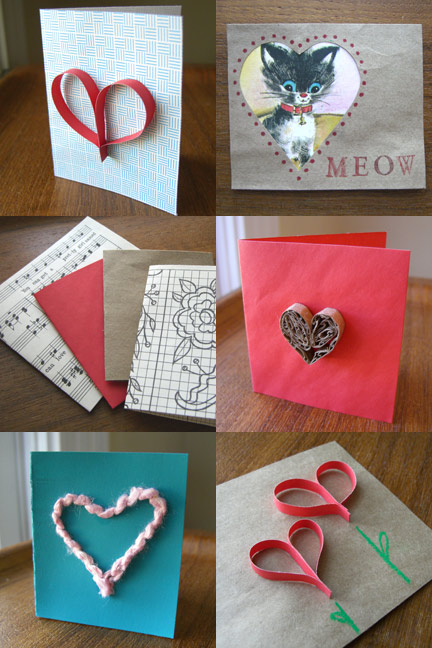
Here are some simple ways that you could use your recycled materials:

cards-collage

From top left:

  1. Patterned side of a security envelope (idea from Design Sponge).
  2. Paper bag with vintage children’s book illustration.
  3. Blank cards made from sheet music, red envelope, paper bag, and embroidery design book page.
  4. Corrugated cardboard heart on recycled envelope.
  5. Painted cereal box with yarn scrap.
  6. Hearts on paper bag (see instructions below).

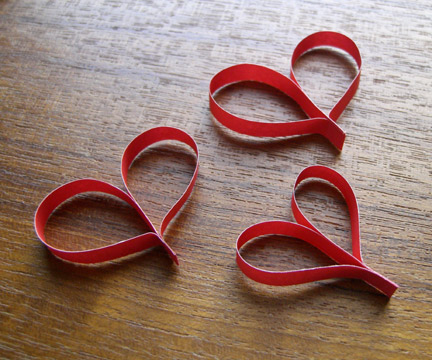
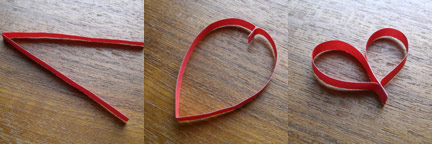
To make these little hearts, just cut some recycled paper in 1/4″ strips and follow the pictures below, adding a drop of glue at each step.  The corrugated hearts were also made with strips of corrugated cardboard rolled down from each end.

paper-heart-steps

Mmmm…cookies.

cookies

I don’t know about you, but when it’s cold out I like to stay inside and eat cookies.  I made these chocolate chip cookies after my friend Laura sent me the link to the recipe — The New York Times cookies.  I used regular flour, regular chocolate chips plus some white chocolate chunks and an ice cream scoop to get them the right size.

parchment-paper

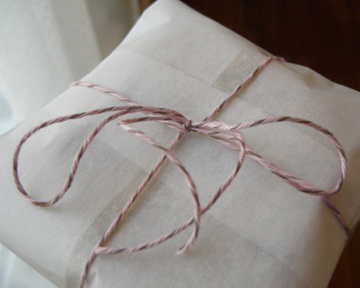
These would be great for Valentine’s Day and I think a single cookie would make a nice little gift for a teacher or co-worker.  I’ve always loved this Martha Stewart CD sleeve idea, but you could just wrap them with parchment paper and twine as I did here.

Soup Can Revisited

valentines-day-recycled-wid1

soup-can1

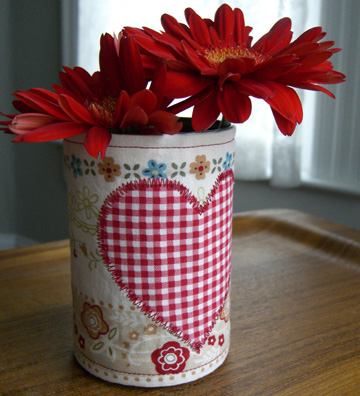
Here’s a project from your grammar school days.  This Valentine’s Day, there’s no need to buy candy in plastic containers with wasteful packaging or flowers in another unwanted vase.  Use a soup can.  Fill it with candy and nuts, pencils, a handmade toy, flowers, a plant (poke holes in the bottom of the can or use rocks for drainage), money, a gift card or whatever else your sweetie might like.  I’ve made it easy for you by providing these templates for 15 ounce cans.  Be sure to thoroughly wash the can, remove the label and make sure there are no sharp pieces on the rim.

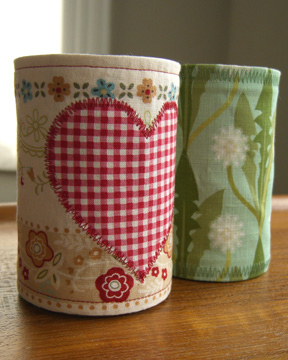
If you sew, you can quickly make a fabric sleeve for your soup can.  I’ve included instructions here (soup-can-fabric-sleeve) for a sleeve with an appliqué heart.  I also made one without the heart from this great Cicada Studio linen blend fabric.  Now for me, using small pieces of fabric from my stash is recycling, but you could also use some old clothing or vintage fabric.
soup-can21

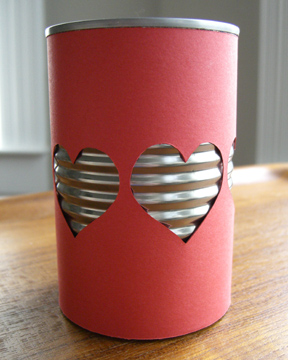
If you don’t sew, here’s a quick template (soup-can-paper-template) using card stock, a craft knife, and some glue.  I really like the look of the steel ridges in the can, so this one exposes them.  Would be even better if you used some paper from the recycling bin.  If you are one of those people like me who is constantly de-cluttering, you won’t feel bad about tossing these cans after Valentine’s Day because they can go right back into the recycling bin.
paper-can

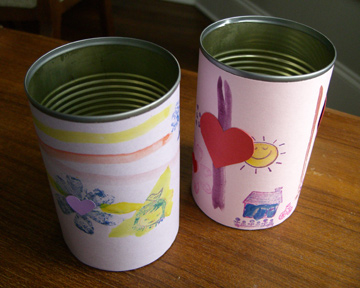
My kids also decorated some cans with stamps and paint.  The possibilities are endless.
kids-soup-cans

See these related tutorials:

Beaded cans from Susan Beal for CraftStylish.

Fabric vase covers from How about orange.

Can covers from Elsie Marley with great embroidery designs.

Silly as it is, I have started a Facebook group for The Long Thread.  Not sure yet what I’ll do with it, but I’d love to have some more members.  Not that 19 isn’t enough — those are 19 quality people there, but you know.

Pumpkin Cheesecake

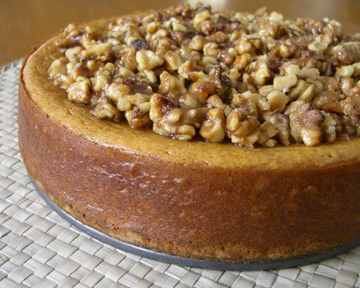
This is not healthy, but it’s good for a special occasion.  I love pumpkin cheesecake and can’t remember the recipe I have used in the past, so this is a combination of several recipes with some of my own ideas and preferences added.  I am not afraid to fiddle with a recipe, which can lead to mixed results.  But this one turned out pretty well, so here it is.

Preheat oven to 350 degrees.

Make Crust:

  • 1 package of graham crackers (approximately 9 full crackers)
  • 1/2 stick of butter

Combine in a food processor and press by hand into a greased 9″ springform pan.  Set aside.

Make Filling:

  • 3 packages cream cheese (8 oz. each), softened
  • 1/2 cup brown sugar
  • 1/2 cup white sugar
  • 1 teaspoon vanilla
  • 4 eggs
  • 1 can pumpkin (15 oz.)
  • 1/4 cup maple syrup
  • 1/4 teaspoon nutmeg
  • 1 1/2 teaspoons cinnamon

In a large bowl, combine first four ingredients with an electric mixer.  Add remaining ingredients and mix on high speed until smooth and fluffy. Pour mixture into springform pan and tap to get out bubbles.  Bake at 350 degrees for one hour and fifteen minutes (possibly longer) until set in the center.  When it is set, turn off your oven and crack the oven door to let it cool slowly.  I read somewhere that this helps prevent cracking, but mine cracked a bit anyway.  The topping will hide any cracks!

Topping:

  • 3 tablespoons melted butter
  • 1/4 cup brown sugar
  • 3 tablespoons maple syrup
  • 1 cup chopped walnuts

Mix together first three ingredients.  Then add walnuts and pour over cooled cheesecake.  Refrigerate for 3 hours or overnight.  Serve with fresh cinnamon whipped cream.  Now go for a jog.  I usually omit that last part.