Pinwheel Quilted Coasters

make-it-monday.jpg

pinwheel-1.jpg

pinwheel-2.jpg

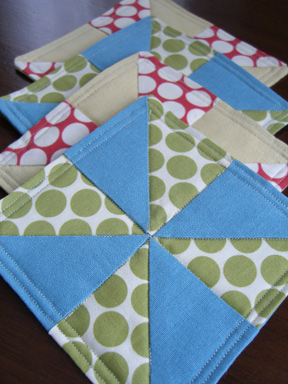
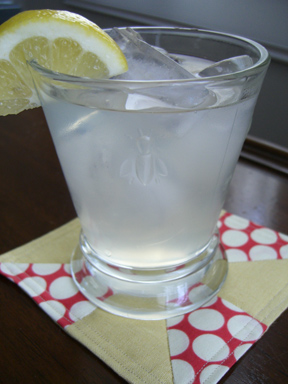
Here are some pinwheel quilted coasters for summertime entertaining. I used Amy Butler’s Lotus dots available here mixed with a linen/cotton solid. I think this design would be nice with striped or gingham fabrics as well. This project took me about 2 hours to make four coasters.

Since I don’t really quilt, I found a couple of challenges. Be sure to cut all of your fabric perfectly and make sure the seams line up so that your pinwheel points will meet.  I got this fine when I started actually paying attention.  I also had a little trouble sewing in the ditch, but I think I’ll get better with practice. Quilting seems to require a level of precision that I don’t possess. Still, this is a pretty straight-forward project and I think it would be a good introduction to quilting for beginners (like me).

Supplies:

  • Fabric Scraps
  • Matching thread
  • Bamboo quilt batting (four small pieces)
  • Iron

NOTE: Seam allowance is 1/4″.
Step #1: Cut fabrics according to template: pinwheel-coasters-template.pdf

step1.jpg

Step #2: Press all fabrics and begin to sew triangles together to form squares. Then press back seam towards darker fabric and trim edges. Make sure that each section is a true square and should be about 3″.

step2.jpg

Step #3: Lay out squares for each coaster to make the pinwheel pattern. Sew two squares together to make a rectangle. Repeat.

step-3a.jpgstep-3b.jpg

Step #4: Align mid-point of each half of the pinwheel and press one side of each new seam to opposite sides so that the seams won’t be too bulky for your machine to sew (see picture below). Sew these two rectangles together to form the full square of the top of the coaster.

step-4.jpg

Step #5: Press open the middle seam as shown below. Place patchwork top and cut bottom fabric, right sides together, and sew around three sides. Trim any excess fabric, particularly around the corners. Turn right sides out and punch corners out with a pointed (but not sharp) object.

step-5a.jpgstep-5b.jpg

Step #6: Cut your batting just a bit smaller than your finished coaster and insert into the opening, being sure that it gets into the corners and lays flat. Turn in the unfinished seam and press.

step-6a.jpg step-6b.jpg

Step #7: Sew a stitch all around the coaster 1/4″ from the edge (pictured above). Then quilt on the seams of the pinwheel design. Add one last row of stitching between the edge of the coaster and the first edge stitching to make a double row, as shown below. All done!

step-7.jpg

As always, projects from the long thread are for personal use only. If you make these coasters, be sure to post a photo to the Make it Monday Flickr group. For more summer pinwheel excitement that the kids can enjoy, try making this paper pinwheel.

Reversible Headbands

make-it-monday3.jpg

reversible31.jpg

reversible1.jpg

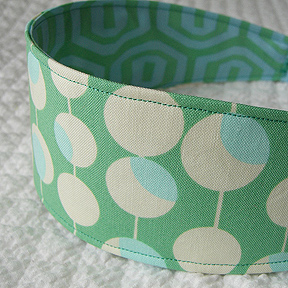
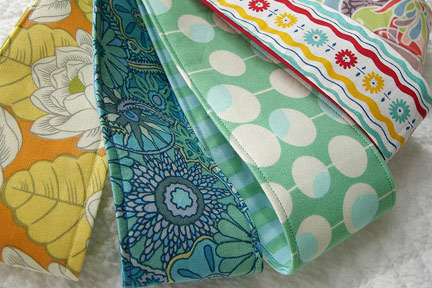
Here’s a quick and easy tutorial for a reversible headband. This makes a fairly wide headband — finished size of 2 1/2″ for adults and 1 3/4″ for kids, so adjust as you like. I used plain elastic in the back, but if you have short hair you might want to make a fabric sleeve, find some decorative elastic, or sew twill tape on top. This is a great project for fabric scraps.

Supplies:

  • Fabric scraps (about 18″ long)
  • Elastic (about 6 inches of 1/2″ width)
  • Fusible interfacing (optional, but recommended)

Step #1:

Cut out template (headband-template.pdf) and make sure it works for your head size. Adjust as needed. Cut one piece of each fabric and one piece of fusible interfacing.

Step #2:

Iron interfacing to back side of one of the cut fabric pieces. Fold down edges of both pieces by 1/2″ and press down (towards wrong side of fabric).

Step #3:

Pin two fabrics together, wrong sides facing, being sure to align them perfectly. Wind a bobbin to match the fabric on the other side. Sew along the outside edges, leaving an opening at each end. Cut your elastic to the desired length (about 6″-7″ for adult sizes, 5″ for kids). Insert into one end and sew into place with a zigzag stitch (reduce tension and use a wide stitch). Repeat on the other end.

If you make this project, please post photos to the Flickr Make it Monday group. Click here to see more Make it Monday projects.

Bamboo Beach Purse

make-it-monday1.jpg

bamboo-purse.jpg

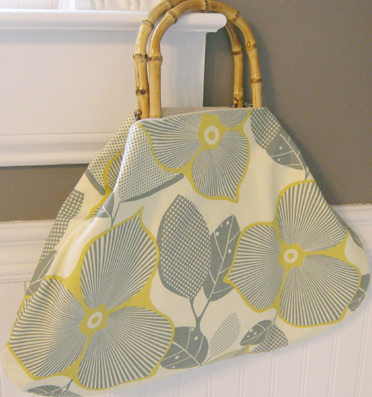
Well, we just returned from the beach so it’s been on my mind. This is my first attempt at making any kind of bag, so there was a bit of trial and error but I came up with this. The bamboo handles are mostly just so I didn’t have to make straps, but I did have to sew them on by hand! The fabric is Amy Butler‘s optic blossom in linen color and the bag is lined with cream-colored canvas. The instructions are below. Please let me know if you have any questions about the pattern!

Supplies:

  • 1/2 yard main fabric
  • 1/2 yard lining fabric
  • U-shaped bamboo handles and hardware
  • matching thread
  • 6″ zipper (optional)

Cut Fabric:

  1. Main Fabric: Cut 2 on the fold 6″ at the top and 9″ across the bottom(finished piece will be double this width).  See drawings below for the basic shape of the fabric.
  2. Lining Fabric: Cut 2 same as above.
  3. 6×13 piece of lining fabric for zippered pocket (optional).

Step #1: Make zippered pocket for inside of bag (optional).

Fold under top end of fabric by 1/2″ and attach one side of the zipper, being sure to align the end of the zipper from the edge with seam allowance. Fold under bottom end of fabric (finish raw edge with an overcasting stitch if you’d like) 1/2″ and attach the other side of the zipper (unzipped). Zip the zipper halfway and turn fabric inside out. Position zipper so that it is about 1″ from the top of the pocket and iron the fabric. Sew right sides together along unfinished sides, creating the pocket. Sew the pocket to one side of the lining, about 1″ from the bottom of the fabric. You can sew a straight stitch down the top of the pocket above the zipper.

zipper1.jpgzipper2.jpgzipper3.jpgzipper4.jpg

Step #2: Sew top seams of bag.

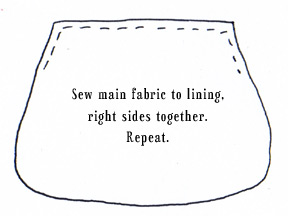
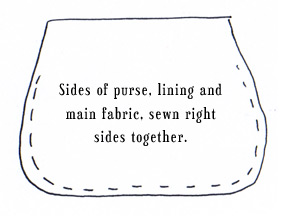
Right sides together, sew one piece of main fabric to one piece of lining fabric as shown in illustration below, sewing down the side approximately 2 1/2″. Repeat with the other set of fabrics. Turn each piece right side out to begin the next step.

right-sides-together3.jpg

Step #3: Sew bag together.

With right sides of main purse fabric together and lining pushed aside, pin and sew main fabric to the other piece of main fabric around remainder of the purse. You’ll need to tuck under the fabric at the beginning of your stitches where they join with the stitches from the previous step. Then repeat with the lining, leaving about 5″ open at the bottom of the lining. Pull the purse through and turn everything right side out. Pull out the lining and turn under the remainder of the open seam. Press, pin flat and sew.

right-sides-together2.jpg

Step #4: Sew Handles.

Mark center of inside on each side of the bag opening. Align the handle and mark each end. Sew hardware in place by hand (as shown). Be sure to sew only to fabric lining so that your stitches won’t show on the front of the bag. Repeat for other side of handle and then again for the other side of the bag. Fold in corners about 3″, creating a crease along the side of the bag. Pin in place and tack down.

inside-clasp.jpginside-fold.jpginside-of-purse.jpg

That’s the bag. As always, patterns posted on the long thread are for personal use only. If you make this bag, please post your version to the Flickr Make it Monday photo pool. Thanks!

Photo Shelves

make-it-monday.jpg

shadowboxes1.jpg

shadowboxes2.jpg

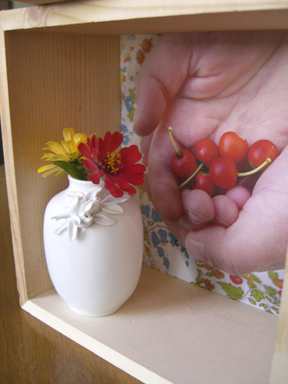
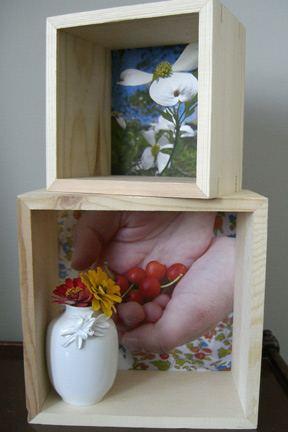
I’ve had these shadow box shelves sitting around the house for a while and had some printable canvas, so decided to add photos to them. These photo shelves could hang on the wall, be stacked on a table or used as a key shelf by a door. They would be nice painted black with sepia-toned photos. It occurred to me as I was taking pictures that you could make an adjustable doll house with these wooden boxes by backing each one with fabric or patterned paper. They’re just the right size for this.

Supplies:

  • Wooden shadow boxes (paint them if you want)
  • Printable canvas (from the office supply store)
  • Computer and printer
  • Scissors
  • Staple gun

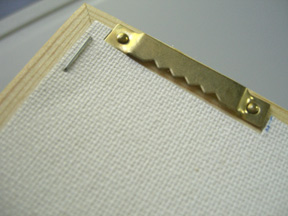
Measure the outside of the wooden frame. Using Photoshop or other photo program, adjust your photos to size and print on canvas cloth. Be sure to cut out space for hangers on frames. Staple to frame with staple gun. That’s it!

back-staple.jpg

Vase with Child’s Drawing

make-it-monday-smaller.jpg

bird-vase1.jpg

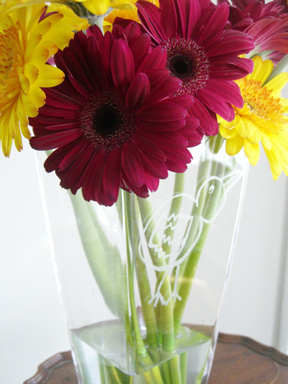
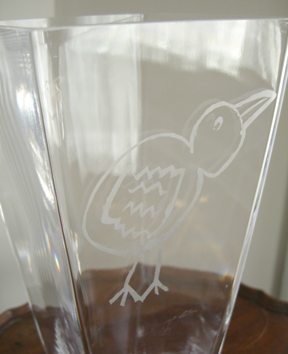
I transferred my five-year-old’s drawing to a vase. I’m posting this as an idea, but I used painter’s tape and I think it would have made a cleaner design with vinyl paper. I think this would also work better with simple shapes all over the vase — maybe flowers or butterflies drawn by the child.

The supplies you’ll need are vinyl paper, etching cream, x-acto knife, child’s drawing, a rotary mat and a vase or glass.  I taped the drawing onto the mat on top of the tape, then cut out the design with the x-acto knife.  I carefully peeled it off and placed it on the vase.  Then I used etching cream to make the design, following the directions on the bottle.  The images below can give you the general idea.

bird-vase2.jpg

step1.jpgstep2.jpgstep3.jpg