The winner of the Handmade Hostess book is #45, Evanthia! Congratulations. If you’re interested in the book, you can head over to amazon to take a closer look. Happy party-planning!
Etsy Finds Friday
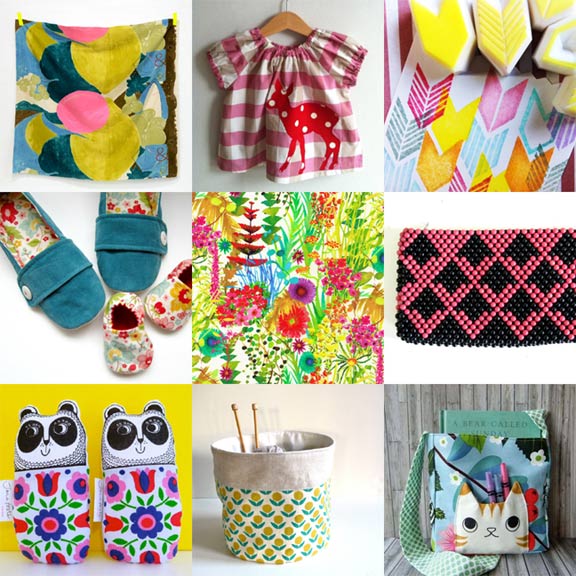
Nani Iro fabric, 24″ x 41″ panel, $11 from Miss Matatabi.
Pink Check Deer Blouse, $34 from Tree Fall Design.
Geometric Hand Carved Rubber Stamp, set of 5 for $10 from Talk to the Sun.
Mom and Baby Slipper Set, $55 from Molipop.
Liberty of London Tresco fabric, $36 per yard from Alice Caroline Supply.
Vintage Beaded Clutch, £15.00 GBP from Goodnight Prudence.
Screenprinted Panda Plush, $18.80 from Jane Foster.
Fabric Bucket, $30 from Jenny Bartoy.
Custom Tabby Cat Kid’s Messenger Bag, $35 from Bikbik and Roro.
Ladybug Tunic
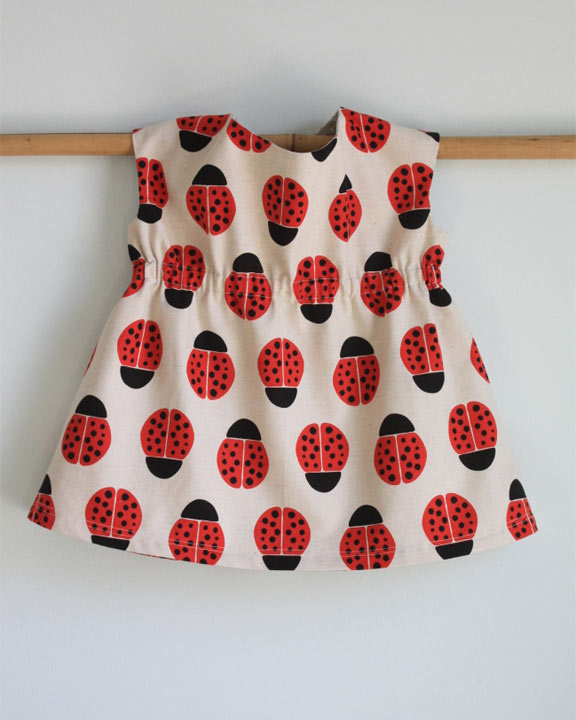
Made this little tunic for my younger daughter using the ladybug print from my Stamped fabric collection and the Roller Skate Dress & Tunic pattern from Oliver + S. This sewed up very quickly! Next I plan to make the dress version with the contrasting v-neck facing.
My older daughter would never wear anything like this, and my younger is more into sequined clothes these days, so I thought if I tried the tunic for her to wear with skinny pants, she might go for it. But her favorite store is an unbearably pink sparkly store in the mall. I really try to allow my kids to have their own sense of style, within reason. But wow, it’s a challenge.
Kaleidoscope Quilt
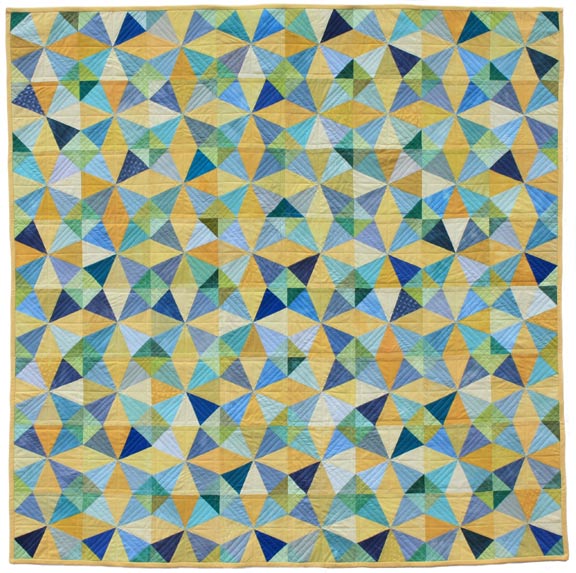
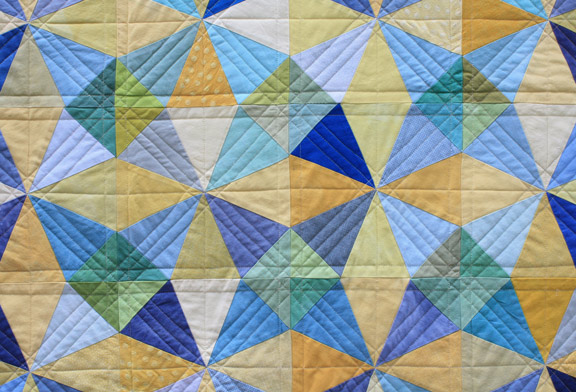
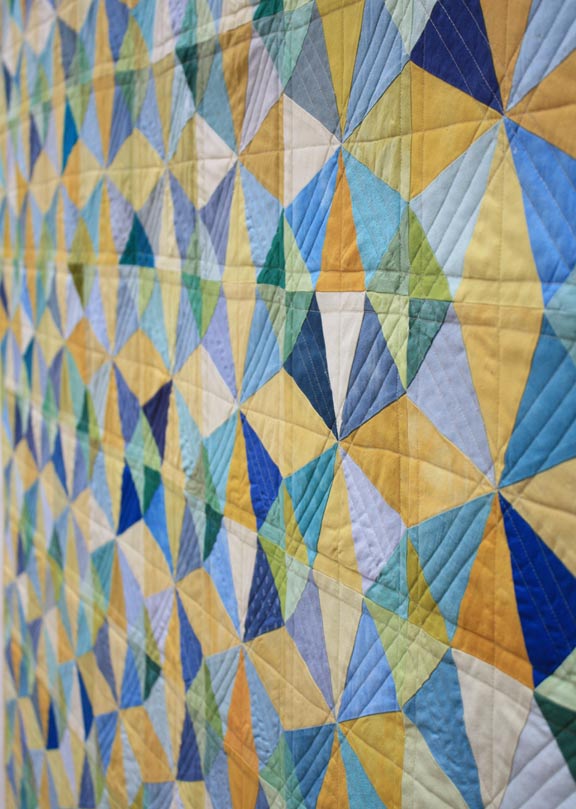
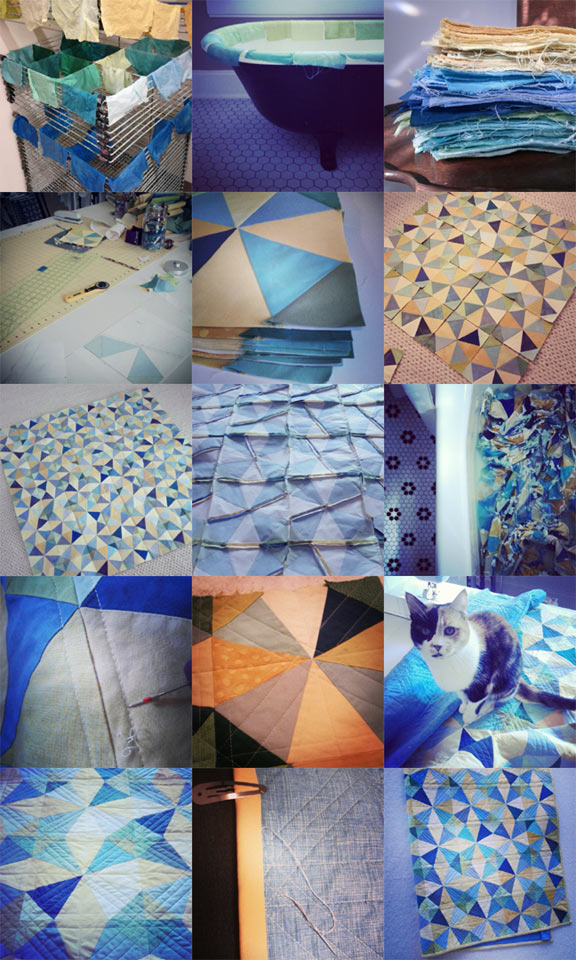
The kaleidoscope quilt I’ve been working on for the past several months was finally finished in time for last night’s school auction. Each of the kids at the school (almost 400) dyed a square of fabric, which I cut up to make this quilt, paper-piecing each block. You can read about the dyeing process here. Of course it didn’t sell for as much as I’d hoped at the auction, but I’ve learned not to take that personally. Just wish that all my time could have resulted in more money for the school and I will definitely not break it down to figure out my hourly rate, because that would be too disheartening.
Here are my Instagram photos of the process, which I thought I’d share in case you don’t follow me over there. These days I really enjoy taking photos of the process and I’m trying to take a step back and enjoy the work more, rather than focusing on the end result. You can see that I sewed the blocks together with the paper backing still attached, then wanted to speed up the process of removing them so eventually the quilt top landed in the bathtub. They do make a dissolvable paper for foundation piecing, which I will definitely try next time on a smaller project. My walking foot was skipping stitches (tried everything including tension, replacing needles, cleaning machine, etc.), so I eventually had to get a new walking foot and an adapter so it would fit my older Babylock Ellageo machine.
If you’re interested in making this quilt using the foundation piecing method, I posted the templates that I created here.
Bunny Stitching
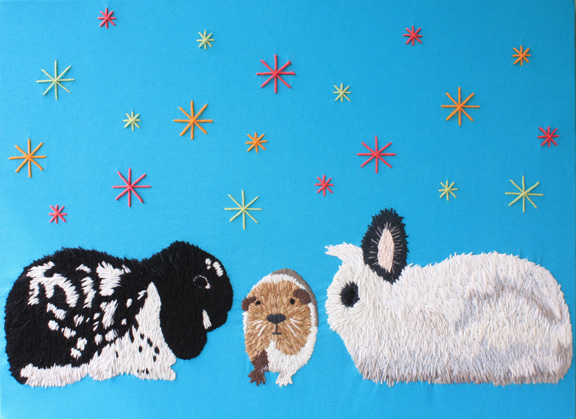
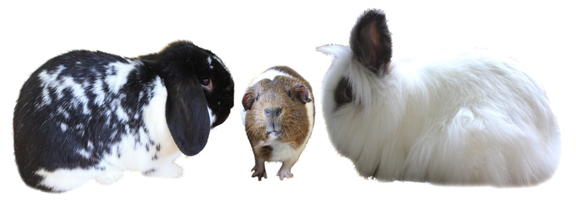
Happy first day of spring! Look, some bunnies are here to celebrate! I just finished up an auction project that I worked on with my daughter’s fourth grade class. Initially we were thinking of making a large-scale cross-stitched canvas, but there are two bunnies and a guinea pig in this classroom and it just felt like we needed to capture their personality rather than making a stylized version of a bunny. So I bought some tapestry wool and we got stitching! I tried using some yarn I had on hand, but it frayed as it was pulled through, so I’d definitely recommend using tapestry wool which is especially designed for stitching.
Each of the kids had a turn with this project, but I did end up doing lots of stitching myself to get this done in time for the auction this weekend. One of the teachers helped and they were both so patient with me being in their classroom all last week, even though I still have trouble not talking in class!
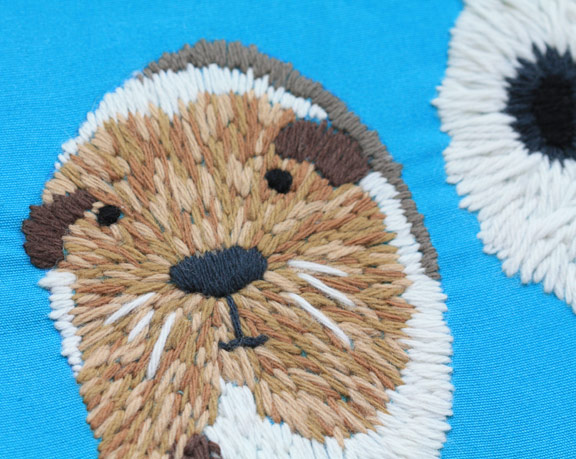
I started with the photo below that I edited in Photoshop because of course the animals wouldn’t pose like this. Then I had the sudden realization that these sweet little bunnies don’t look that much like bunnies at all! One is a big fluffball and the other has down-turned ears. And the guinea pig was tricky! We stitched on colored canvas fabric, then I added some colored asterisks stitched up top, then stretched it over a canvas, which also serves to hide the messy back side. I think it would have been interesting if we’d stitched some brightly colored patches into their fur, but another idea for another time!
This was a lot of work, but the kids have been so excited and I think it would look adorable hanging in a child’s room. I really enjoyed taking the time to relax and stitch by hand, and now I want to make portraits of our own pets. I just have a quilt to finish up and I’m done with auction duties!
