Ribbon Hair Clips

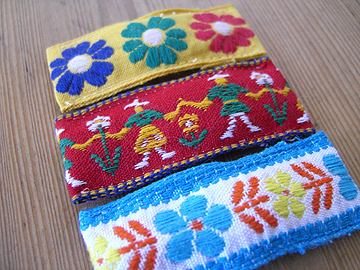
You might have noticed that I love this embroidered ribbon (especially vintage).  So I decided to make some hair clips with my scraps.  Here are some quick and rather vague directions for how to make them. Sorry if this is confusing, but you all are so smart!

Supplies:

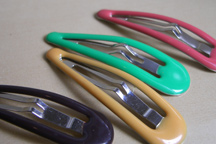
  • Hair Clip (like these pictured below)
  • Ribbon (6″ or less)
  • Thread

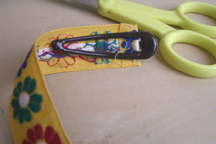
Step #1: Turn under one end of the ribbon and sew it down.  Clip off the excess.  Tuck it inside your hair clip to get the desired length.  Then fold it over and sew so that you have a pocket for your clip.
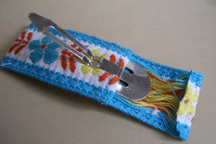
Step #2: Check to see how long your finished hair clip cover will be by wrapping it back around, keeping a small hem allowance in mind (approximately 1/4″).  Cut the ribbon, turn down the unfinished edge and sew it under. Then insert the hair clip into the ribbon pocket.
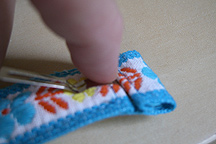
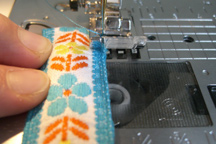
Step #3: Wrap the other end around the hair clip and sew in place down either side.  Note: If you are afraid to put the hair clip in your machine, you could probably just glue down this last bit with a hot glue gun.
Back to School Tee

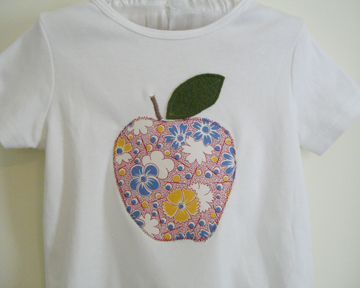
Many of you will have kids headed back to school soon (here in Georgia, school begins next week). So here’s a quick appliqué project. I think it would be cute with a matching skirt or pants.

Supplies:

  • cotton tee
  • fabric scrap
  • lightweight interfacing (optional)
  • wool felt (approximately 4″ x 4″)
  • thread

Step #1: Wash and dry felt square. It will shrink considerably.

Step #2: Cut out fabric and interfacing according to back-to-school-tee-template. Iron on interfacing to the back of the apple shape.

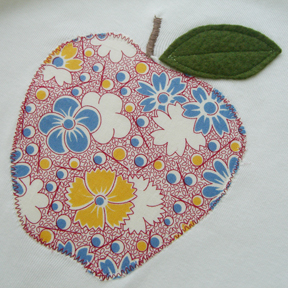
Step #3: Pin apple to center of shirt and sew a zig-zag stitch around the edge.

Step #4: Cut out leaf shape from felt. Pin onto shirt and sew around edges, then through center.

Step #5: Sew a quick stem. Done!

Green Counter Spray

make-it-monday-smaller.jpg

kitchen-cleaner.jpg

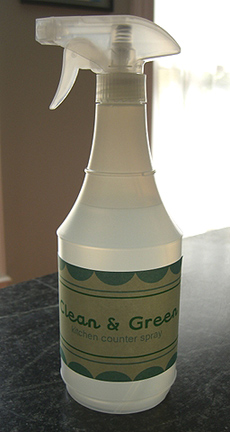
Here’s a quick and easy recipe for a safe, inexpensive and green counter cleaner. I use a 24 ounce spray bottle to mix mine.  I love cleaning with vinegar, but this concoction simply dilutes the vinegar and adds some essential oils to tackle that smell.  Any essential oils will likely work well.  Works great on glass and stainless steel too.  I have soapstone countertops and vinegar works well for me, but you might want to make sure the acid in vinegar will not damage your surface.

  • 4 ounces vinegar
  • 20 ounces water
  • 5-6 drops peppermint oil
  • 5-6 drops grapefruit oil

Simple Soap

make-it-monday1.jpg

soap2.jpg

soap1.jpg

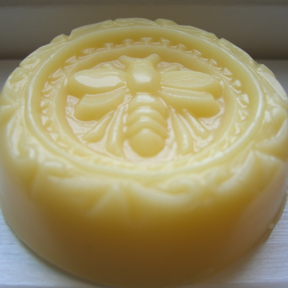
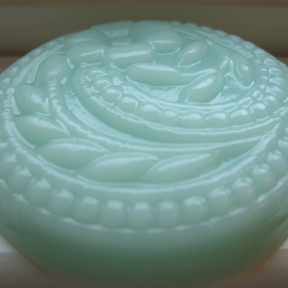
This is too easy!  Am I doing something wrong?  There is lots of soap-making advice out there, but here’s how I made my melt & pour soaps.  I got all of my supplies from Brambleberry Soapmaking Supplies.  I think having high quality ingredients is essential here.  I packaged mine in glassine envelopes and plan to make some nice stickers for the back.  Creature Comforts has another lovely way to package your soaps in pretty paper.

Supplies:

  • Melting base (clear glycerin, shea, aloe, goat’s milk or any combination of bases)
  • Fragrance Oil
  • Coloring (optional)
  • Mixing Cup (microwave-safe and with pouring spout)
  • Small spray bottle filled with rubbing alcohol
  • Chopsticks or whisk for stirring
  • Eyedroppers (I used medicine dispensers)
  • Sharp knife
  • Soap Molds or silicone cupcake tray (that you plan not to use for food again)

Here are the ingredients that I used: for the bee bar I used goat’s milk and honey bases, oatmeal milk & honey oil mixture, ginseng, and yellow coloring.  For the blue bars I used aloe and white bases, spearmint eucalyptus fragrance, ginseng,  and blue and green colorings.

Step #1:  Cut amount of soap base(s) needed and melt in the microwave (try 30 seconds).

Step #2: Add color, fragrance, and any extracts one drop at a time until you get the desired effect.

Step #3: Carefully pour mixture into molds and tap mold gently to release bubbles.  If any are on the top, you can spray with the alcohol (I didn’t have any around the house, so I had some tiny little bubbles on the bottom of my bars).

Step #4: Allow to dry for several hours then release from mold by gently bending and tapping.  Now go give some soap to all your smelly friends!

Don’t have the time or inclination to make soap?  Buy some from one of my favorite Etsy shops, 4th Ave Soap Co.