Make it Monday!

make-it-monday1.jpg

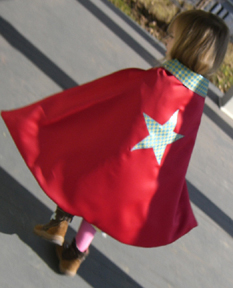
I’m adding a new feature to the blog called Make it Monday. I’ll be offering free craft and sewing patterns every other Monday (maybe every week, but I’m not promising). This week I’m posting a pattern for my Superhero Cape. This can be made with the fabrics of your choice and used for a superhero, princess, magician, sorcerer, or anything else you can imagine. The cape is lined with a contrasting fabric, appliquéd with a design, and fastened by Velcro so the wee ones can take care of themselves. I used matte satin and a shiny cotton print for this cape. It seems to fit sizes 2-6, but is easily adjustable. It was tough to get a good picture of the cape because Supergirl is always on the run!

cape-in-action.jpg

cape4.jpg

cape2.jpg

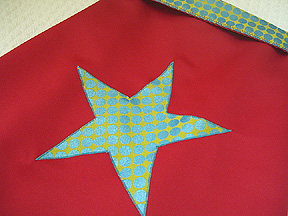
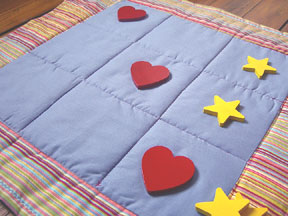
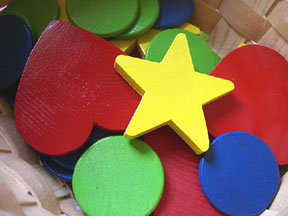
Below is the pattern file and the shape templates. I have included a star, lightning bolt, crown and heart. If anyone makes this I would love to see some pictures. I have set up a flickr group here.

superhero-cape.pdf

applique-shapes.pdf

Of course with any of these patterns, they are intended for personal use and not for sale!

Works on Paper

Works on paper and a couple made from paper. Here’s a quick post about some artists who have caught my attention lately.

postal2.jpg

Simone sent me the link to the lovely paper dolls by Portuguese artist Ana Ventura. You can purchase her postcards as seen above here (don’t trust me on the euro conversion, but I think you can purchase these for under $7).

hiding.jpg

Another paper artist, Patricia Zapato of A Little Hut creates wonderful cut paper images like Hiding, above (8″x10″, $35).

buttercup2.jpg

Just added the Etsy shop of Creative Thursday to my new Etsy Favorites page. A print of buttercup (8.5″x11″), above, is available in her Etsy shop for $35.


Embroidery Hoop Frames

hoop-frames.jpg

Since finding the photo of Liberty of London fabrics framed in embroidery hoops at Purl (see post here), I’ve been meaning to try the idea. Here’s my interpretation with some embroidered birds on linen. I painted the hoops matte black. But I think that these would be great unpainted or painted with different bright colors and used in a child’s room.

I simply hooped the fabric and cut the excess, so this was a quick and easy project. I plan to add more to this grouping, mix in some plates or find some flea-market style small round mirrors. I embroidered the birds myself, but I think that vintage handkerchiefs would make a great display. You can find lots of vintage handkerchiefs online here and here.

Checkerboard Quilt

quilt1.jpg

Since I updated our playroom, I wanted to make something that the girls could use so I decided to make a checkerboard quilt using this flower fabric from IKEA and some striped fabric that I had on hand. I quickly realized that a checkerboard has 64 squares! I cut 3″ squares and made the top. I then decided to make things more difficult by making the reverse side a tic-tac-toe game board. This was a little tricky, so I decided to just use one piece of fabric and delineate the squares with the stitching. There is a lot of math in quilting. Argh.

quilt2.jpg

quilt4.jpg

But I am enjoying my first attempts at quilting. I love to come up with a design and piece it together. I’m having a little trouble putting it together and finishing the edges. You can see on this project I finished with the fabric from the reverse side. I can see why this is not the recommended quilting method because you would be much less likely to get puckering with a separate piece of fabric. But I was too lazy to cut binding.

game-piece.jpg

We went to the craft store and bought some unpainted wooden chips for the checkerboard pieces, which we painted green and blue. We couldn’t find Xs and Os, so we went with hearts and stars instead and painted those as well. I think it would be nice to make a pouch for the game pieces and ties to roll up the board and take it with you.