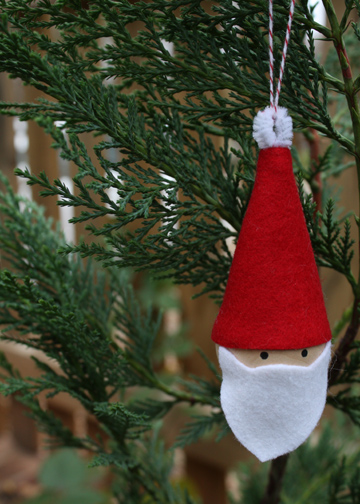
10-Minute Santa Ornament

make-it-monday

santa-ornament

Ten minutes. Really. This is sort of a variation on the elf skittles that I posted about last week. But even easier. I think these would make cute additions to gifts for family, friends or teachers. The kids can help make these if you skip the glue gun and use regular school glue. You  could sign them on the back and add the year.  You could use even smaller wooden balls to make teeny tiny Santas. Or you can take it a step further and make a little body with chenille stems, a larger ball for the belly and beads for the arms and legs.

Supplies:

  • wooden ball (1 1/2″ diameter)
  • red and white felt scraps
  • black acrylic paint
  • white chenille stem (cut to 2″)
  • twine
  • glue gun

santa-ornament-instructions

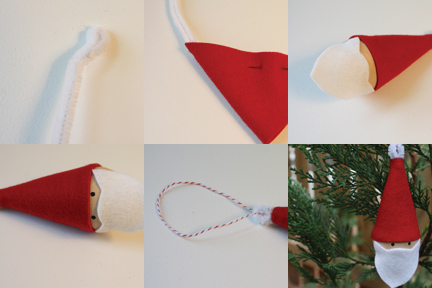
  1. Cut out the hat and beard from felt according to this template.
  2. Bend the end of your chenille stem and cut to 2″.
  3. Insert the chenille stem in the top of the hat felt and sew, right sides together, using a scant 1/4″ seam allowance. Turn right sides out and poke out the tip with a blunt tool.
  4. Place a couple of drops of glue on the inside rim of the hat and fit onto the wooden ball. Glue the beard on as well, just meeting the hat at the corners.
  5. Draw eyes with a pencil and then paint them on with black acrylic paint.
  6. Loop twine through the chenille stem and tie in a knot. Trim off the ends and put a tiny drop of glue to hold the knot in place just at the chenille stem. All done!

If you make this project or anything else from the Make it Monday series, be sure to post a photo in the Make it Monday Flickr group.

Sweater Stocking

holidays-recycled

sweater-stocking

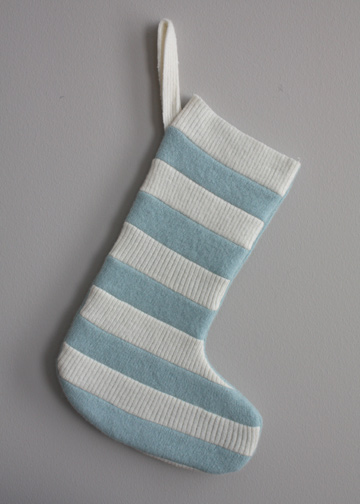
Well, maybe I can make all of our holiday decorations from two thrifted sweaters.  Here’s a quick tutorial for a felted sweater stocking.  I never can seem to find any good striped sweaters at the thrift store, so I thought I’d make my own.  I have a sneaking suspicion that Betz White has visited every thrift store in the land and is hoarding all the cool sweaters in her closet.

This makes a 12″ long stocking, but you could increase or decrease the pattern to suit your needs.  Print the template here.

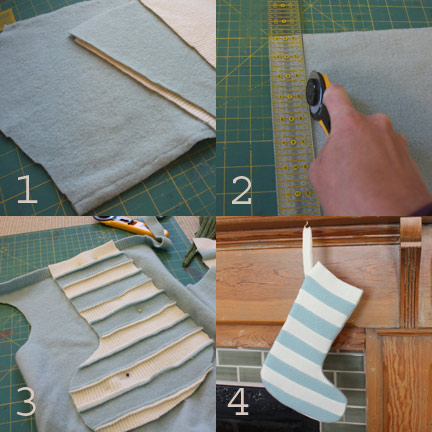
  1. First, you’ll need 100% wool sweaters, washed and dried.
  2. I cut my sweaters into 1 1/2″ strips (the width of my yard stick).  I used about 15 strips in all.  I sewed them with a straight stitch right sides together until I had a somewhat rectangular striped piece.
  3. I then cut the pattern front from this piece, adding 1/2″ around the outside for the seam allowance.  I cut the back from a solid color (with a band at the top).  Be sure to cut the front and back in mirror image.  I then inserted a quick loop and sewed it all together.

sweater-stocking-tutorial

kiki-the-cat

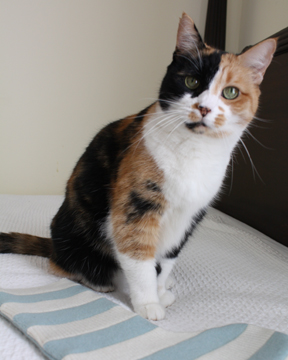
This wouldn’t be a sewing blog without a picture of a cat, would it?  Here’s the the best cat in the world with her new stocking.  Seriously, this cat comes when you call her and she would meow at my door when the girls were babies and cried at night.  She was the only family member who didn’t have a stocking yet.  I will not be making one for the fish.

More Placemats for Kids

make-it-monday

kids-placemats-again

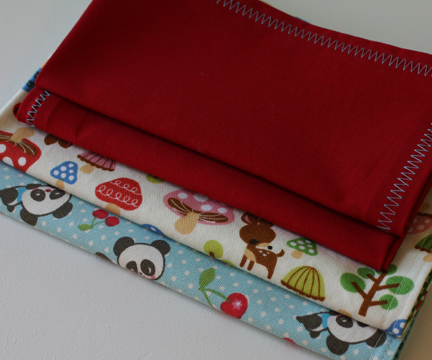
I just made another set of placemats and napkins for my younger daughter to use at her Montessori school. She is starting to have lunch at school and on her way to becoming an “afternoon child”, so she’ll stay in the afternoons and do some more serious learning. This is a big step for her!

Anyway, since I made some more of these, I thought I’d share again. This is such a simple project and a great one for beginners. You can use the same instructions for adult-sized placemats and napkins as well. I think it would also be nice to sew in some ribbon or twill tape to tie the placemat into a roll.  And these are reversible! This time I made my version a bit larger from the original instructions, which really make some pint-sized linens. I used 16″x16″ uncut dimensions for the napkins and 12″x16″ uncut dimensions for the placemats. This turned out to be just the right size. You can find the instructions here from my post last year.

I made the placemats pictured above with some cute kokka fabrics (deer and pandas) with a gingham and a stripe on the reverse side.

Dress-up Crown

make-it-monday

princess-crown

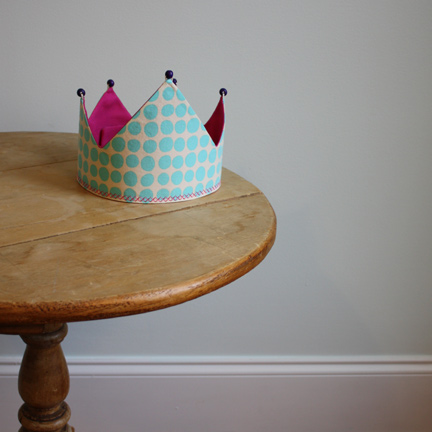
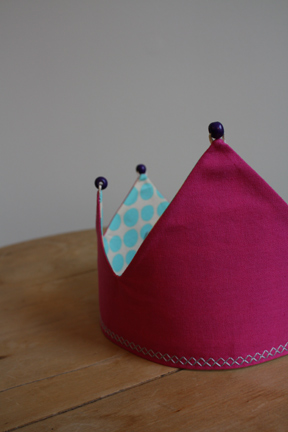
I made this dress-up crown as part of a birthday gift for a very sweet three-year-old girl.  I’m also going to make her one of these capes to go with it.  With Halloween coming up, I thought a quick how-to for the crown might be useful.  It’s reversible too.  This fits both of my young kids, but you might want to measure to be sure.

The dotted fabric is Sunspots from the Love collection by Amy Butler.  And the hot pink is an Echino solid from Etsuko Furuya.

Supplies:

  • Fabric (approximately 7″x26″ or a quarter yard of each fabric)
  • Heavyweight fusible interfacing (7″x26″)
  • Velcro (3″ length of 1″ wide velcro)
  • Thread
  • Wooden beads (optional–for older children)

Step 1: Cut fabric and interfacing according to template (be sure to add the extra 2″ which will form the tab).  Iron the interfacing onto one piece of your fabric.  If you are using very lightweight fabrics, you might want to use interfacing on both fabric pieces.

Step 2:  Using a zig-zag stitch,  sew one side of 3″ velcro to the right tab of the front of one crown piece.  Leave about 1/2″ from all edges for the seam allowance.  Repeat with the other piece of velcro, also sewing the velcro onto the right tab of the front of the fabric.

Step 3: With right sides together, sew around the sides and peaks of the crown.

Step 4: Turn right sides out and press the peaks of the crown as you pull the fabric to make neat corners.  Press under the bottom seam by 1/4″ and sew in place.  I used a decorative stitch.

Step 5 (optional): Sew beads onto tips of the crown, pulling your knots through to the inside.

princess-crown2

Wrist Pincushion

make-it-monday

wrist-pincushion1

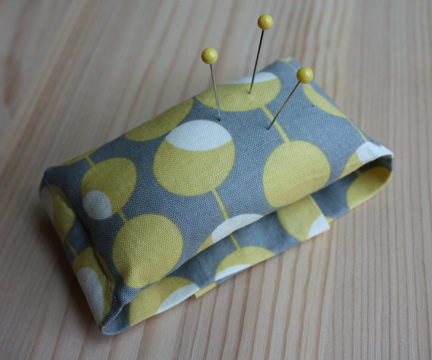
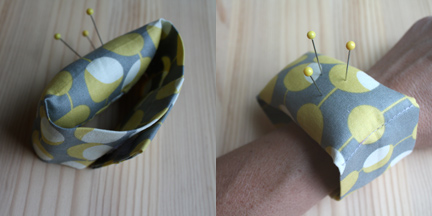
Attach your sewing pins to your body and you’re pretty much guaranteed not to misplace them.

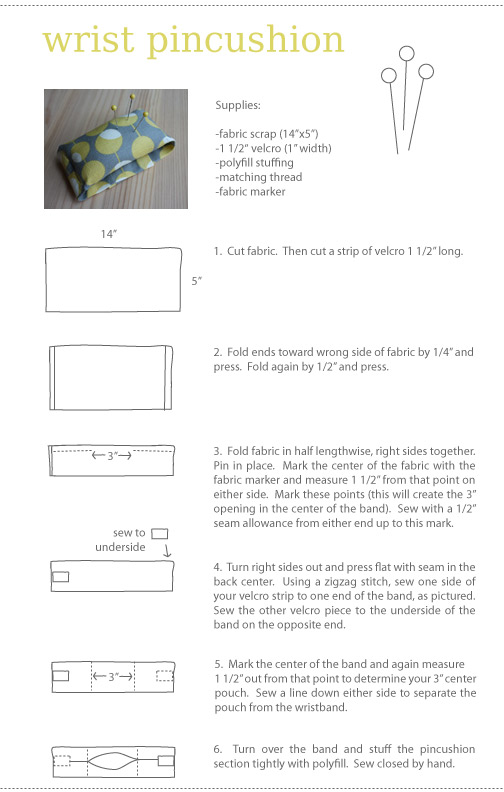
I’ve had pincushions on the brain after this post, so today I made a handy wrist pincushion.  Simple to sew, it’s made from one fabric scrap, some filling and velcro.  Easy!  The measurements should be correct for an average sized woman’s wrist, but you can measure your own wrist and make necessary adjustments.  The pincushion in the center takes up 3″ of space, so be sure to account for that.  I thought about adding a cardboard piece to keep you from poking your arm with pins, but decided to leave that out as I found that I didn’t have any problems.  But use caution!

Instructions are below.  And if you make one of these, we’d love to see it!  Add your photo to the Make it Monday Flickr pool here.

wrist-pincushion2

wrist-pincushion-instructio