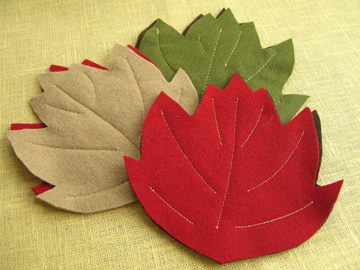
Maple Leaf Coasters

A quick and easy project to add a handmade touch to the Thanksgiving table.

Supplies (for 4 coasters):

  • wool felt scraps in fall colors
  • interfacing
  • contrasting thread
  1. Cut out 8 maple leaf shapes according to template: maple-leaf-coasters
  2. Cut 4 pieces of interfacing in a smaller size (if using fusible, iron interfacing onto the back of a leaf).
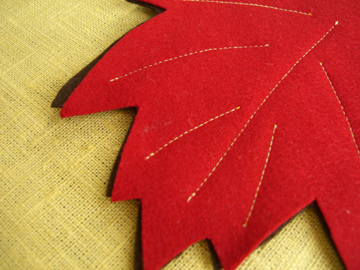
  3. Stack two contrasting colors of felt leaves together (slightly overlapping) and sew leaf veins by hand or machine.

Done!

Halloween Luminary

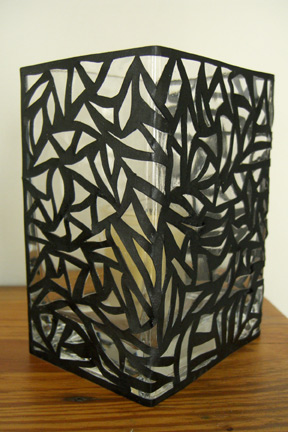
I’ve been seeing a lot of nice decoupage projects lately, so thought I’d give it a try.  I used an abstract design for this, but I think it would be great with a spider web, bat or owl.  This project would also be nice in white for the winter holidays.  I didn’t have a piece of paper long enough to cover the entire vase, so I wrapped three sides.  It would be interesting to create a design on the back side so it will cast a reflection onto the wall.
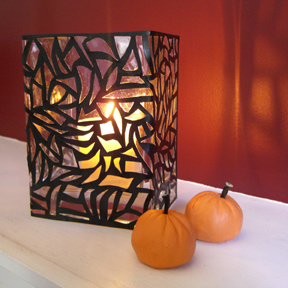
Supplies:

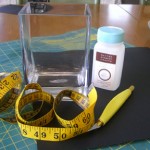
  • Black card stock
  • Measuring tape
  • Candle holder or vase (preferably cylindrical or rectangular)
  • Decoupage glue
  • Craft knife and cutting mat

Step 1:  Measure your vase or votive holder.  Cut paper to the correct width and length.

Step 2: Using your craft knife, cut random abstract shapes over the entire sheet.

Step 3: Brush a very light coat of decoupage glue onto the back of the paper.  Center your paper and carefully adhere it to the glass.  Press down all areas.

Step 4: Brush over the entire candle holder with a thicker coat of decoupage glue.

Done!  If you make this project, please be sure to post a photo to the Make it Monday Flickr pool here.

Bat Leaf Prints

Here’s a quick and easy Halloween craft.  We picked up some nice leaves at the park the other day and realized they looked a lot like bats.  I think these are from a large maple tree.

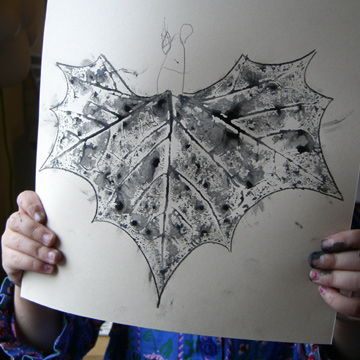
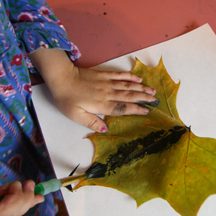
It’s best to get a leaf that isn’t too dried out or it will crack.  I cut off the stem and the girls painted them with watercolor paints on the textured side.  The leaf resists a bit, but if you keep applying the paint it will adhere.  Then we just turned them over and printed on paper.  I traced around the outside with a black pencil to give it some definition and my three-year-old drew the bat head.  She has just started making representational drawings and is so proud of herself.

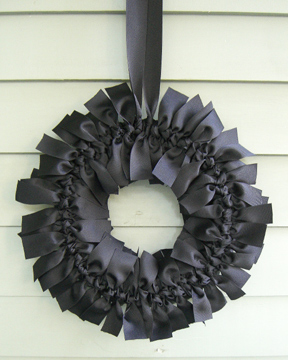
Halloween Ribbon Wreath

Our friend Sarah gave me a couple of spools of this black grosgrain ribbon, presenting me with a challenge.  So here is this quick and easy Halloween wreath.  Since it takes a lot of ribbon, try buying in bulk online rather than at the craft stores.  I really like this site for ribbons and trims.

Supplies:

  • 12″ foam wreath form
  • 24 yards 1 1/4″ black grosgrain ribbon (or less if using a wider ribbon)
  • Scissors
  • Measuring tape

Steps:

  1. Cut 45-50 16″ pieces of ribbon.
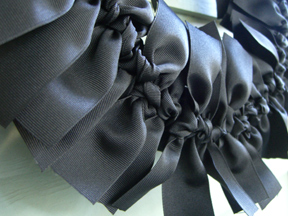
  2. Tie one strand of ribbon in a knot around the wreath.  I used a “messy knot” — right over left, then right over left again, pulling in the opposite direction.  It doesn’t really matter how you do it as long as you are consistent all the way around.  Repeat with the knots, pushing them close together, until you fill the wreath.
  3. Cut one long piece of ribbon (48″) and tie one end to form a knot.  Leave a long loop for hanging and tie another knot onto the wreath.
  4. Trim any frayed or long ends.

Done!  If you make one of these, I’d love to see a photo in the Make it Monday Flickr pool here.  There are lots of great new photos over there, so take a look.
Ghost Garland

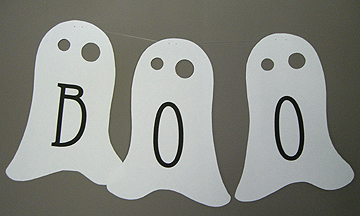
Just a quick Halloween decoration.  Since the world seems to be falling apart, we’re trying to save money around here (and gas and water since we live in Atlanta), so here’s an easy and free ghost garland.  This is a craft blog, after all.

Just print out the files below on white card stock, cut with an x-acto knife and hang with monofilament.  I’ve changed the eyes around on these files so that  they won’t all three be the same.  Try hanging this from a doorway or fireplace mantel.

ghost-b

ghost-o1

ghost-o2