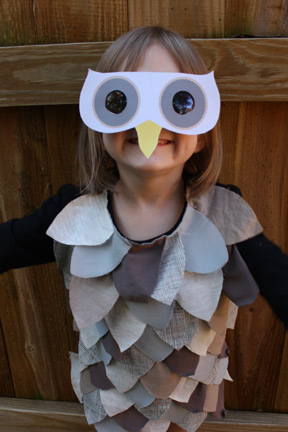

Still looking for Halloween costume ideas? Head over to Alpha Mom and check out my post on how to make this quick owl costume from a t-shirt. Then complete the outfit with the printable mask.


Still looking for Halloween costume ideas? Head over to Alpha Mom and check out my post on how to make this quick owl costume from a t-shirt. Then complete the outfit with the printable mask.

Check out my cereal box stencil project for Halloween over at Alpha Mom.
Here’s a fun project to make with the kids. These are papier-mâché bowls made from paper bags and tissue paper. We plan to use our bowls for Halloween candy.
I’ve never had much luck with the flour mixtures (maybe because of the humidity here), so I used a mixture of equal parts white glue and water. I used a full bottle of glue for each bowl. For the pumpkin bowl, I cut off the top of an actual pumpkin and used that as our base, but we just used a metal mixing bowl for the ghost bowl. If you do use a pumpkin, be sure to cut it at the widest point so that you can remove the paper bowl when dry.
For both, I first covered the base with a plastic grocery bag (you could use plastic wrap), dipped strips of paper bags in the glue mixture, squeezed off the excess and laid the strips across the top until the bowl was covered. Oh, if you’re working with kids, you will definitely want to do this project outside. We let the bowls dry for a day, then brushed them with more glue mixture and laid tissue paper (cut into strips) on top. We then brushed more glue on top of the tissue as we laid it around the bowl. Once dry, you can trim your edges or leave them ragged. We painted our bowls with acrylic paints and left the insides unfinished. If you used colored tissue paper, you wouldn’t need to paint at all. I just used some brown tissue paper leftover from packaging. Now the kids are ready to fill up the bowls!
A couple more ideas to add to your list of Halloween decorations using recycled materials. Here, I used etching cream to create a jack o’ lantern face on the jars. It’s a subtle effect, but would be pretty with an orange votive. I simply put masking tape on the jar, cut out the shapes with a craft knife, and let the etching cream sit for about twenty minutes (not a kid-friendly project, obviously).
And for the jack o’lantern cans, I cut out the face with a craft knife and glued the paper onto the can. A quick tip for holding the paper in place while you wait for the glue to dry — painter’s tape. I love painter’s tape and use it all the time in my crafting.
More Halloween crafts with bottles and cans (just clap your hands).

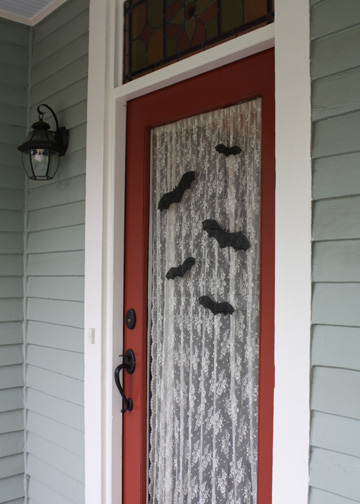
More bats! I made these bats for the front door by editing the template from yesterday’s project. I printed them out on window decal paper (available at your local office supply store). Here’s the bat file for you. Then just cut them out and press them onto the glass. Spooky. My husband thinks it’s too early for Halloween decorating, but bats year round, I say!