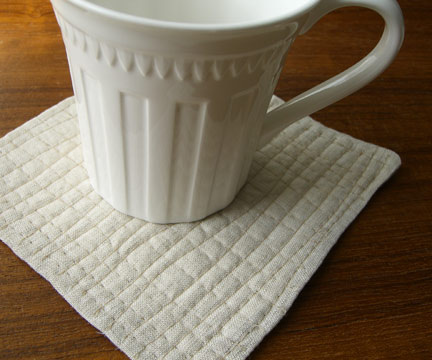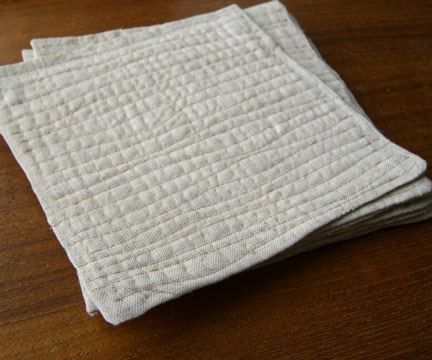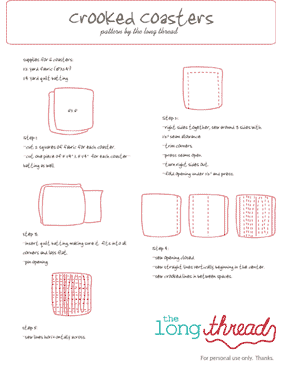


A day late, but here’s a tutorial for some crooked coasters. Do you like to sew? And sew and sew? I found these very relaxing to make. I used linen for these, which made them extra wonky.
Click on photo below to view the .pdf file with instructions.
Oh, and by the way — you might have noticed some changes around here. In addition to the new look, there are a lot more links to other sites and crafty tutorials. Browse through the categories on the left. I’ll be adding to these regularly and have lots more kids’ crafts to add. And let me know what you think!


I love the tutorial links!!!
Thanks for such a lovely site!
Greetings from Costa Rica
I like the new look!
These are Great. I have just ordered some medium weight linen for dish towels. I think I will
make some of these too, good to have around for last minute gifts.
Hi ! 🙂 I used to love your site but now I really love it even more with this new design, it’s so simple & neat & effective ! Well done !
And this tutorial is totally my kind of things, thank you so much for sharing it with us, that’s very kind !
Have a great day ! 🙂 Kind regards
Those are beautiful! You did a great job, and I love the linen.
I love the new look!!! Refreshing!!
I don’t even have to try hard to sew crooked…
I really love these.
Wonky?! Cool! I can do that! I’ll have to try it out. Thanks for the tutorial. Mandy
Great changes, love all of the FYI’s and tutorial links! Thanks!
I love the new look!
LOVE those photos, and this project is right up my alley. Thank you for generously sharing!
Thank you for all the links you’ve posted–I’m having a blast visiting them all!
Fabulous site makeover! I love it!
Love the new look and all the fantastic links. I’ve been going through them all and enjoying the inspiration and eye candy. Plus gorgeous coasters.
ooooh, these are fab!!!! Blogged them at Craft Gossip Sewing Blog: http://sewing.craftgossip.com/tutorial-sew-a-set-of-crooked-coasters/2009/02/24/
Great tutorial! Those coasters are super cute. Thank you!
I like the new look site! Thanks for the links too.
now that’s it! I am saving a lot this month to make sure I can buy a sewing machine and start doing loads of stuff like this coasters! Your blog is lovely thanks for making it nicer!
Thanks for the tutorial…these are so cute!
I’m loving the new layout. Nice work!
Your blog looks absolutely stunning!! Did you make this yourself? If yes, you should feel proud! 🙂
These coasters are beautiful!
Very, very nice! Good in any solid color. I have personally become fond of pure wool for coasters. Double-woven wool, or two layers of thiner wool, stay flat but protect surfaces very well. Your stitch pattern would look great on wool, too.
Linen for spring/summer coasters. Wool for fall/winter coasters. What fun!
I’m new to reading your blog. It’s super! Thanks!
Wow, these are just gorgeous! Elegant and simple with perfect detail. I love them! Thanks so much for the how-to, I’ll be linking.
Thanks for this! I’ve made 2 already – even though I have a stack of other stuff I SHOULD be doing! These were so simple I couldn’t not do them. I also LOVED your pattern illustrations. Great work – and great new blog too!
Those look cute and easy. Thanks for the tutorial.
Hi! I’ve recently become an admin for this group on flickr, http://www.flickr.com/groups/fabric-coasters/
I’d love to post the link for your tutorial in our discussions, if I may have your permission. I found my way to your great blog via whipup.net.
Thanks, and hope to hear back,
Elle
boltandfrolic
Thanks Ellen!
()()
>’.'<
Wow – these are great! Thanks for sharing!
Darling Gift idea!
LOVE these! So easy and quick. Thanks for the tut!
http://dannyandginapalmer.blogspot.com/2010/02/crooked-coasters.html
Thanks for sharing! These are great! Easy, quick and very useful!
It might be easier to cut a batting square maybe 5/8 inches shorter than your coaster square. Use the fusable webbing to stick it on the wrong side of one square. Sew your outside seams. I think it would turn easier.
I was thinking about make them and sewing an X across the center, sewing around the edges and then slipping the edges like a rag quilt square.