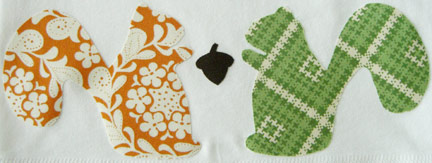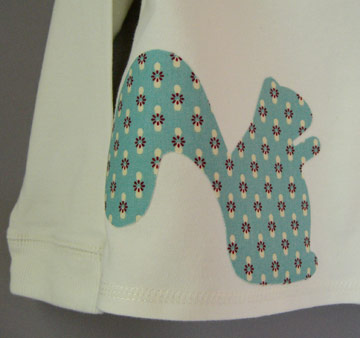


Happy first day of Fall! Here’s a little autumn no-sew appliqué project. I put these appliqués on tees, but I think they would be cute on a kitchen towel, tote bag, at the hem of a skirt, or wherever you choose. I think it’s best to have some contrast with your fabric — dark appliqué on light fabric, light appliqué on dark fabric. As you can see, the orange fabric above doesn’t really show up all that well because of the white in the fabric design. It would also be cute to sew some buttons for eyes, maybe even embroider a little face.
I have never used this Wonder Under product for appliqué because I didn’t trust that it would stay on through wear and tear without sewn reinforcement. But I’ve washed and dried these tees and they just frayed a teeny bit around the edges, so I am satisfied. If you’re as confused by the vast array of interfacing at the fabric store as I am, just ask for “Wonder Under” and check to make sure that’s what you’ve got. It comes on a bolt or in small packages. The Wonder Under instructions say this works on wood too. I’m skeptical — anyone tried that?
Supplies:
- Double-sided fusible webbing (Wonder Under or other brand)
- Fabric scraps (about 6″x6″ for each squirrel)
- Tee
- Fabric marker
- Iron
- Small, sharp scissors
- Damp cloth
Print out the template you wish to use and cut out the image(s). The single squirrel is about 5 1/2″ wide and the squirrels in the other design are each 4 1/2″ wide:
- Cut a piece of fabric just larger than the appliqué design. Iron rough side of fusible webbing to wrong side of fabric, according to fusible webbing instructions. Be sure not to let the webbing overlap while you are ironing or you will get goop on your iron and/or your ironing board.
- Place template on the back of your fabric and trace image with a fabric marker.
- Cut away excess fabric and then cut carefully around your image with small, sharp scissors.
- Carefully peel away backing and place design on tee.
- Iron in place according to package directions with damp cloth on top.
All done! If you make this project, please show us by posting your photos in the Make it Monday Flickr pool.

This is such a fantastic idea! I love the squirrel. I’ll be linking to this!
Aww, it’s so cute! I kind of like the orange/white squirrel with the white background. It looks so fresh! Thanks for posting this and all your tutorials, they truly are inspiring!
I love it! I have always wondered how that stuff works. I have something I need to use it on, so maybe I will pick some up and see what I can do! the squirls are very cute! Thanks!
I ADORE this!! Can’t wait to feature it on 30days (hope you don’t mind :).
the link on the two squirrels is broken – adobe reader says it is damaged
That’s strange. I am able to open it here. I will check into it and e-mail you another copy. Thanks for letting me know!
I think the boys will like these. Thanks, LT!
I needed a squirrel for my window quilt (my bedroom is my office and overlooks a wet, dreary parking lot). This is perfect. Thank you so much for sharing it as I am on a very limited budget and now I can have my friends inside as well as out! Blessings, Rain.
I was wondering if you have a picture of how much the squirrel has frayed since washing. I want to do an applique project and am trying to decide whether I need to sew or not to get the look I want. Thanks!
This shirt has been outgrown and passed along already! Sorry I couldn’t be more helpful. I do think it will fray a bit over time and really I’d recommend sewing anything you plan to keep for an extended period of time.
LOVE the squirrel template!! Thank you SO much this will make someone very happy
I used this cute applique for a jumper. Thank you for sharing. Posted to your Flickr pool
http://embendesigns.blogspot.com/2011/09/autumn-jumper.html
Then, just make sure you have right-sides together (the peak of the folds
should touch), align the strips for a bias seam, and sew from corner to corner as shown in the photo (a.k.a.
the standard binding finishing).