Simple Soap

make-it-monday1.jpg

soap2.jpg

soap1.jpg

This is too easy!  Am I doing something wrong?  There is lots of soap-making advice out there, but here’s how I made my melt & pour soaps.  I got all of my supplies from Brambleberry Soapmaking Supplies.  I think having high quality ingredients is essential here.  I packaged mine in glassine envelopes and plan to make some nice stickers for the back.  Creature Comforts has another lovely way to package your soaps in pretty paper.

Supplies:

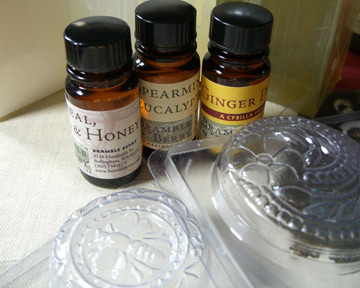
  • Melting base (clear glycerin, shea, aloe, goat’s milk or any combination of bases)
  • Fragrance Oil
  • Coloring (optional)
  • Mixing Cup (microwave-safe and with pouring spout)
  • Small spray bottle filled with rubbing alcohol
  • Chopsticks or whisk for stirring
  • Eyedroppers (I used medicine dispensers)
  • Sharp knife
  • Soap Molds or silicone cupcake tray (that you plan not to use for food again)

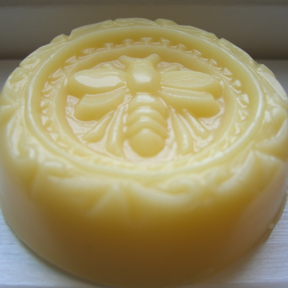
Here are the ingredients that I used: for the bee bar I used goat’s milk and honey bases, oatmeal milk & honey oil mixture, ginseng, and yellow coloring.  For the blue bars I used aloe and white bases, spearmint eucalyptus fragrance, ginseng,  and blue and green colorings.

Step #1:  Cut amount of soap base(s) needed and melt in the microwave (try 30 seconds).

Step #2: Add color, fragrance, and any extracts one drop at a time until you get the desired effect.

Step #3: Carefully pour mixture into molds and tap mold gently to release bubbles.  If any are on the top, you can spray with the alcohol (I didn’t have any around the house, so I had some tiny little bubbles on the bottom of my bars).

Step #4: Allow to dry for several hours then release from mold by gently bending and tapping.  Now go give some soap to all your smelly friends!

Don’t have the time or inclination to make soap?  Buy some from one of my favorite Etsy shops, 4th Ave Soap Co.

Peasant Blouse

peasant-blouse.jpg

Since we are planning to put our children to work in the field and feed them only potatoes, I decided to make some peasant blouses.

Here’s the first one with a Liberty of London Tana Lawn fabric (appears that this particular pattern is no longer available there), which is a nice thin weight perfect for this project.  I looked at this tutorial, but cut the pattern based on a shirt we already had.  The shapes of the sleeves were a little tricky for me to envision as they become part of the elasticized neck, so are not traditional sleeve shape.  But it was an incredibly simple thing to make.  I think it turned out well and I already have the fabric cut for the second one.  This style could also make a simple dress.

Mosaic Bird House

bird-house.jpg

I love my children’s artwork, so I was thrilled that my five-year-old came home from summer camp with this mosaic bird house. I worked with her on the grouting and looks like we need to do some more cleaning, but it is a treasure! Great summer activity. Don’t throw away those broken dishes; save them for a project.

Etsy Finds Friday

etsy-6-27.jpg

Glow Bowls, strand of 5, $65 from Diana Fayt.

Ginkgo Leaves Shoulderbag, $54 from Black Bags.

Old Fashioned Girl’s Dress, size 4, $39 from Like My Dress.

Wild Bouquet, 8″ x 10″ limited edition print, $20 from Ola Design.

Zukzuk Peacocks Orange, 8 1/2″ x 11″ print, $20 from zukzuk.

Little Amigurumi Hedgehog Pattern, downloadable .pdf file, $2.50 from purl.etsy.com.

Girl’s Orange Fruit Stripe Dress with Vintage Fabric, $35 from Bread and Roses.

Mint Valley Lip Balm, $3 from Dress Green.

Large Lampshade made from vintage wallpaper, $295 from When in Doubt, Draw Flowers.

Mermaid Dolls & Soap Supplies

mermaid-dolls.jpg

I used this ingenious idea from Angry Chicken to make mermaid tails for a couple of the girls’ dolls. After taking these photos I realized that yes, mermaids are weird and dolls in general are just kind of creepy (note zombie-like stare of doll pictured on the right).

But there was much excitement in the house about these. I showed my kids the photo from Angry Chicken and they were thrilled because they had one of the same dolls. I didn’t quite follow the instructions, opting for a lazier one-piece version with polyfill stuffing in the tail. I think the two large seashells on that one doll might be a bit much! Better than Barbie, I guess. I think little slip-on fairy wings would be another cute project for the dolls when the girls get tired of mermaids.

soap-supplies.jpg

On another note, I just received these soap-making supplies from Brambleberry. I can’t wait to mix up some stuff and see what happens. The scents smell heavenly and I love the molds.