Place Mats and Napkins for Kids

make-it-monday3.jpg

placemats2.jpg

placemat1.jpg

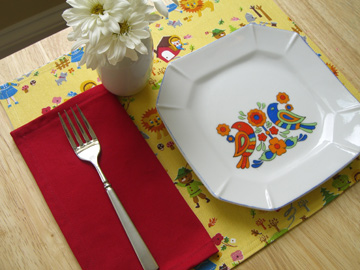
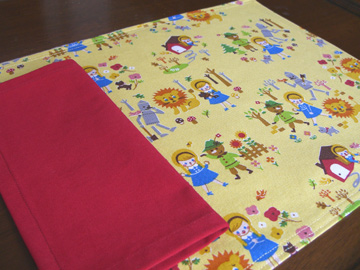
We have eliminated paper napkins around our house, so thought I’d share this project for kids’ place mats and napkins. Obviously you could use this pattern for adult-sized napkins and place mats by increasing the dimensions (I’ve made some suggestions below). This is a super-easy project and a great one for beginners. I also think that some plain fabric with appliqué monsters or flowers would be really cute. We just happened to have this Wizard of Oz canvas from Reprodepot and my kids love it. I backed the mats with a ticking stripe.

Supplies for 4 Place Mats and Napkins:

  • 1 yard main fabric (heavy weight cotton or canvas)
  • 1 yard contrasting fabric (heavy weight cotton or canvas)
  • 1/2 yard napkin fabric (cotton twill or similar)
  • scissors
  • matching thread
  • measuring tape

A note about fabrics: Working with a striped fabric will help you cut straight lines. If you choose to use a lighter weight cotton or even linen for the place mats, you could add a layer of interfacing. And for the napkins, I wanted to use a fabric that was the same on both sides so that a bad side wouldn’t show as you are using the napkin (this is just my personal preference).  I’d recommend washing and drying your fabrics before you begin.
ticking.jpg

Place Mats

Step 1:

Cut your fabrics to the following specifications:

Napkins 10″x 10″ (cut 4). Try 18″ x 18″ for adult-sized napkins.
Place mats 14″ x 12″ (cut 4 of each, main and contrasting fabrics) . Try 20″ x 14″ for adult-sized placemats.

A clear square ruler like one of these will help you get straight lines and achieve 90 degree corners easily. A rotary cutter and mat are also helpful for this project, but not necessary.

Step 2:

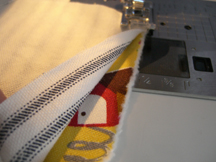
Pin place mat fabrics right sides together and sew a straight stitch about 1/4″ around the edges (pictured below), leaving about 4 inches open. Then turn place mats right side out. Push out corners with the blunt end of your scissors or the end of a pen. Press place mats flat, turning in the open edge.
right-sides-together.jpg

Step 3:

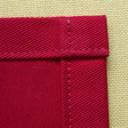
Sew around edges 1/4″ from edge. Then sew another straight stitch 1/2″ from edge. This will leave you with a nice double-stitched edging. Alternately, you could sew a nice decorative stitch or ric-rac trim around the edges. I didn’t think this fabric needed any embellishment.

Napkins

Step 1:

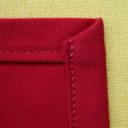
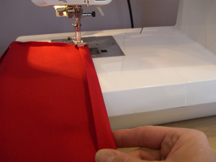
Fold and press napkin edges 1/4″ towards wrong side of fabric. Then bring napkins to the sewing machine. Fold again about 1/2″ and place under the presser foot. Hold the bottom of the fold as you sew (see picture below). Then sew the opposite side.
napkin-seam.jpg

Step 2:

There are two ways that you could do the corners of the napkins. You may fold corners over at a 90 degree angle like this:

squared-corner.jpg

Or tuck under for an angle like this (works best with thin fabrics):

45degree-corner.jpg

Either way you do it — fold a bottom corner, pin it in place, then make top corner and sew it, then continue down the seam. Repeat for the other side.

Another project finished! Please let me know if you have any comments or questions.

Learning to Sew

sewing.jpg

So you want to be a sewer? A what? Not sure what to call people who sew these days. Seamstress doesn’t usually fit. I think someone needs to invent a new term so that we can’t be confused with the stinky underground place that carries away sewage. Any suggestions?

So many people tell me that they want to learn to sew and don’t know where to begin, so I thought I’d give a few tips. I am certainly no expert as I have never taken a class and frequently come across sewing terms that I’ve never seen before. It’s important to remember that sewing is a learning process. Once you figure out the basics of your machine and learn that you can fix mistakes, it’s not such a mystery. Here are the things you’ll need to think about before you begin:

The Machine. I’d love to say that you can learn to sew on any machine, but I’m not so sure. If you already have a machine hanging around the house or someone has offered to let you borrow one, try it out and see if you like it. But if you are having problems with it, just remember that it may be the machine and not you. I really fell in love with sewing when I started using my computer-based Baby Lock sewing machine (the old Singer is gathering dust).

I’d recommend going to a sewing store to try out some machines with a budget in mind. With advances in sewing technology, the price and wide variety of choices can be overwhelming. They will let you sew with the machines and the employees generally have a lot of expertise to share. If you can, make a list of the types of things you’d like to sew and the features you might like in your machine. I don’t think that buying a used one is a bad idea (as long as it was not used for commercial purposes), but I think a warranty would be nice. If you do buy a new one, the sewing store will likely give you a free class. As far as brands go, there is a myriad of opinions. Many people who sew adore Bernina. Click here to find a store near you. I have a Baby Lock and really love it, but it was given to me, so I never went through the research process. Here‘s a good discussion about this topic.

Read the manual! I know it’s boring, but read the entire sewing machine manual from cover to cover. Really, this is the most helpful thing you can do (and this is from a person who hates to read instructions). If you have an old machine, you might be able to find the manual online.

The Sewing Place. Most people don’t have the luxury of a dedicated sewing room, so set up a plan that you can manage. If you spread everything out on the dining room table and you want to cry every time you pass through the room, then come up with a new plan. IKEA has some great storage solutions that can help you hide your machine when it’s not in use. Getting organized is helpful. I find it so frustrating to sew in a messy room (which is a frequent problem). You’ll also need a large table or floor space to cut patterns and fabric. Helpful if it’s near the sewing machine!

How to Begin. I sewed Halloween costumes for a few years before I really started sewing, but found that I was dreading it. Having a deadline (even if it’s months away), can be frustrating. Find something that you want to sew, but nothing that will make your world fall apart if it doesn’t get done. I love the patterns from Burda, but any pattern labeled “easy” can be a good start. I recommend something with straight seams that you can do quickly: place mats, pillow covers, simple curtains (see tomorrow’s Make it Monday project). I would wait until you’ve tried a few easy home projects before you try clothes. There will be some new terms that might scare you (um, like”sleeves” and “zipper”). When you get frustrated, just get up and walk away from the machine. It will still be there tomorrow.

Reference Materials. If you like to take classes, you could try one. But there’s so much online these days that you can usually find the answer to your question. I also recommend these books:

Bend-the-Rules Sewing: The Essential Guide to a Whole New Way to Sew A new book with basic information and some fresh ideas for simple projects.

Simplicity: Simply the Best Sewing Book This is an older book, but I like to use it as a reference.

Sewing 101: A Beginner’s Guide to Sewing A clear book with nice illustrations and photographs.

The Goods. Having the right tools for the job is pretty essential. Here are a few things that you’ll need:

  • Scissors. A good pair of scissors is the best tool. You’ll need a nice sharp pair for cutting fabric (straight and pinking shears), a small sharp pair for clipping threads, and a junk pair for cutting patterns. There will be more as you learn.
  • Pincushion. Magnetic or stuffed; you’ll need at least one pincushion.
  • Straight pins. You’ll want the ones with glass heads.
  • Tape measure and yard stick.
  • Fabric pen. I use a vanishing ink fabric pen for marking fabric. Tailor’s chalk seems imprecise to me.
  • Bobbins. Extra bobbins that fit your machine. Since I began with embroidery, I started using pre-wound bobbins and now can’t be bothered with winding bobbins unless I need a specific color of bobbin thread.
  • Rotary cutter and mat. Most helpful for quilters, but I use mine all the time. It makes cutting much quicker. Transparent square quilter’s rulers are also helpful. Here’s a tutorial with pictures from the purl bee.
  • Seam ripper. You’ll need it.

That’s all I can think of for now. I’d love to hear some other suggestions from you sewers out there!

Some New Pillows

pillows.jpg

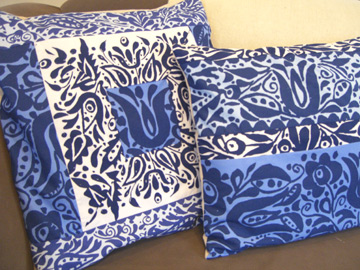
There’s no point in getting new furniture around here because it will only get over-loved by the kids, so I decided to make some new throw pillows.

I wanted to find fabric that would lend itself well to a patchwork pillow design so I went with this Marimekko fabric from Reprodepot. Seems that it’s longer available there, but you can find it and all the other incredibly cool fabrics on the Marimekko site here. This is a pattern from the ’60s and I chose it because I needed blue, but I’m thinking it looks a bit like I pulled it off a dorm room wall. Can you smell the patchouli? Or maybe the colors make it look kind of nautical. Perhaps I should have mixed in some other fabrics.  Anyway, I’m just not sure about these pillows. I’m going to try to make some more pillows to add to the room and see how it goes. Thought I might try Amy Butler‘s hourglass pillow pattern (available free on her site).

KLT Works

bird.jpg

owl.jpg

Artist Kristin Loffer Theiss of KLT Works created this adorable plush bird and this owl “drawing in thread”. Isn’t that thread drawing amazing? I find it really inspiring and hope to try some pillows with free sewing sometime soon.

Rocket Man

make-it-monday3.jpg

rocket.jpg rocket-boy.jpg

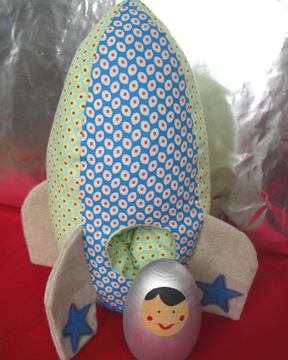
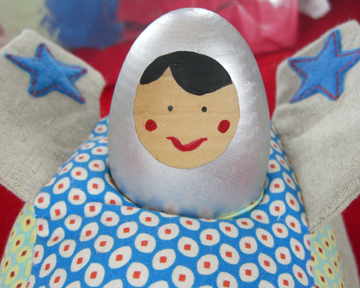
OK, all finished. Crystal got it right — it’s a rocket ship! Finally, I get to make something for a boy. I used quilting weight cotton fabric (from the Belle line by Amy Butler, available here), but it might be wise to try a canvas, tweed or wool felt. I hand-sewed the bottom and was concerned that the fabric was pulling a bit, so I whip stitched a piece of felt on top to secure it. The fabric and design of the rocket was so egg-like that I decided to use a wooden egg for the little rocket boy. I am so not artistic; therefore I tried to keep the design simple and the hand painting to a minimum. But I think I’d like to try some of these egg dolls as matryoshka dolls for Easter. Maybe with some decoupage fabric dresses? Always thinking of the girly stuff.

Instructions and template for the rocket ship are below. I’ll leave it to you to work on a little space boy figure if you want. Here’s the down-low: I bought a wooden egg from the craft store, cut a circular piece of painter’s tape and applied it to the face area, sprayed the body silver and came back and painted the face with acrylic paints. Then it needs a coat of polyurethane.

Instructions for Rocket Ship:

If you make one of these, please share it by uploading a photo to the Make it Monday Flickr group here.

Supplies:

  • 1/2 yard of fabric (I used three different fabrics, plus some felt)
  • scissors
  • thread
  • thin cardboard (cereal box will do)
  • polyfill stuffing

Step 1: Cut all fabrics according to template below. Cut out four pieces of thin cardboard slightly smaller than the template of the rocket wings (leave a bit of room for sewing on the side that attaches to the rocket — I sewed right over the cardboard, but not sure if that’s advisable).

rocket-template.pdf

Step 2: Add your own appliqué stars if you choose. I did not provide these in the template, but you can handle it!

Add a pouch for a little figure (skip to step 3 if you don’t want to bother with this): I just measured the circumference of my egg, added extra for seam allowance and cut a rectangular shape (you want it to be snug so the little egg doesn’t fly on its own). I then sewed right sides together. Then my husband showed off his knowledge of pi to the 10th decimal place and helped me figure out the size of the circle for the bottom of the pouch (you’re on your own here since I don’t know the size of your little figure). I am told that you can determine the diameter of the circle you need to cut by taking the circumference of your little figure divided by pi. I then sewed the circle to the little “sleeve” and sewed the entire piece to one of the main body pieces of the rocket ship (cut a circular hole in the fabric first!).

Step 3: Make wings by sewing right sides together (leave the side that attaches each wing to the rocket unfinished). Turn wings right side out. Insert cardboard pieces.

Step 4: Sew pieces of rocket body right sides together, inserting and attaching wings as you go (bottom of wing should be about 1″ from the bottom of the rocket ship). It might be a good idea to reinforce seams with an overcasting stitch. Turn right side out.

Step 5: Sew bottom circle of rocket to four sides of the main body, leaving room for stuffing. I hand-sewed this part because I found that the wings got in the way when I tried with the machine.

Step 6: Stuff densely with polyfill or filling f your choice (add figure to pouch while you stuff). Pin and sew final seam together and reinforce if needed.

Blast off!