Humpty Dumpty GIVE-AWAY!

humpty-dumpty.jpg

make-it-monday-smaller.jpg

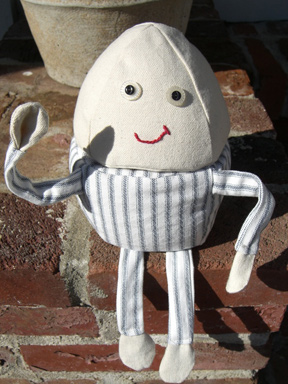
It’s Make it Monday and our first ever Give-Away! Enter to win this Humpty Dumpty toy by simply leaving a comment on this post. Entries must be received by midnight Eastern time on Tuesday night, when the winning comment number will be chosen at random. I will e-mail the winner to get the shipping address, so no need to leave any personal information in your comment. I will try to mail this so that it arrives before the weekend if you live within the continental United States. I’m willing to ship overseas, but obviously that will take longer.
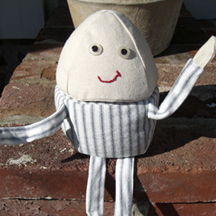
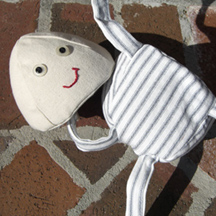
sitting-on-wall2.jpghumpty-falls2.jpg

Humpty Dumpty sat on a wall. Humpty Dumpty had a great fall. This Humpty Dumpty breaks in half! But you can put him back together again. He is made in two pieces and attached with velcro. I stuffed the bottom with buckwheat hulls and the top with polyfill. He has adjustable arms thanks to a couple of pipe cleaners. Instructions for making him can be found here:

Humpty Dumpty Pattern Please note that this is a large file (189KB).
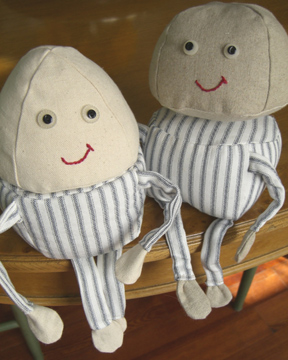
humpty-and-frank.jpg

Just so I’m never accused of making things look easy, I wanted to show you that designing toys is a process. Here’s Humpty with his cousin Frank. Frank lives in the Land of Misfit Toys and might prefer to be a hamburger bun. Not to worry, he’s getting a lot of love from my kids. Obviously I made the shape a little wrong the first time and had some construction issues. I never get it right on the first try. This is NOT the toy you will win in this give-away.

Hurry and enter the contest! Humpty Dumpty needs a home.  If you make a Humpty Dumpty toy, please add a photo to the Make it Monday Flickr photo pool here.  I would love to see your creations!

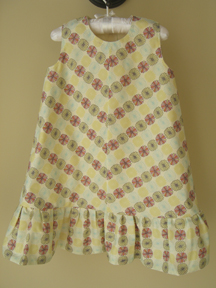
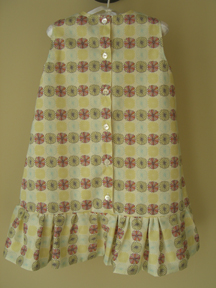
Spring Dress

dress-front.jpgdress-back.jpg

I made this dress for my three-year-old with a modified version of this simple Burda pattern. I made the front in two pieces to get the geometric effect and I made the back with six buttons instead of a zipper. I cut out the pattern pieces and then didn’t read any of the directions as the delicate Liberty of London Tana Lawn fabric had to be lined and thus the whole dress had to be put together differently. I took my time making this dress — measured correctly, fixed mistakes, pressed seams, etc. (which is unusual for me), but I think it worked out pretty well. Now on to the dress for the picky child who wants rows and rows of ruffles.

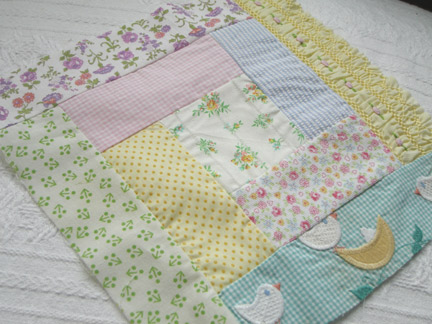
Baby Dress Quilt

quilt-block.jpg

Here’s the first block of the baby quilt made of baby dresses that I’ve been planning for quite a while. Some dresses were mine and some were new, but all are stained or too worn to pass down. The birds were cut off on this block, but it was impossible to cut them another way. The smocking was a little tricky, but I really like it. This is going to be a very fragile quilt. Since I have two girls, I thought I’d just make two quilts now and sew all the blocks — 32 of them I think! We’ll see how it goes.

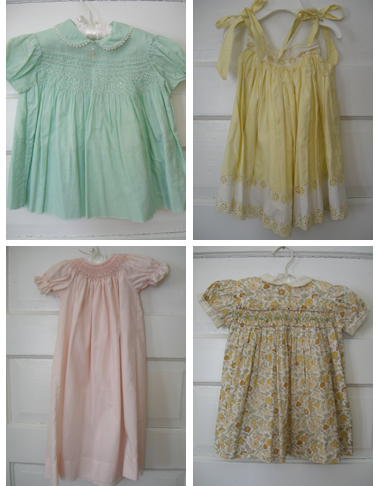
The Things They Outgrew

dresses.jpg

I’ve been feeling a bit nostalgic for those baby days.  As I was going through the girls’ closet today, I saw all of the things that they have outgrown.  A bit sad for me knowing that we likely won’t have another baby to wear them.  I know with all my rational senses that two children is enough for us (and some days it’s completely overwhelming!).  Three of these dresses were mine as a child and all were completely handmade and are so sweet.  Hand-sewn button holes.  What dedicated person had the time for that?  Hey Mom, who made these?  Did you make the yellow one?  Really sweet.  I am going to save them for grandbabies.

Heidi Headbands

headband-1.jpg

headband-2.jpg

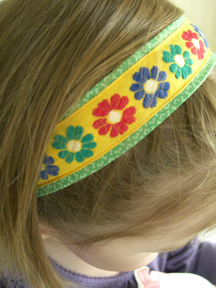
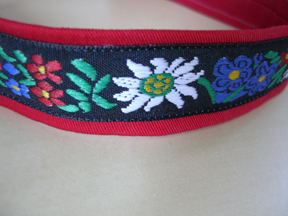
I saw the pattern for Heidi Headbands in Amy Karol’s book Bend the Rules Sewing. But in typical fashion I didn’t read the instructions. I am looking at the instructions now, and it does seem that I made them a bit differently. I just made a fabric tube, turned it right side out, pressed it with seam in the center on reverse side, sewed the ribbon, inserted the elastic, then closed the ends. I also sewed some thin grosgrain ribbon on top of the elastic to hide it a bit since my three-year-old has short hair. Turns out headbands aren’t really the best accessory for her thin hair.

I discussed the project with my five-year-old repeatedly and she chose her ribbon and fabric, but after I made it she refused to wear it because it was a circle rather than a u-shaped hard headband that she had imagined. Ugh.  So here it is sitting on a table. Next up, headbands for me!