

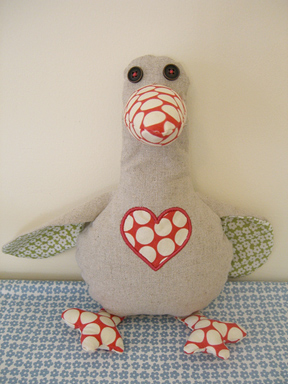
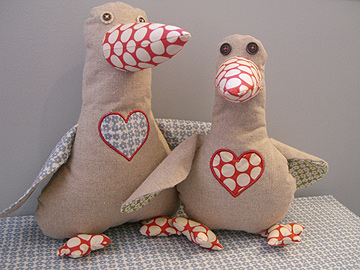
I call my five-year-old a goose all the time, so I made her one. And then I made another for my three-year-old with some of the fabric I bought at Reprodepot. Below is a picture of Lucy and Gertrude. The template below is for the smaller goose, but feel free to play around with the design. I appliquéd a heart onto the goose’s tummy (which I did not include in the instructions below); but you could embroider it, use heart fabric or fabric stamps, or just leave it plain. I think this would make a nice Valentine’s or Easter gift and I found this book of the same name that looks really sweet.
Supplies:
1/4 yard fabric (canvas, heavyweight cotton, tweed, wool felt, etc.)
scraps of contrasting fabric for wings, nose and feet
stuffing material (bamboo filling, polyfill, buckwheat hulls, etc.)
scissors
thread
two buttons
Step 1: Cut out fabric according to template: goose.pdf. Draw a 1 1/2″ vertical line where you want the nose to be, fold over your fabric and cut a half-circle shape.
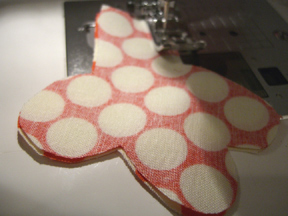
Step 2: Sew nose, wings, and feet right sides together (see photo below). To turn them right-side out, it might be helpful to have one of these tools. But I use the technique of safety pinning a piece of string into the top of the tube before I sew. Then I pull on the string to turn the fabric tube right-side out. (Caution: this technique can pull delicate fabrics and sometimes the safety pin comes open). Some people sew the string directly into the tube and then cut it.
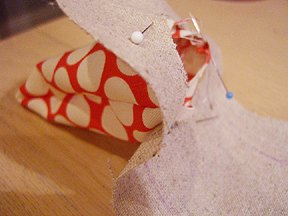
Step 3: Pin nose to body (see picture below). Tack on by hand and then machine sew like you would attach a sleeve. Since this is so small I found that pins got in my way, so had to do the hand tacking.
Step 4: Sew buttons or use embroidery floss for eyes.
Step 5: Stuff feet with polyfill.
Step 6: Place body fabric pieces right-side together and insert wings and legs (as shown in photo below). Wings should be folded in half lengthwise. Pin. Sew around the edges, leaving an opening between the legs.

Step 7: Turn goose right-side out by gently pulling (I found it helpful to get the wings and feet out first).
Step 8: Stuff the nose and neck, then the body. Hand sew bottom securely. I stuffed the head and nose with polyfill, the body with buckwheat hulls, then a little more polyfill to keep the hulls from falling out as I sewed it together.
All done! If you make this goose and you’d like to share your photos, please add them to the flickr group here.