
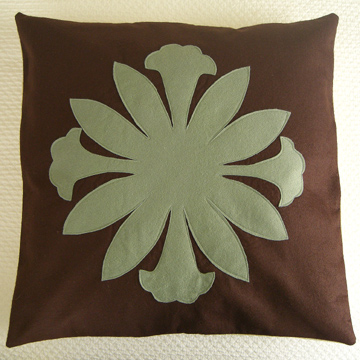
Inspired by Hawaiian quilts and folk art traditions, I created a flower pattern that can be appliquéd for a 20″x20″ pillow. I’m giving complete instructions for making the pillow, so if you’re not interested in trying the appliqué you can still use the tutorial to learn to make a pillow cover. I used a wool blend for the front of this pillow and a canvas fabric for the back. The felt is easy to work with and cut, but I would recommend using 100% wool or a high-quality blend for durability. I think this would be great in a variety of colors.
Rather than attaching a .pdf file, I will just give the instructions here, as they are pretty quick. This project may take an hour or two. This is difficult for me to estimate because I was working on it with kids “helping”. I think a beginner can do this, but you might want to practice sewing around corners and edges.
Supplies:
- felt: 1 yard of background color, 1/2 yard of contrasting felt
- backing fabric: 1 yard of canvas, felt, or upholstery fabric
- small, sharp scissors
- fabric marker or regular pen
- pins
- 2 large buttons
- thread to match contrasting felt color
- 20″ x 20″pillow form
Step 1: Cut Fabric
- Background felt: 22″x22″
- Pillow Back (2 pieces): 22″x17″, 22″x14″
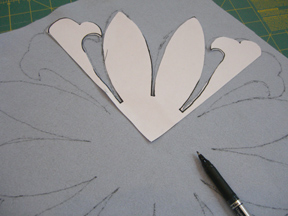
Step 2: Create Appliqué Shape
- Print and cut out template below. Card stock might be helpful here.
- Trace pattern directly onto felt with a fabric marker or regular pen, then rotate design 90 degrees and continue until you have the full flower effect (if using a regular pen, be sure to flip over before sewing design to hide markings).
- Carefully cut out shape with small, sharp scissors.
folk-art-pillow-template.pdf
Step 3: Sew Appliqué Shape
- Fold pillow front background fabric in halves to mark center (or measure), then pin appliqué design to the center of the fabric, with at least one pin in each point of the flower. Felt sticks to itself pretty well, so you shouldn’t have too much trouble with slipping as you sew.
- With matching thread, carefully sew shape onto pillow background with a straight stitch, moving slowly around the corners. Stitching should be almost to the edge. Take your time.
Step 4: Buttonholes
- Take the two pieces of backing fabric and fold one edge of each piece down 3″ (on a 22″ side). If you can manage it, try to have the selvege ends folding down; otherwise, run a quick overcasting stitch along the edge to prevent fraying. Press the folds down.
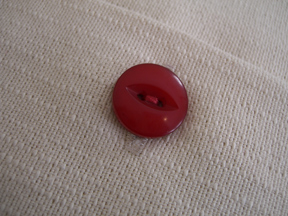
- On the larger piece, measure 7 1/2″ in from each edge and 1/2″ up from fold. Mark this as the bottom of your buttonhole. Sew buttonholes perpendicular to the fold in the fabric, as shown in photo below (this helps keep them from opening).
Step 5: Sew Pillow Together
Make a “fabric sandwich” in the following order:
- felt pillow front piece (with appliqué side face up).
- backing fabric larger piece with buttonhole (wrong side facing up).
- backing fabric without buttonhole next (wrong side facing up). The fabric with the buttonholes should overlap the smaller piece by about 3″ to form pillow opening.
- Pin and sew fabric together.
- Trim excess and corners.
- Cut buttonholes open with a seam ripper or sharp scissors (you can put a pin in the bottom so you don’t cut too far).
- Turn right side out and sew buttons. It helps to lay pillow cover flat and draw a line through the buttonhole to mark the correct spot for the button.
All done! Hope this makes sense. Please let me know if you have any questions or suggestions.

