

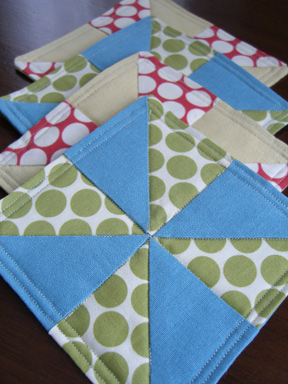
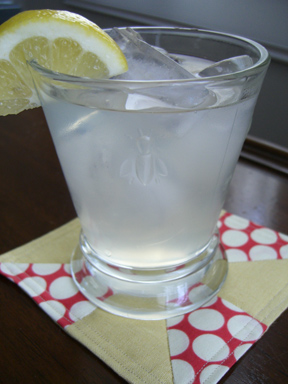
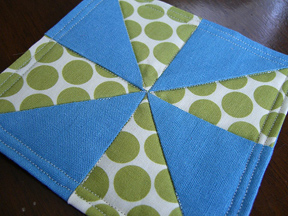
Here are some pinwheel quilted coasters for summertime entertaining. I used Amy Butler’s Lotus dots available here mixed with a linen/cotton solid. I think this design would be nice with striped or gingham fabrics as well. This project took me about 2 hours to make four coasters.
Since I don’t really quilt, I found a couple of challenges. Be sure to cut all of your fabric perfectly and make sure the seams line up so that your pinwheel points will meet. I got this fine when I started actually paying attention. I also had a little trouble sewing in the ditch, but I think I’ll get better with practice. Quilting seems to require a level of precision that I don’t possess. Still, this is a pretty straight-forward project and I think it would be a good introduction to quilting for beginners (like me).
Supplies:
- Fabric Scraps
- Matching thread
- Bamboo quilt batting (four small pieces)
- Iron
NOTE: Seam allowance is 1/4″.
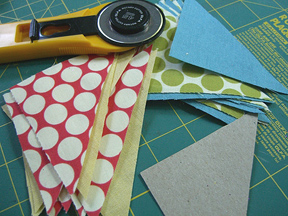
Step #1: Cut fabrics according to template: pinwheel-coasters-template.pdf
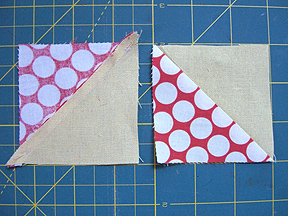
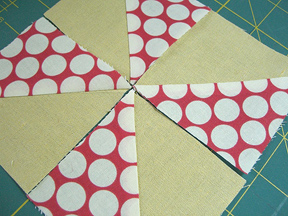
Step #2: Press all fabrics and begin to sew triangles together to form squares. Then press back seam towards darker fabric and trim edges. Make sure that each section is a true square and should be about 3″.
Step #3: Lay out squares for each coaster to make the pinwheel pattern. Sew two squares together to make a rectangle. Repeat.
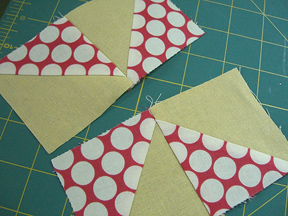
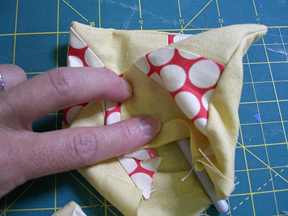
Step #4: Align mid-point of each half of the pinwheel and press one side of each new seam to opposite sides so that the seams won’t be too bulky for your machine to sew (see picture below). Sew these two rectangles together to form the full square of the top of the coaster.
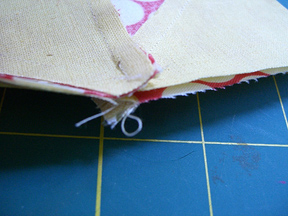
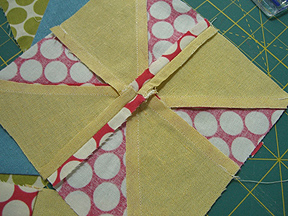
Step #5: Press open the middle seam as shown below. Place patchwork top and cut bottom fabric, right sides together, and sew around three sides. Trim any excess fabric, particularly around the corners. Turn right sides out and punch corners out with a pointed (but not sharp) object.
Step #6: Cut your batting just a bit smaller than your finished coaster and insert into the opening, being sure that it gets into the corners and lays flat. Turn in the unfinished seam and press.

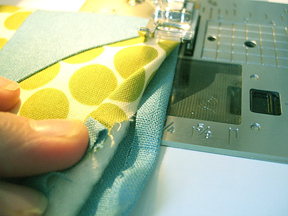
Step #7: Sew a stitch all around the coaster 1/4″ from the edge (pictured above). Then quilt on the seams of the pinwheel design. Add one last row of stitching between the edge of the coaster and the first edge stitching to make a double row, as shown below. All done!
As always, projects from the long thread are for personal use only. If you make these coasters, be sure to post a photo to the Make it Monday Flickr group. For more summer pinwheel excitement that the kids can enjoy, try making this paper pinwheel.