

Artist Kristin Loffer Theiss of KLT Works created this adorable plush bird and this owl “drawing in thread”. Isn’t that thread drawing amazing? I find it really inspiring and hope to try some pillows with free sewing sometime soon.


Artist Kristin Loffer Theiss of KLT Works created this adorable plush bird and this owl “drawing in thread”. Isn’t that thread drawing amazing? I find it really inspiring and hope to try some pillows with free sewing sometime soon.

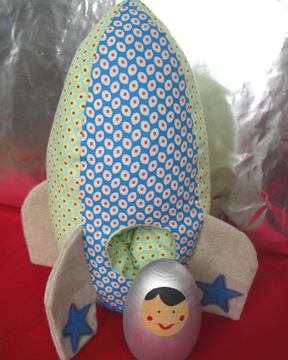
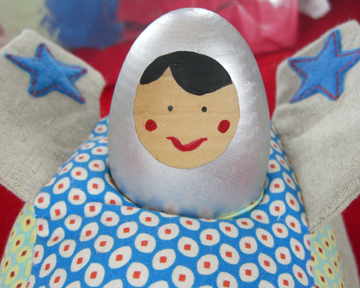
OK, all finished. Crystal got it right — it’s a rocket ship! Finally, I get to make something for a boy. I used quilting weight cotton fabric (from the Belle line by Amy Butler, available here), but it might be wise to try a canvas, tweed or wool felt. I hand-sewed the bottom and was concerned that the fabric was pulling a bit, so I whip stitched a piece of felt on top to secure it. The fabric and design of the rocket was so egg-like that I decided to use a wooden egg for the little rocket boy. I am so not artistic; therefore I tried to keep the design simple and the hand painting to a minimum. But I think I’d like to try some of these egg dolls as matryoshka dolls for Easter. Maybe with some decoupage fabric dresses? Always thinking of the girly stuff.
Instructions and template for the rocket ship are below. I’ll leave it to you to work on a little space boy figure if you want. Here’s the down-low: I bought a wooden egg from the craft store, cut a circular piece of painter’s tape and applied it to the face area, sprayed the body silver and came back and painted the face with acrylic paints. Then it needs a coat of polyurethane.
Instructions for Rocket Ship:
If you make one of these, please share it by uploading a photo to the Make it Monday Flickr group here.
Supplies:
Step 1: Cut all fabrics according to template below. Cut out four pieces of thin cardboard slightly smaller than the template of the rocket wings (leave a bit of room for sewing on the side that attaches to the rocket — I sewed right over the cardboard, but not sure if that’s advisable).
Step 2: Add your own appliqué stars if you choose. I did not provide these in the template, but you can handle it!
Add a pouch for a little figure (skip to step 3 if you don’t want to bother with this): I just measured the circumference of my egg, added extra for seam allowance and cut a rectangular shape (you want it to be snug so the little egg doesn’t fly on its own). I then sewed right sides together. Then my husband showed off his knowledge of pi to the 10th decimal place and helped me figure out the size of the circle for the bottom of the pouch (you’re on your own here since I don’t know the size of your little figure). I am told that you can determine the diameter of the circle you need to cut by taking the circumference of your little figure divided by pi. I then sewed the circle to the little “sleeve” and sewed the entire piece to one of the main body pieces of the rocket ship (cut a circular hole in the fabric first!).
Step 3: Make wings by sewing right sides together (leave the side that attaches each wing to the rocket unfinished). Turn wings right side out. Insert cardboard pieces.
Step 4: Sew pieces of rocket body right sides together, inserting and attaching wings as you go (bottom of wing should be about 1″ from the bottom of the rocket ship). It might be a good idea to reinforce seams with an overcasting stitch. Turn right side out.
Step 5: Sew bottom circle of rocket to four sides of the main body, leaving room for stuffing. I hand-sewed this part because I found that the wings got in the way when I tried with the machine.
Step 6: Stuff densely with polyfill or filling f your choice (add figure to pouch while you stuff). Pin and sew final seam together and reinforce if needed.
Blast off!
Purse and i-pod cases from Mariela Dias. A beautiful selection of bags, totes, and accessories.
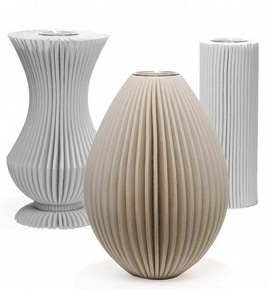
Joshua Stone industrial felt vases. Priced from $265-$330.
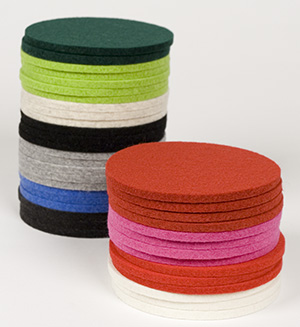
Domestic Affairs Coaster Set, available at Rose and Radish for $12 (set of four).
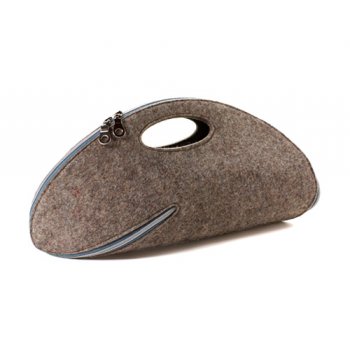
UM Carry, available at Branch for $95.
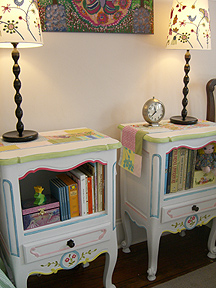
Raise your hand if you own one of these IKEA lamp shades. I have seen them everywhere, but still love them. My mother bought these two tables at an estate sale and I painted them for the girls’ room. They are right next to each other because their beds are pushed up against the walls for now. You can see the before and after of the tables below.
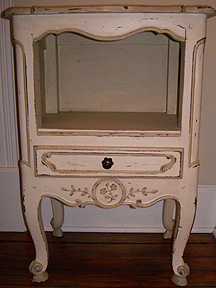
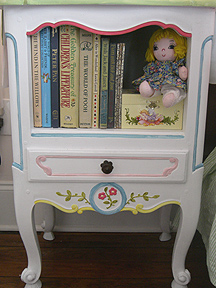
I’m not sure that I’m happy with the colors as I was mixing acrylics with house paint that I had on hand, but oh well. It adds some brightness to their very pale pink room.
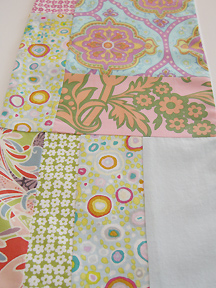
Then I finally finished these little runners for the tables that I’ve been thinking about for a while. I just cut fabric with no measuring at all, then snipped as I pieced it together in a random pattern.
Catherine Bertola. Scratching at the Surface (detail). 2001. Found painted surface. Newcastle Upon Tyne, ©Locus+ Archive, Photo Steve Collins.
Art versus craft. I’ve been thinking about this topic for a while now. After looking through the images from an exhibition at the Victoria and Albert Museum entitled Out of the Ordinary: Spectacular Craft, I am left contemplating the nature of craft. For me, craft is about making beautiful functional objects. These artists are definitely pushing the limits. I suppose that fine art has traditionally moved ahead of craft in setting trends. I am particularly moved by British artist Catherine Bertola, whose work is shown above. She evokes a sense of the past and questions the traditional domain of women, as she frequently uses dust as a medium. Her work is about the forgotten; making something beautiful from the decay of the everyday.
The distinctions between fine art and craft are becoming more ambiguous these days. I was a slack art history major and spent a few years working in a museum, so I felt that I had some understanding of fine art. Something about having kids has caused me to re-think all the “deep” feelings that I once had. Much of what I see happening in the art world these days seems frivolous to me (I’m certain you could say the same of the craft movement). Still, so many things changed for me once I became a parent. Of course I can see the beauty and the value of art as it pushes society forward and confronts reality, but there is something about fine art that leaves me cold these days. Is there as much value in a beautifully crafted piece of furniture as there is in a painting with a social or political message? For me, the idea of painstakingly putting yourself into a functional object that can be passed down to the next generation is beautiful and I just can’t compare the two things.
Perhaps this is all defensive talk because I love crafts and have no artistic ability. But I also have trouble with the distinctions being made within the so-called “craft revolution”. Sure, I can dismiss the artistic merits of the country style cat quilt, but I am in awe of traditional techniques and if someone spends hours making anything, then I am impressed. Modern crafters are using most of the same techniques that have been passed down from our grandmothers, but re-interpreting them. I appreciate innovation and strive to come up with new ideas in my own work, but for me, there’s just nothing wrong with my grandmother’s crafts.
Lace Tatting from the 1840s. Image from The Ring of Tatters. I saw some women practicing this craft and it is the most amazing and detailed work that I have ever seen. To spend hours on a tiny object like this is simply unbelievable. And then to see them machine-produced! Oh, the heartache.