Both of my children were born in December. Poor planning. After going through the year of pictures for our 2007 photo album, I realized with sadness and a sense of pride that our older daughter grew up this year. She just turned five and is asking questions like “Does Santa have a job?” and too frequently dismisses things as “just pretend”. She is coming up with her own (and surprisingly funny) jokes and has started wearing blue jeans and a ponytail.
We read Alice’s Adventures in Wonderland over the last few months and decided to have a birthday party with a Wonderland theme. I’ve been looking at the Alice birthday party pictures posted over at Design Mom and thinking what a lovely theme it would be. I’m posting pictures and download-able invitations, party hats and garland.


Of course the girls wanted to dress up as the characters from the book, so I made Alice and Queen of Hearts dresses. I made these giant tissue roses to hang from a chandelier using this method. But I stacked two or more groups of folded tissue paper in an “X” shape before wrapping with the chenille stems, which created fullness for such a large flower. Also, I find that it helps reduce tearing if you fluff the tissue before you wrap it with the stem.


I made this mobile with fabric created by iron-on transfer paper. I just cut out the designs and sewed together with an Alice in Wonderland patterned fabric. I then sewed on ribbon and tied each one to an arm of the chandelier. The mushrooms were made with felt, burlap, stuffing and thread spools. I embroidered the dots by machine, made a basting stitch to gather them, stuffed the inside, and hot glued the tops to the base. This was a very last minute project, but one of my favorites.


I made two garlands; one with playing cards (jumbo-sized cards would have been better) and one with print-outs of the characters. Here are the images for the cut-out garland: wonderland-cut-out-garland.pdf.


The children sat at a small table and drank tea. I made this runner with fabric that I bought from sonatine over at Etsy. I don’t see it there anymore, but Reprodepot has some great Alice in Wonderland fabric here. For the ribbon flower, I used the pattern at Martha Stewart that you can find here. I served scones and tea sandwiches with cream cheese and orange marmalade cut in the shape of hearts. We used red roses for the centerpiece and made cakes from this rose-shaped pan (in all the frenzy, I neglected to get a photo of the cakes). I decorated the cakes with icing flowers at the base and icing in the rose petals, but it would be lovely with powdered sugar and a rose in the center. Kids do like icing.
We played “Pin the Tail on the Cheshire Cat” with a nice poster board drawing created by my husband (no photo). We sent the kids home with this “Drink Me” hot chocolate mix, shown below. I wanted to do something with “Eat Me”, but the fourteen-year-old in me just couldn’t do it.


I did not get around to making party hats for the party, but I made some samples and am posting the templates below. You can put them together with glue dots or staples (be sure sharp part is on the outside). You can find thin elastic at the fabric store and staple or securely tape it to the inside.
Here are the party hat templates:
alice-party-hat1.pdf
queen-of-hearts-party-hat1.pdf
white-rabbit-party-hat1.pdf
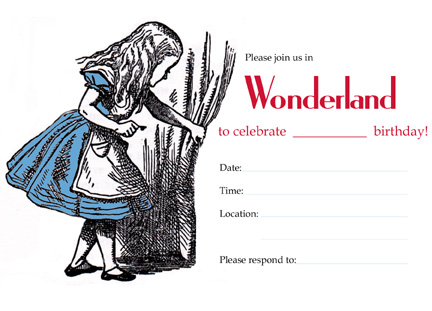
Our invitations were a bit different, but I am posting the basic design as a fill-in invitation (.pdf file below). We printed ours on scallop edged paper, size 4.5″x6.25″(A6 envelopes).
blank-invitation.pdf
wonderland-sticker-page.pdf
And I have also posted a page of characters that you could print on sticker paper, which we used in the pinata. We tried a homemade pinata and it seems that my engineering skills need some work. All of the strings pulled at once! The kids didn’t really mind; they just wanted the candy. So if you want to dress up a store bought pinata (or cover up the princess design), you could glue some tissue flowers on it. Another case of me trying to make something that costs $8.99 to buy.

