Rocket Man

make-it-monday3.jpg

rocket.jpg rocket-boy.jpg

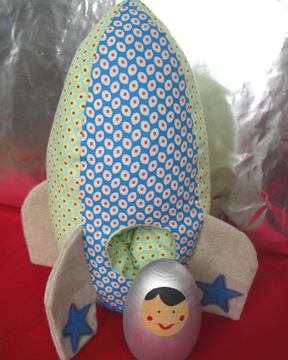
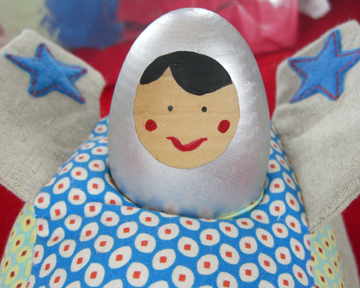
OK, all finished. Crystal got it right — it’s a rocket ship! Finally, I get to make something for a boy. I used quilting weight cotton fabric (from the Belle line by Amy Butler, available here), but it might be wise to try a canvas, tweed or wool felt. I hand-sewed the bottom and was concerned that the fabric was pulling a bit, so I whip stitched a piece of felt on top to secure it. The fabric and design of the rocket was so egg-like that I decided to use a wooden egg for the little rocket boy. I am so not artistic; therefore I tried to keep the design simple and the hand painting to a minimum. But I think I’d like to try some of these egg dolls as matryoshka dolls for Easter. Maybe with some decoupage fabric dresses? Always thinking of the girly stuff.

Instructions and template for the rocket ship are below. I’ll leave it to you to work on a little space boy figure if you want. Here’s the down-low: I bought a wooden egg from the craft store, cut a circular piece of painter’s tape and applied it to the face area, sprayed the body silver and came back and painted the face with acrylic paints. Then it needs a coat of polyurethane.

Instructions for Rocket Ship:

If you make one of these, please share it by uploading a photo to the Make it Monday Flickr group here.

Supplies:

  • 1/2 yard of fabric (I used three different fabrics, plus some felt)
  • scissors
  • thread
  • thin cardboard (cereal box will do)
  • polyfill stuffing

Step 1: Cut all fabrics according to template below. Cut out four pieces of thin cardboard slightly smaller than the template of the rocket wings (leave a bit of room for sewing on the side that attaches to the rocket — I sewed right over the cardboard, but not sure if that’s advisable).

rocket-template.pdf

Step 2: Add your own appliqué stars if you choose. I did not provide these in the template, but you can handle it!

Add a pouch for a little figure (skip to step 3 if you don’t want to bother with this): I just measured the circumference of my egg, added extra for seam allowance and cut a rectangular shape (you want it to be snug so the little egg doesn’t fly on its own). I then sewed right sides together. Then my husband showed off his knowledge of pi to the 10th decimal place and helped me figure out the size of the circle for the bottom of the pouch (you’re on your own here since I don’t know the size of your little figure). I am told that you can determine the diameter of the circle you need to cut by taking the circumference of your little figure divided by pi. I then sewed the circle to the little “sleeve” and sewed the entire piece to one of the main body pieces of the rocket ship (cut a circular hole in the fabric first!).

Step 3: Make wings by sewing right sides together (leave the side that attaches each wing to the rocket unfinished). Turn wings right side out. Insert cardboard pieces.

Step 4: Sew pieces of rocket body right sides together, inserting and attaching wings as you go (bottom of wing should be about 1″ from the bottom of the rocket ship). It might be a good idea to reinforce seams with an overcasting stitch. Turn right side out.

Step 5: Sew bottom circle of rocket to four sides of the main body, leaving room for stuffing. I hand-sewed this part because I found that the wings got in the way when I tried with the machine.

Step 6: Stuff densely with polyfill or filling f your choice (add figure to pouch while you stuff). Pin and sew final seam together and reinforce if needed.

Blast off!

Lucy Goosey

make-it-monday3.jpg

goose1.jpg

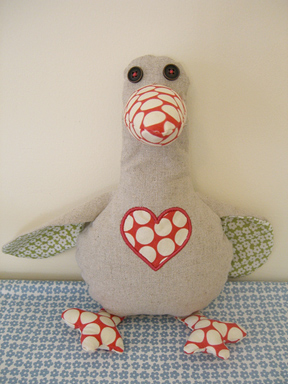
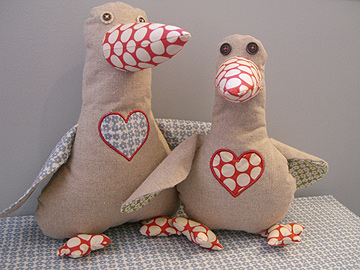
I call my five-year-old a goose all the time, so I made her one. And then I made another for my three-year-old with some of the fabric I bought at Reprodepot. Below is a picture of Lucy and Gertrude. The template below is for the smaller goose, but feel free to play around with the design. I appliquéd a heart onto the goose’s tummy (which I did not include in the instructions below); but you could embroider it, use heart fabric or fabric stamps, or just leave it plain. I think this would make a nice Valentine’s or Easter gift and I found this book of the same name that looks really sweet.

geese2.jpg

Supplies:

1/4 yard fabric (canvas, heavyweight cotton, tweed, wool felt, etc.)
scraps of contrasting fabric for wings, nose and feet
stuffing material (bamboo filling, polyfill, buckwheat hulls, etc.)
scissors
thread
two buttons

Step 1: Cut out fabric according to template: goose.pdf. Draw a 1 1/2″ vertical line where you want the nose to be, fold over your fabric and cut a half-circle shape.

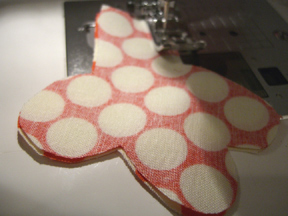
Step 2: Sew nose, wings, and feet right sides together (see photo below). To turn them right-side out, it might be helpful to have one of these tools. But I use the technique of safety pinning a piece of string into the top of the tube before I sew. Then I pull on the string to turn the fabric tube right-side out. (Caution: this technique can pull delicate fabrics and sometimes the safety pin comes open). Some people sew the string directly into the tube and then cut it.

instructions1.jpg

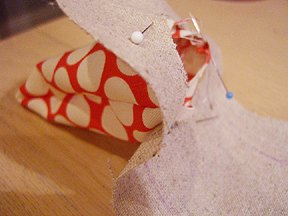
Step 3: Pin nose to body (see picture below). Tack on by hand and then machine sew like you would attach a sleeve. Since this is so small I found that pins got in my way, so had to do the hand tacking.

instructions2.jpg

Step 4: Sew buttons or use embroidery floss for eyes.

Step 5: Stuff feet with polyfill.

Step 6: Place body fabric pieces right-side together and insert wings and legs (as shown in photo below). Wings should be folded in half lengthwise. Pin. Sew around the edges, leaving an opening between the legs.

instructions3.jpg

Step 7: Turn goose right-side out by gently pulling (I found it helpful to get the wings and feet out first).

Step 8: Stuff the nose and neck, then the body. Hand sew bottom securely. I stuffed the head and nose with polyfill, the body with buckwheat hulls, then a little more polyfill to keep the hulls from falling out as I sewed it together.

All done! If you make this goose and you’d like to share your photos, please add them to the flickr group here.

Felt Fairies & Flowers

fairies.jpgfairy-babies.jpg

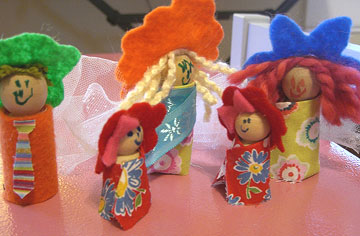
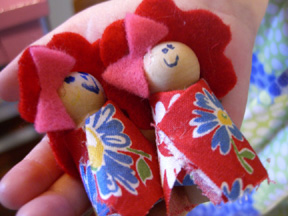
We made these quick little flower fairies over the weekend. It was hard for the kids to keep their hands off them just for me to snap a photo. My five-year-old tells me that baby fairies do not have their wings yet. Interesting.

b-delicious.jpg

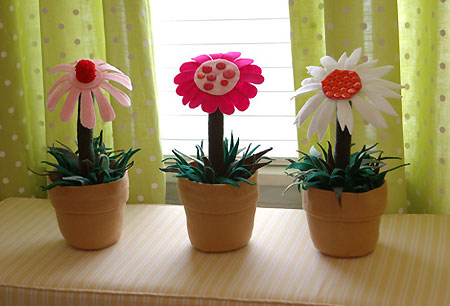
I saw the photo of these felt flowers in a pot over at b.delicious and wanted to share since it would be a great spring project.  I would probably use a real pot, but I love the use of buttons.

Checkerboard Quilt

quilt1.jpg

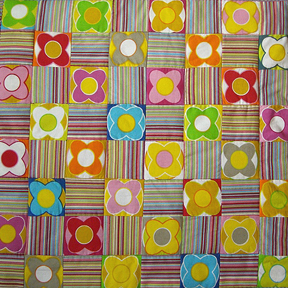
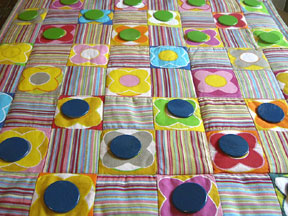
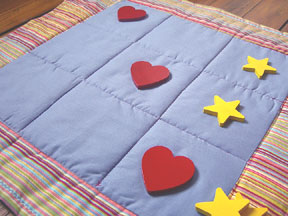
Since I updated our playroom, I wanted to make something that the girls could use so I decided to make a checkerboard quilt using this flower fabric from IKEA and some striped fabric that I had on hand. I quickly realized that a checkerboard has 64 squares! I cut 3″ squares and made the top. I then decided to make things more difficult by making the reverse side a tic-tac-toe game board. This was a little tricky, so I decided to just use one piece of fabric and delineate the squares with the stitching. There is a lot of math in quilting. Argh.

quilt2.jpg

quilt4.jpg

But I am enjoying my first attempts at quilting. I love to come up with a design and piece it together. I’m having a little trouble putting it together and finishing the edges. You can see on this project I finished with the fabric from the reverse side. I can see why this is not the recommended quilting method because you would be much less likely to get puckering with a separate piece of fabric. But I was too lazy to cut binding.

game-piece.jpg

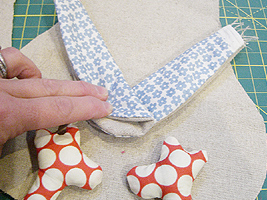
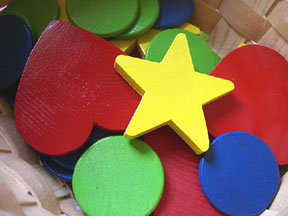
We went to the craft store and bought some unpainted wooden chips for the checkerboard pieces, which we painted green and blue. We couldn’t find Xs and Os, so we went with hearts and stars instead and painted those as well. I think it would be nice to make a pouch for the game pieces and ties to roll up the board and take it with you.

Crowns

fairy-crown.jpgmermaid-crown.jpg

We’re all about fairies, princesses and now, after our trip to Hawaii and a television program starring a large-headed Spanish-speaking character, mermaids too. Since I’ve started sewing, the kids are asking me to make things (often unrealistic, elaborate things, by the way).

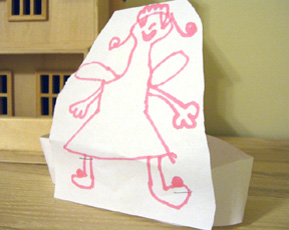
My younger daughter wanted a fairy crown yesterday so her sweet sister made her the one pictured above and fitted it properly with no assistance from me; just the stapler. Are you tired of me showing my child’s drawings? If you’re my mother, you’re not. Today the little one once again requested a mermaid crown, so I obliged with this fabric, some leftover shells from our beach trip last year and a glue gun.