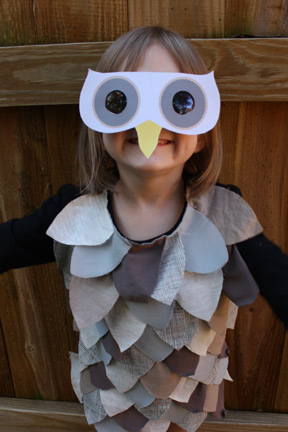
Still looking for Halloween costume ideas? Head over to Alpha Mom and check out my post on how to make this quick owl costume from a t-shirt. Then complete the outfit with the printable mask.


Still looking for Halloween costume ideas? Head over to Alpha Mom and check out my post on how to make this quick owl costume from a t-shirt. Then complete the outfit with the printable mask.
…doopedee doo. I don’t know how to spell that. Here’s the best I could do for my six-year-old’s Violet Beauregarde costume. I think it has cellulite. I’m making a pair of pants to go with it and we’ll paint her face blue. People are going to have no idea who she is, but she’s going to be thrilled. Oh, and she gets to chew gum too.
See, do you remember Violet? Now that’s a Halloween costume challenge. What was your craziest costume experience?

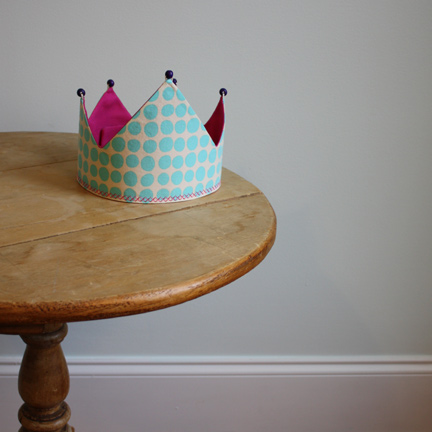
I made this dress-up crown as part of a birthday gift for a very sweet three-year-old girl. I’m also going to make her one of these capes to go with it. With Halloween coming up, I thought a quick how-to for the crown might be useful. It’s reversible too. This fits both of my young kids, but you might want to measure to be sure.
The dotted fabric is Sunspots from the Love collection by Amy Butler. And the hot pink is an Echino solid from Etsuko Furuya.
Supplies:
Step 1: Cut fabric and interfacing according to template (be sure to add the extra 2″ which will form the tab). Iron the interfacing onto one piece of your fabric. If you are using very lightweight fabrics, you might want to use interfacing on both fabric pieces.
Step 2: Using a zig-zag stitch, sew one side of 3″ velcro to the right tab of the front of one crown piece. Leave about 1/2″ from all edges for the seam allowance. Repeat with the other piece of velcro, also sewing the velcro onto the right tab of the front of the fabric.
Step 3: With right sides together, sew around the sides and peaks of the crown.
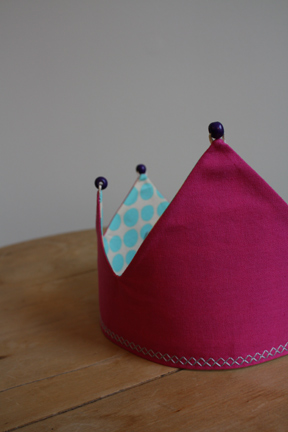
Step 4: Turn right sides out and press the peaks of the crown as you pull the fabric to make neat corners. Press under the bottom seam by 1/4″ and sew in place. I used a decorative stitch.
Step 5 (optional): Sew beads onto tips of the crown, pulling your knots through to the inside.
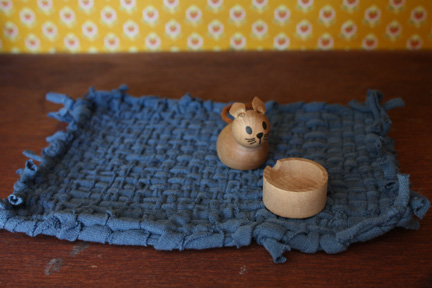
My six-year-old finished up her dollhouse rug the other day. We used old t-shirts like we did in my tutorial for Alpha Mom. This time around, we used t-shirt strips for the warp strings as well. I think it turned out to be pretty cute!
The first thing that I ever sewed was that little pumpkin costume for my daughter’s first Halloween. Now maybe you’ve just bought a sewing machine and you are excited about making your first project: your child’s Halloween costume. I don’t recommend it.
First, Halloween costume patterns often call for the worst fabrics ever: acrylic felt (like the pumpkin above), slippery satins, polyester, fake fur, pleather, or the worst fashion offender of all — fleece. All of these fabrics can be tough to sew for beginners and that fluffy fleece is a lint nightmare for your machine.
Second, making a Halloween costume requires a deadline. This can be stressful if you are just starting out. Who wants to stay up until three in the morning working on a costume that your kid will wear once or might even refuse to wear altogether? “Mommy, it’s itchy.” Or “Mommy, it doesn’t look like the one we saw at Target.” Right, I know.
So, for your first project it’s smart to choose a simple cotton and a quick and easy skirt, curtains or pillow. But if you have already bought your blue fake fur to make that cookie monster costume, go for it. Relax and make it in advance. Try it on your little booger before Halloween so you don’t end up with tantrums and last-minute costume changes.
Now, the pumpkin project pictured above was fairly straightforward and not really a bad idea for a first sewing project, but the acrylic felt was no fun for a beginner and I do remember getting frustrated with the hat. I think it would have been super-cute in an orange cotton, linen or even a tweed (maybe with some interfacing). A couple of years later, I made Dorothy and the Good Witch costumes, which were fun and it was great to see my then-two-year-old wearing that giant poster paper hat. Then I made Wonder Woman and Super Girl costumes for the kids. These were homemade costumes made without a pattern, complete with my custom digitized designs for machine embroidery for the logos. The result? Costumes that I probably could have bought in the store for much less heartache. So if your kid wants to be Batman or Cinderella, it really might be easier to buy the costume. Yes, I’m actually suggesting that you buy a costume rather than make it.
Then the girls dressed as Little Red Riding Hood and a mermaid. The mermaid costume was fun to make with all the scales. And the Little Red Riding Hood cape was very pretty — made with a wool/cashmere blend that I couldn’t resist. My idea was that my daughter could wear it after Halloween. But then of course she went to a Halloween party and got green “witch’s brew” all over the side of the cape. And she thought the weight of it was too heavy for regular wear anyway. Lesson learned: no fancy fabrics. So, that’s my advice.
Having said that, my older daughter is insisting on dressing as Violet Beauregarde as a blueberry from the Willy Wonka movie (Gene Wilder version, of course). Yes, this one is a challenge. But I’ve already started, and so far, so good. It won’t be as large as the original, but there are some practical considerations here — like being able to walk in it. I’ll keep you posted.
Here’s hoping you have a Happy Sewing Halloween free of tears and tantrums (from both you and your children).