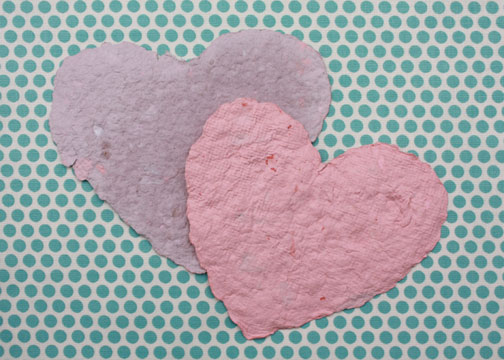

My eight-year-old made paper on a Brownie field trip last weekend, so she wanted to do it again for her Valentine cards. We’ve made paper before, but with a slightly different method. This time we poured the pulp mixture into a heart-shaped cookie cutter for the mold. She is planning to draw faces on these. My eight-year-old did almost this entire process herself, but I did operate the blender.
Below are the supplies we used, but you may be able to find things that work just as well around your house. For the paper mixture, we used recycled office paper, toilet paper tubes, a few sheets of pink paper and some red acrylic paint added for color when needed. Recycled paper is best of course, but if you have too much writing on it, the mix will turn gray. You also can not use shiny paper (magazines, food packaging, etc.).
- recycled paper
- blender
- water
- heart-shaped cookie cutter
- small bowl (just larger than cookie cutter)
- screens (2 cut larger than your cookie cutter)
- plastic screen (We used plastic canvas, but you could use a sturdy wire mesh.)
- wooden block for pressing out water
- felt, quilt batting or paper towels for drying

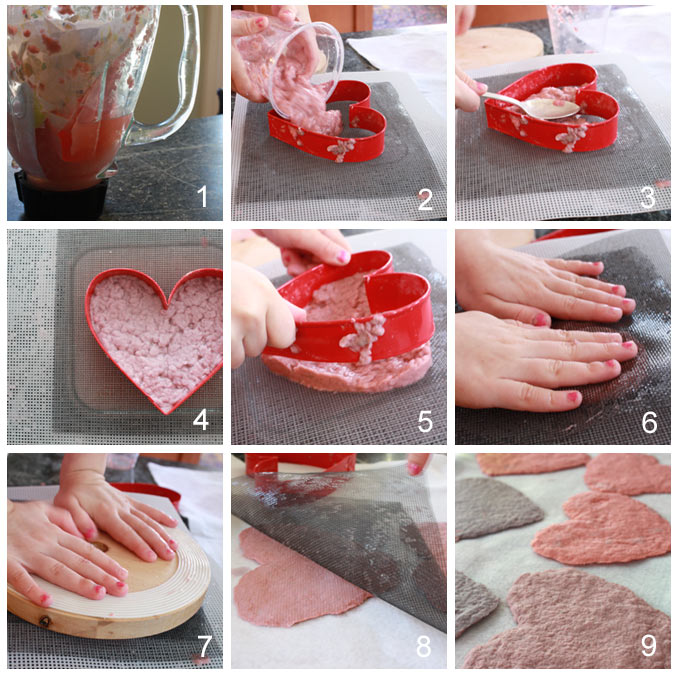
1. Rip the paper into small pieces and blend it with water. Add paint if needed.
2. Have a bowl set up with the heavy plastic mesh on top and one screen on top of that. Place the cookie cutter in the center. Pour the paper mixture into the cookie cutter.
3. Spread it around with your fingers or the back of a spoon.
4. Allow the water to drip in the bowl while you count to 20.
5. Carefully pull off the mold.
6. Place another screen on top and gently press out more water.
7. Place a wooden block on top and press again.
8. Remove the screen and turn the heart onto the felt to dry. Blot again with the felt (if very wet, you can again apply pressure with the wooden block).
9. Allow to dry at least 24 hours before decorating.
Happy Valentine’s Day!

That really looks like good squishy fun to do indoors and very therapeutic. Perfect for a typically blustery grey February day in London!
love the process. thank you!
you are so good!
Og!! Its gorgeus!!
Each day one sorprise!!!
What blog so creative!! Congratulations
I like so much. Very original. I´ll write about you in mine.
Kisses from Madrid
We did this a few weeks ago with heart shaped cookie cutters to make our valentines. It was a lot of fun. 🙂
We also added flower seeds to our paper pulp to make plantable seed paper!
What a fun project idea! I haven’t made paper since I as a kid, and have been meaning to figure out how it’s done (when I did it, I was far too young to remember the process). My girls are gonna love doing this. Thanks for sharing!
SUPER! I had seen a website last year that did this and added wildflower seeds before it dried. Your instructions were great and easy to follow
This is such a fantastic tutorial! Thank you so much for the inspiration! My four-year old is going to love doing this. I can hardly wait to see how they turn out!
nice !!! 🙂
my girl scout recently played a games that used alot of toilet paper, so instead of throwing it away, I put it aside to see if we could reuse it, do you think it would work for this project?
Sure! I think that would work. You’ll need less water.