A Little Skirt

flowers-and-stripes1

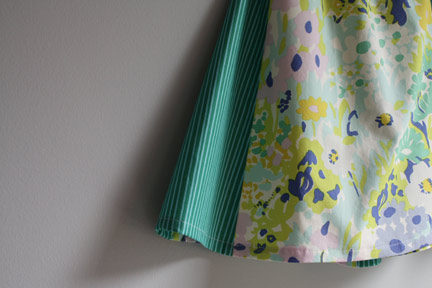
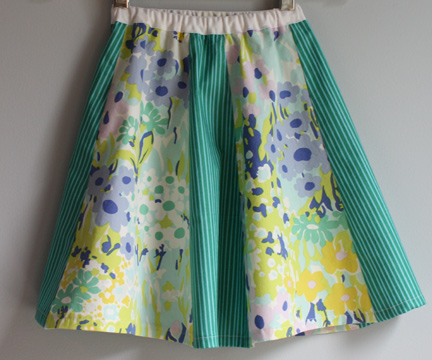
I made this little skirt for my six-year-old.  She’s the picky one, but she actually likes it.  I cut the pieces in straight lines so then I used double fold bias tape to make the waistband easier.  Love ready-made bias tape.  The pattern was sort of an accident as I cut 6 pieces and realized that wouldn’t be big enough, so I made one larger piece for the front (above) with the smaller pieces in the back (below).  The striped fabric is from Lizzy House’s Red Letter Day collection and the vintage-inspired floral is Alexander Henry’s My Secret Garden.  I might try this skirt design again for my little one.

flowers-and-stripes21

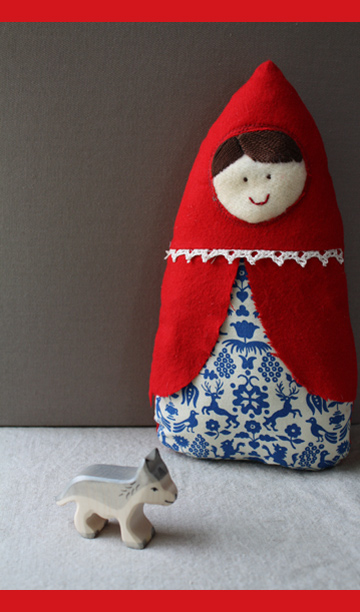
Little Red Riding Hood

make-it-monday2

little-red-riding-hood-doll

It’s all about the fairy tales this week.  Today I made a simple Little Red Riding Hood stuffed doll.  Just a few pattern pieces cut from scraps plus a little embroidery and you’re set.  I used red flannel for the cape, wool felt for the face and some vintage fabric for the dress.  Here are the instructions:

Supplies:

  • fabric scraps
  • embroidery thread and needle
  • stuffing
  • matching thread
  • small sewing needle
  • crochet trim (optional)
  1. Print out templates page 1 and page 2.
  2. Embroider the face onto uncut felt or fabric of your choice according to size of the face on the template.  Then cut the face piece to the size of the outside template circle (or a little larger to give some extra sewing space).
  3. Cut out the rest of your fabric according to the templates.
  4. Fold the hood piece in half lengthwise and cut a half-circle at least 1/4″ smaller than your face piece.  Pin the face to the underside and topstitch around several times.
  5. Sew the front pieces together: place the cape pieces aligned with the top of the dress front, then place the hood piece right sides together with hood pointed down and sew along the top, using a 1/4″ seam allowance followed by an overcasting stitch.  (If you are using the crochet trim, you’ll want to insert it in this step.)
  6. Beginning at the bottom, sew front piece to back, right sides together.  Be sure to leave a 1″-2″ opening at the bottom for stuffing.
  7. Stuff and hand sew bottom closed.

If you make one of these, I’d love to see it!  Be sure to add your photo to the Make it Monday Flickr group.

Etsy Finds Friday

7-23-09

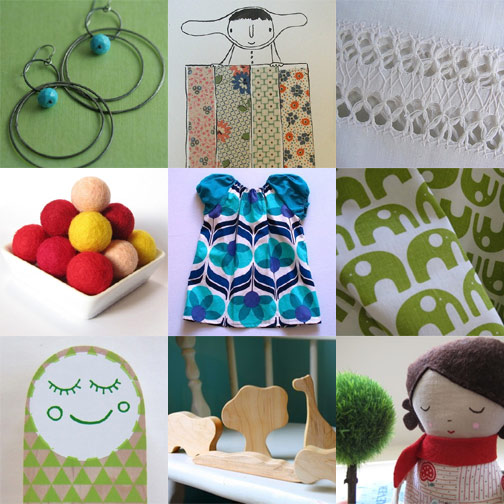
Turquoise Orbital Silver Earrings, $34 from gypsy studio.

Quilter’s Strips drawing, $18 from Aunty Cookie.

Vintage Pillowcase, $6 from The Cherry Chic.

Felted Wool Beads, 14 for $11 from Smika.

Girl’s Play Dress, $35 from kid a collective.

Hand Screenprinted Fabric, $35 from Umbrella Prints.

Screenprinted Wood Figure, $100 from Christopher Bettig of The Mountain Label.

Wooden Safari Set, $28 from little alouette.

Chloe Ragdoll Paperweight, $14.50 from lil sprinkles.