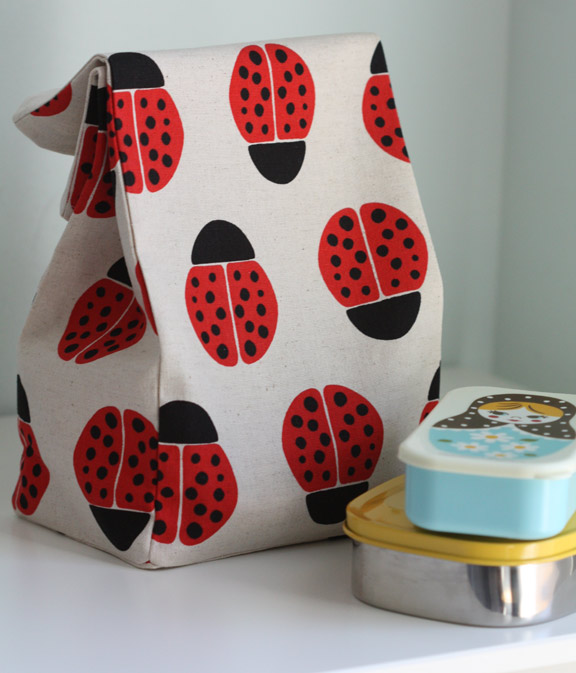
Ready for the kids to get back to school? Here’s a quick and simple tutorial for a basic lunch sack. I used my ladybug fabric for Kokka for this project. The cotton/linen blend works really well for these kinds of projects because it is soft, but also holds its shape.
Better Than Paper Bag
Supplies:
Brown paper lunch bag (7-by-13-by-5 inches)
1/2 yard thick fabric (such as cotton canvas or twill)
Pencil or tailor’s chalk
Straight pins
Pinking shears
Matching thread
Assembly:
1. To use the brown paper bag as a template, cut it into five pieces: front and back, two sides and the bottom.
2. Trace these five pieces onto the wrong side of the fabric, adding ½ inch on all sides for the seam allowance. Cut out the pattern pieces.
3. Next, sew the front, back and side pieces to the bottom piece: With the bottom piece and the front piece placed together with right sides facing, sew a seam ½ inch from the edge, beginning and ending ½ inch from the corners. (You might want to mark the ½ inch point before sewing.) As you sew, use a backstitch to lock the stitches in place at each end. Repeat this step with the back and side pieces, until you have all pieces sewn to the base.
4. Create the bag shape by sewing the side pieces to the front and back pieces with right sides together. Again, begin ½ inch from the bottom corners and use a ½ inch seam allowance, stopping and starting with a backstitch. Sew all the way to the top of the bag.
5. Fold down the raw edge at the top by about ½ inch and sew a hem along the top, topstitching on the right side of the fabric, ¼ inch from the folded edge. Turn the bag right sides out, and press along all the seams.


